· Cristina Ciolac · Shopify Tutorials · 9 min read
How to Build a Shopify Website in 2025
Shopify is a powerful e-commerce platform that allows anyone to create and manage an online store with ease. Shopify platform is used by big brands like allbirds and Gymshark, as well as thousands of smaller, successful businesses.
If you’ve been thinking about setting up your store on Shopify for a long time, now’s the time to do it.
In this tutorial, I will walk you through the process of creating a Shopify website or online store. You don’t need to have prior experience using Shopify - the tutorial is beginner friendly.
Contents
- Create Your Shopify Account
- Shopify Store Admin
- Choose Theme for Your Store
- Customize Your Theme
- Add Your Products
- Create Collections
- Add Collection to the Menu
- Customize Customer Notifications
- Set up Shopify Payments
- Launch Your Store
- What to do next
Create Your Shopify Account
The first step is to create your Shopify account. You have a 3-day free trial, then you pay $1/month for the next 3 months. 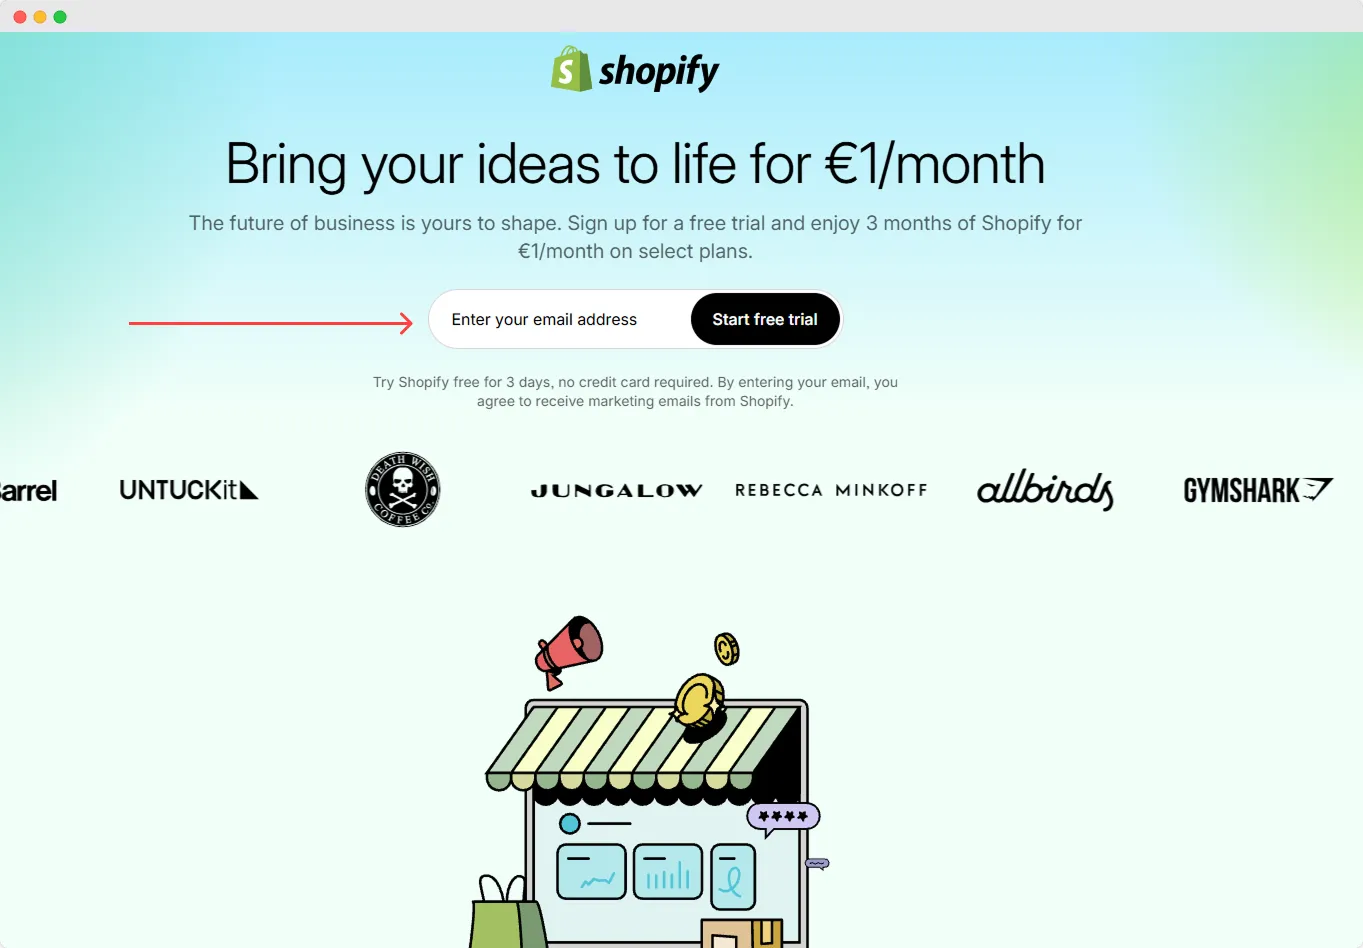
Enter your email address, and you’ll be asked to answer a few questions about your business, including the products you sell and where you sell them.

Once you complete these questions (you can skip some of them, even choosing Shopify plan), you’ll be redirected to your Shopify store admin.
Shopify Store Admin
Now that your store is created, you can start setting it up.
The administration of your online store is done through the Shopify Admin. You will be redirected here right after you create your account.
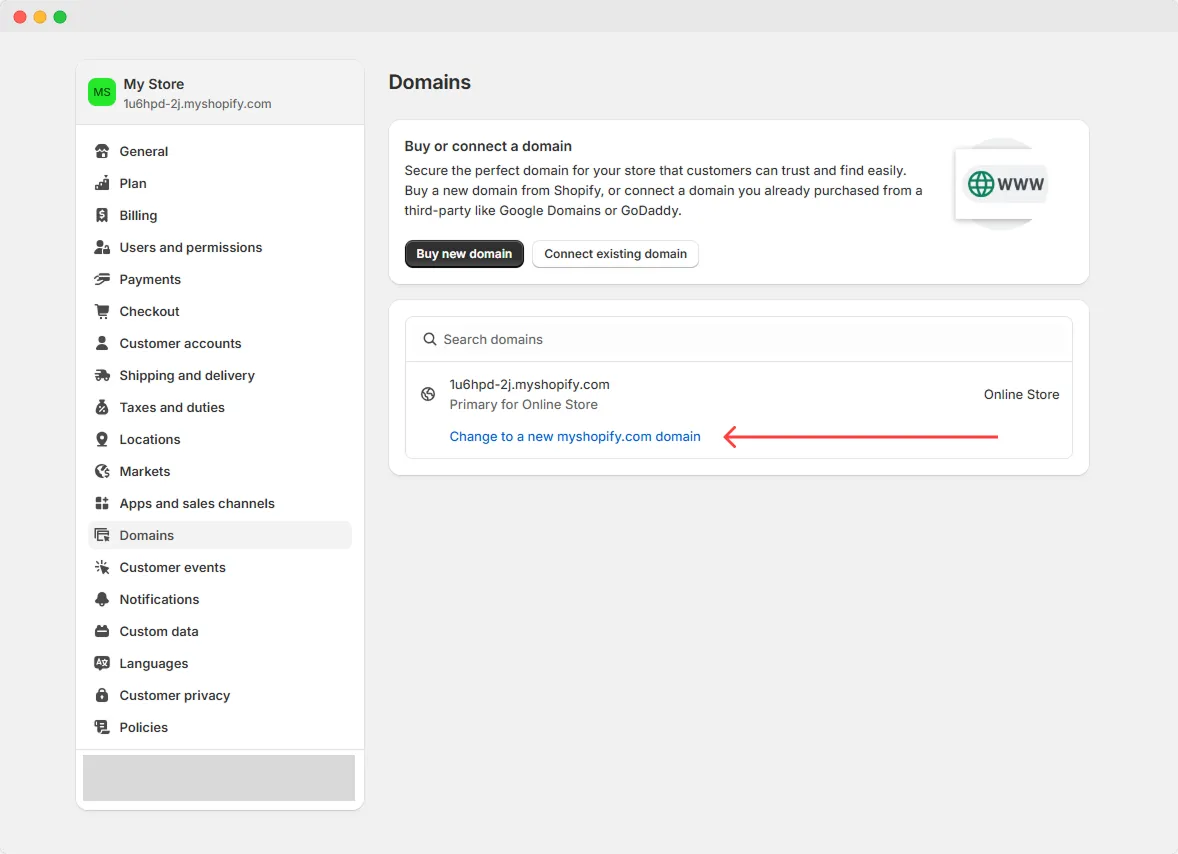
First, I recommend you to customize the domain name which Shopify automatically has assigned to your store. This domain has the following format <store-id>.myshopify.com, for example in case of my store it has created 1u6hpd-2j.myshopify.com.
Click the Settings button in the lower left corner to access Domains settings.

For the purposes of this tutorial, I’ll change to 1u6hpd-2j.myshopify.com to bestdomainever.myshopify.com to make it easier to remember.
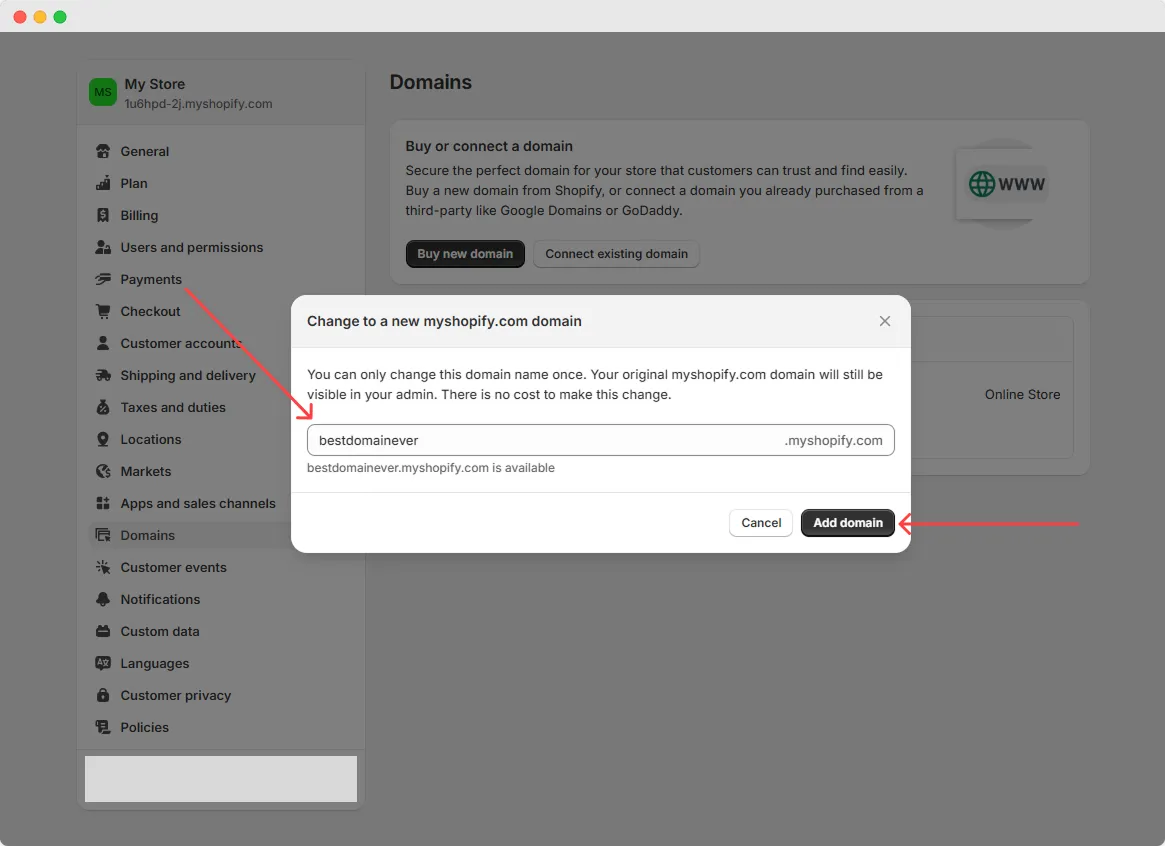
Later, you can buy a domain or connect an existing domain that you own. But in this tutorial, I’ll continue to use bestdomainever.myshopify.com.
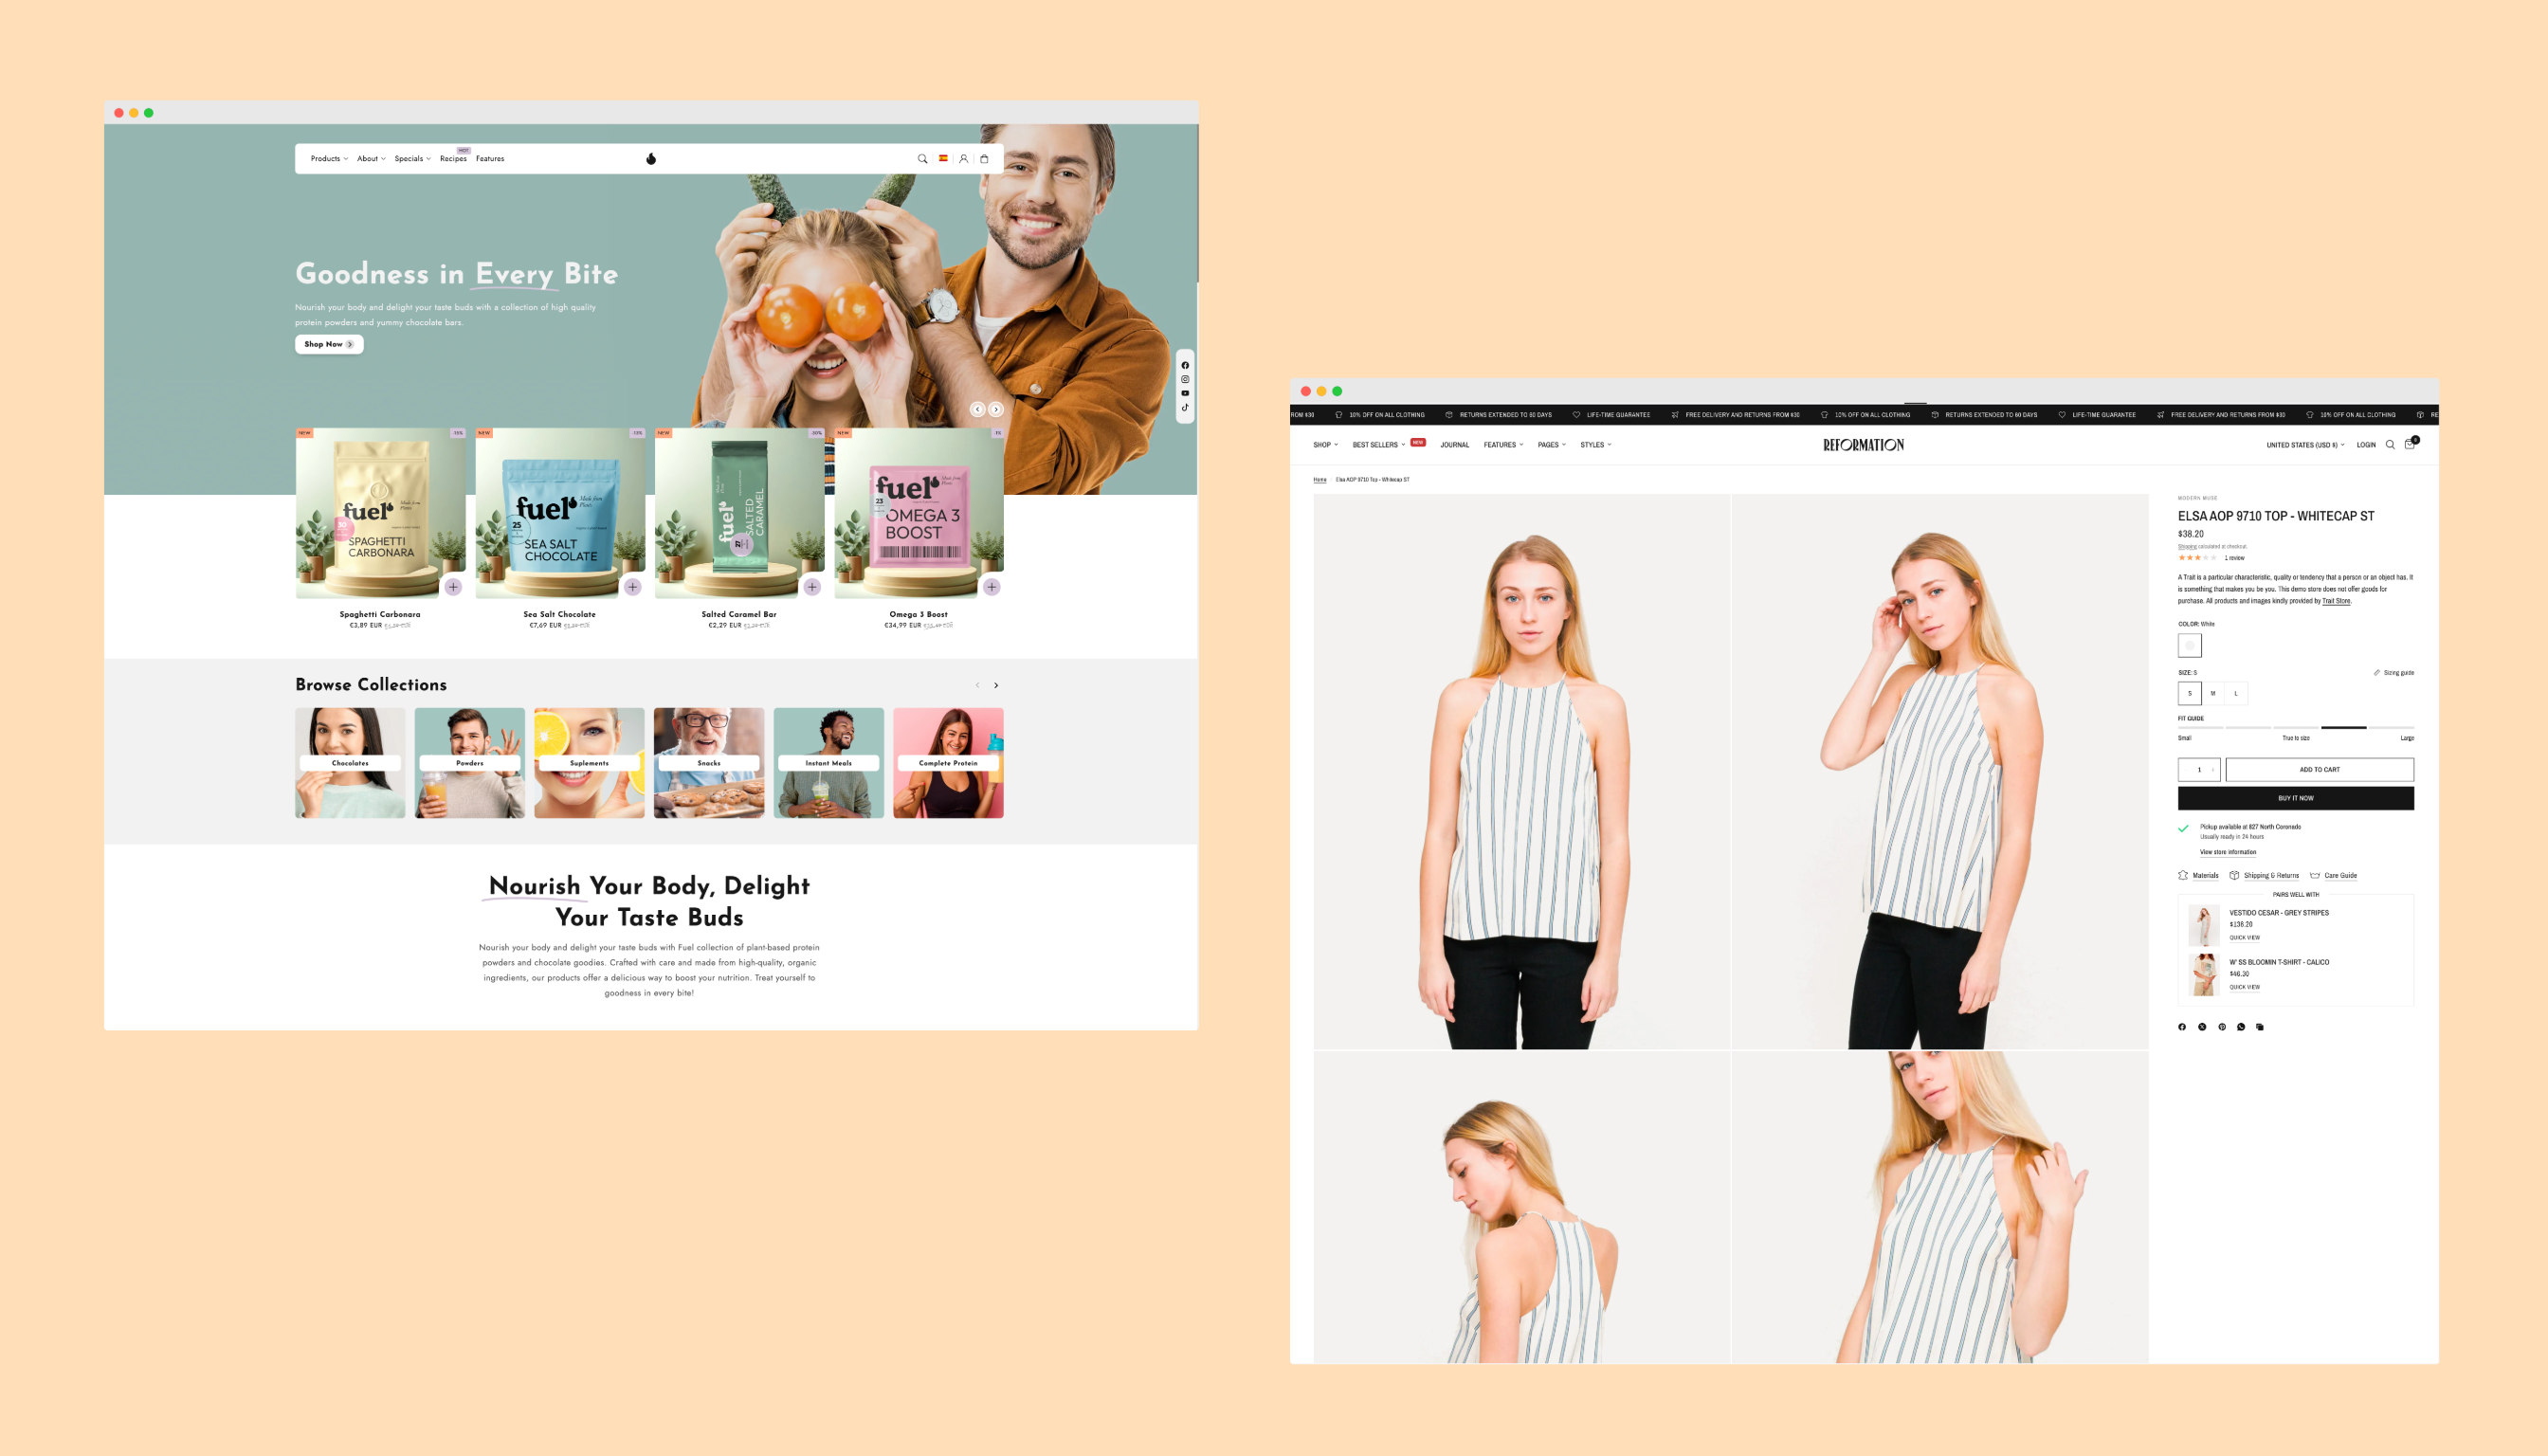
Choose Theme for Your Store
A Shopify theme is a template that defines how your online store looks and feels. It provides a visual look and user experience for your customers.
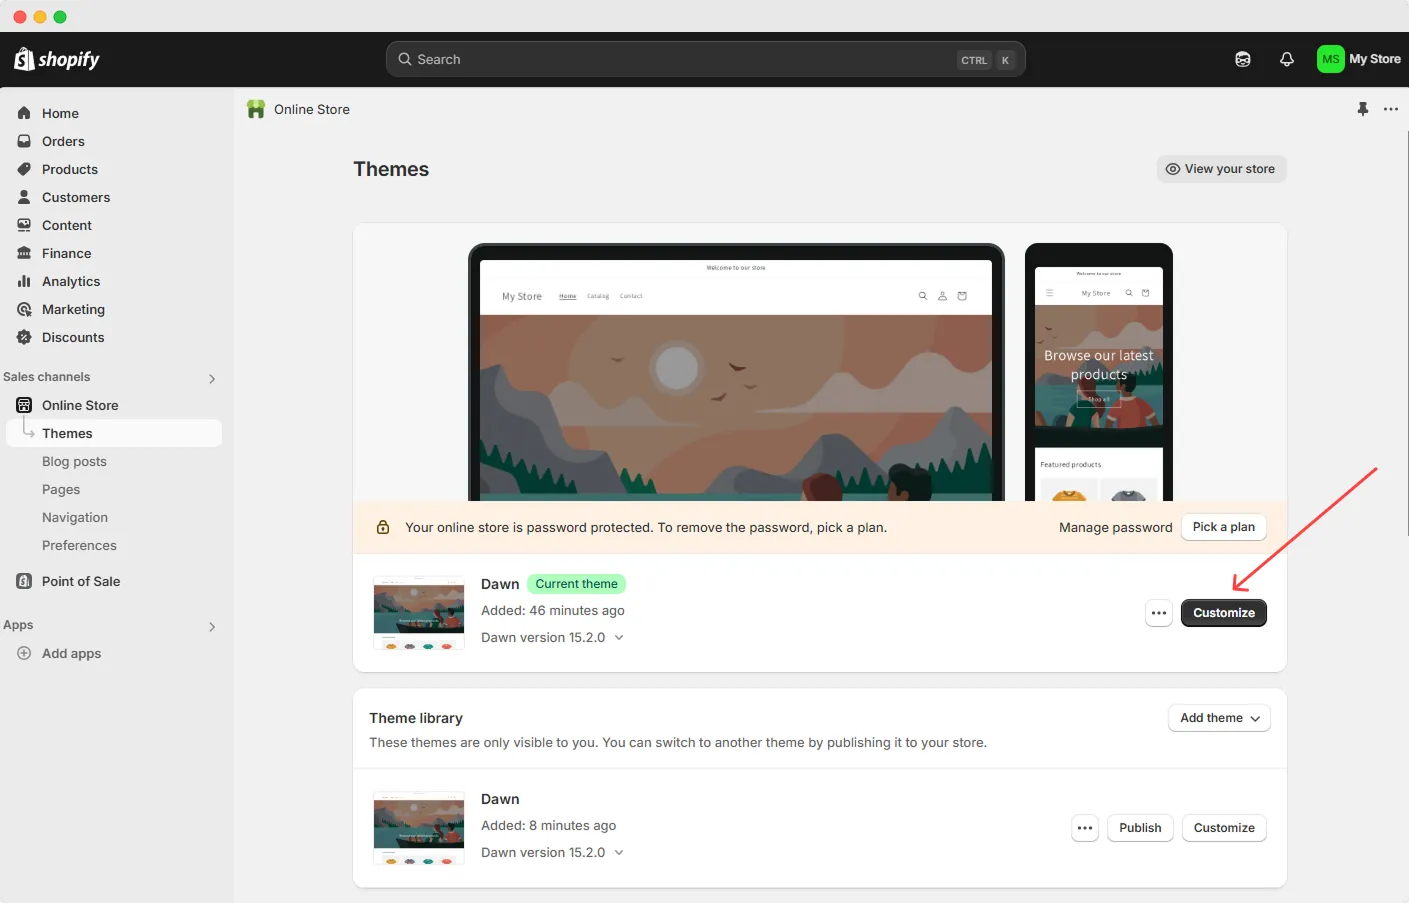
Please navigate to the left-side bar and click Online Store. This is where all your themes are.
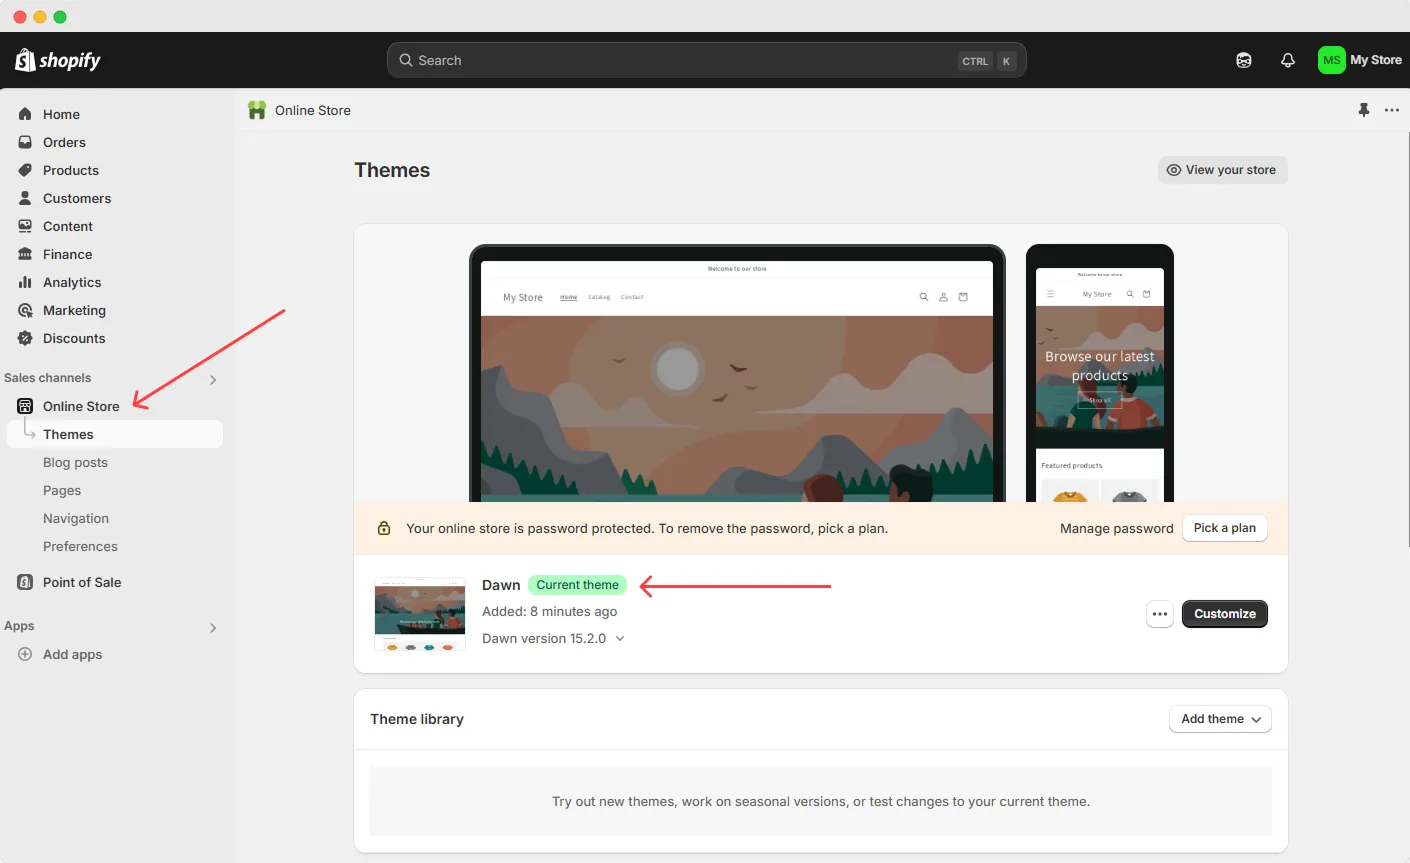
By default, Shopify assigns the Dawn theme - a free, highly rated theme with a clean design, responsive layout, and user-friendly interface. You can view your store at any time: click View your store and you will be taken to a default store.

There are other themes to consider if this one doesn’t fit your vision for your business. To explore more themes, click Add theme, then click Visit Theme Store.
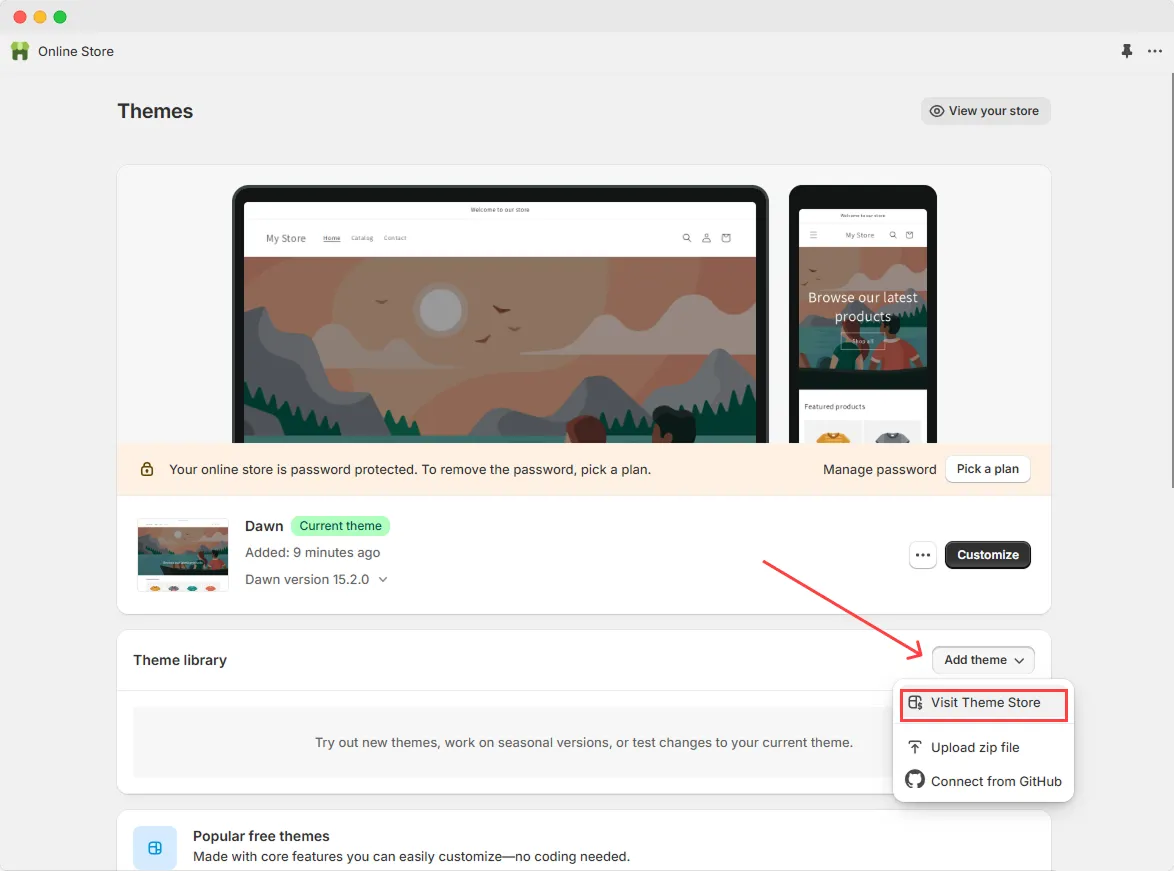
Here are all the themes - you can filter themes by price, industry, and features in the store.
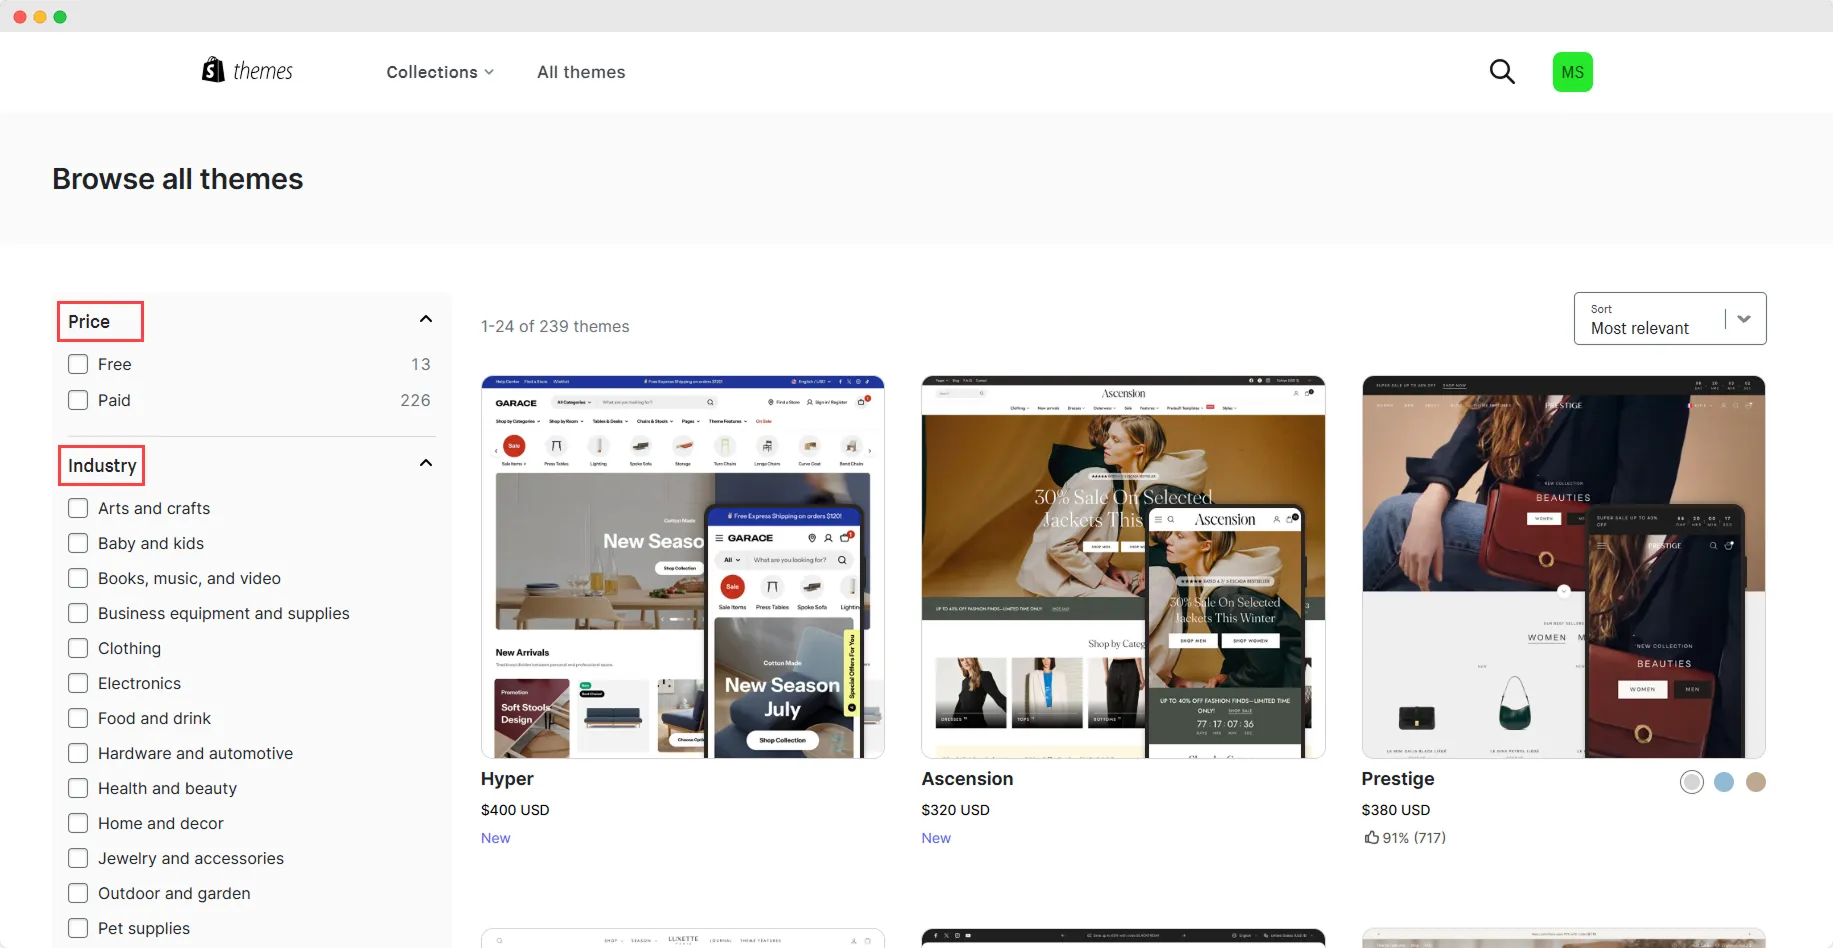
You can also preview themes before selecting one. Once you choose a theme, it’s automatically added to your store.
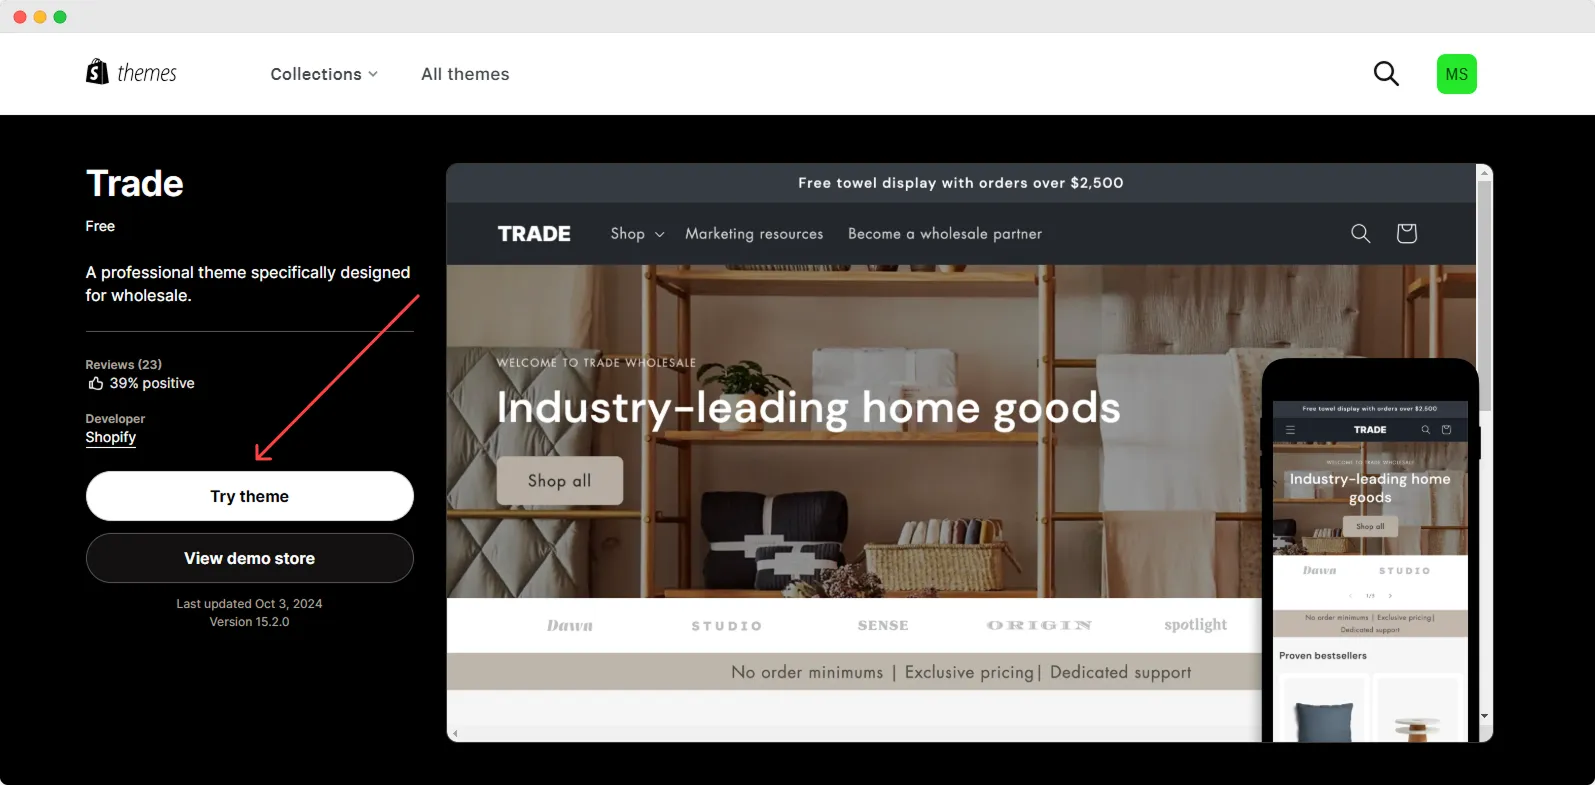
For this tutorial, I’ll use Dawn because it’s a great choice for beginners who want a professional-looking store at no extra cost.
If you’d like to learn more about choosing a good theme for your website - I recommend reading this article.
Customize Your Theme
Now it’s time to align your theme with your store’s concept to make it unique and memorable. Click on the Customize button to start experimenting.
You are now in the Theme Editor. This is the tool you will use to create a store that perfectly suits your needs. Here you can add elements to the home page, customize product pages, add different types of widgets to website pages, etc.
Once the theme editor is opened, the first thing it allows you is to modify the contents of your home page.
On the left, you will see the sections included by default on the homepage. You can drag and drop, delete or add new sections to customize your layout. Click on Image banner and the customization options will appear on the right. Play around with the settings, for example, add a new image for your store. Don’t worry - all changes are controllable 🙂.

To access Theme settings, click on the Settings button. Here, you can adjust buttons, add logo, choose a color scheme, and more.
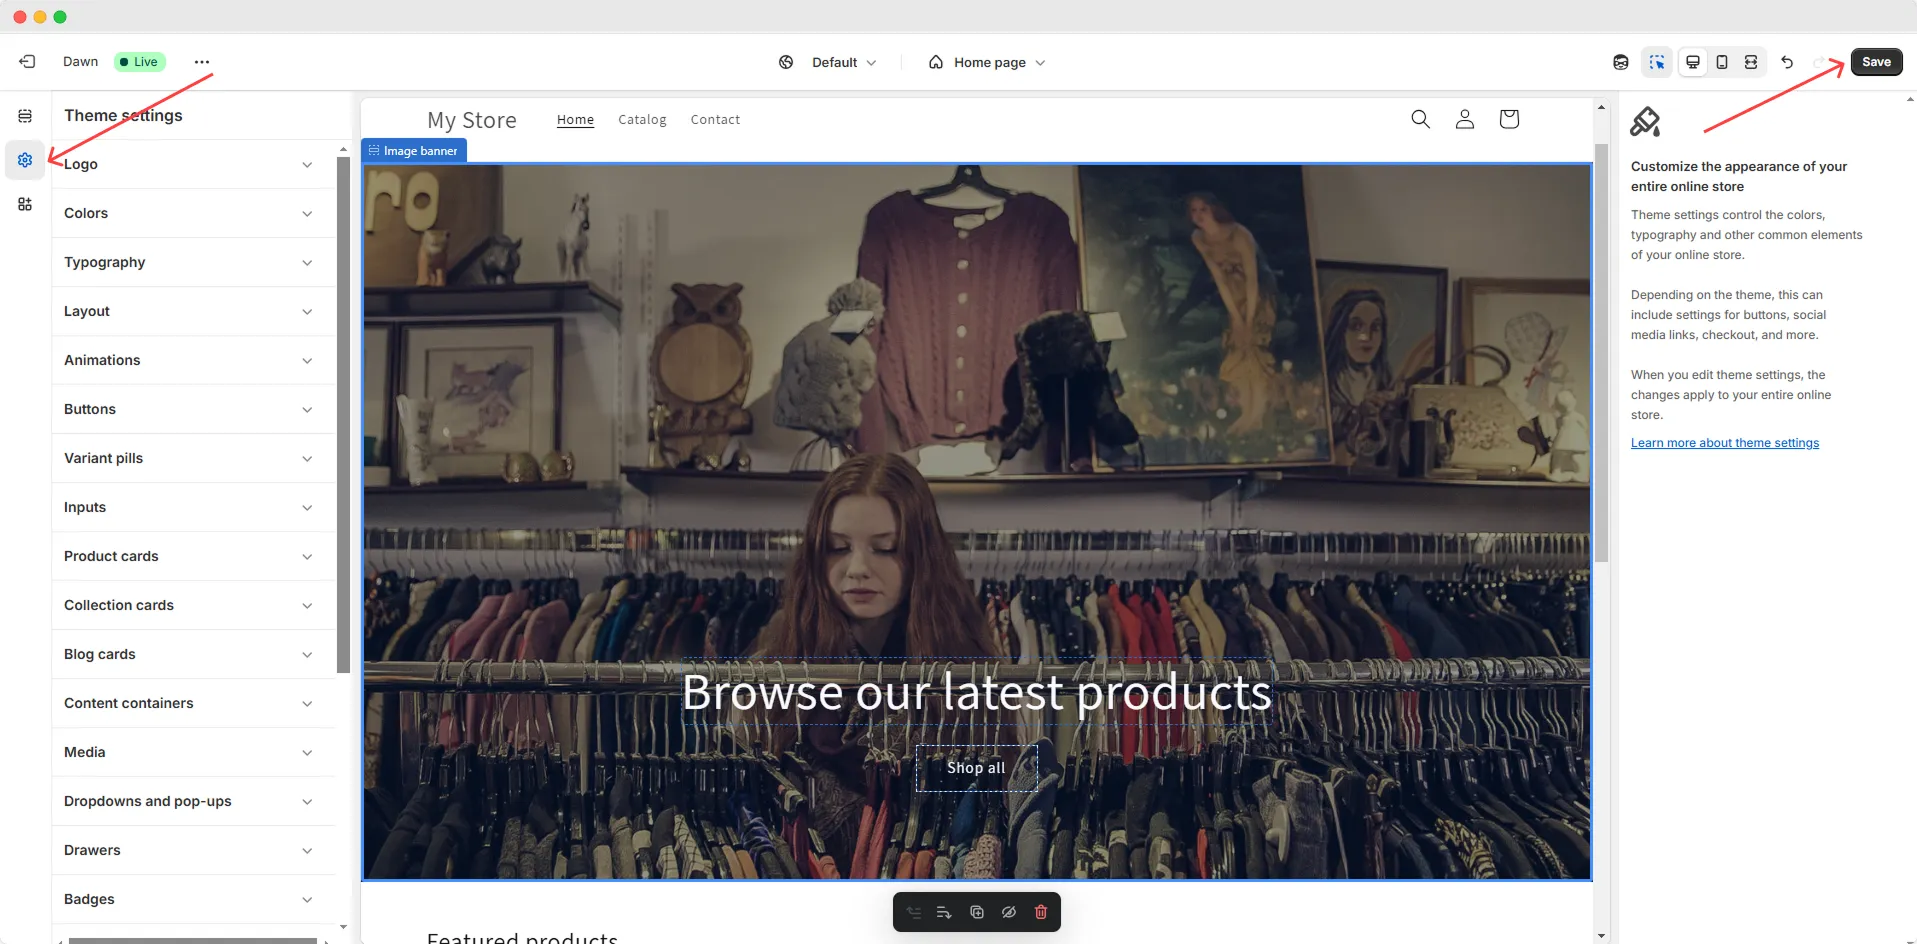
As you make changes, you’ll see them update in real time in the Theme Editor. When you’re happy with the look, don’t forget to Save your changes.
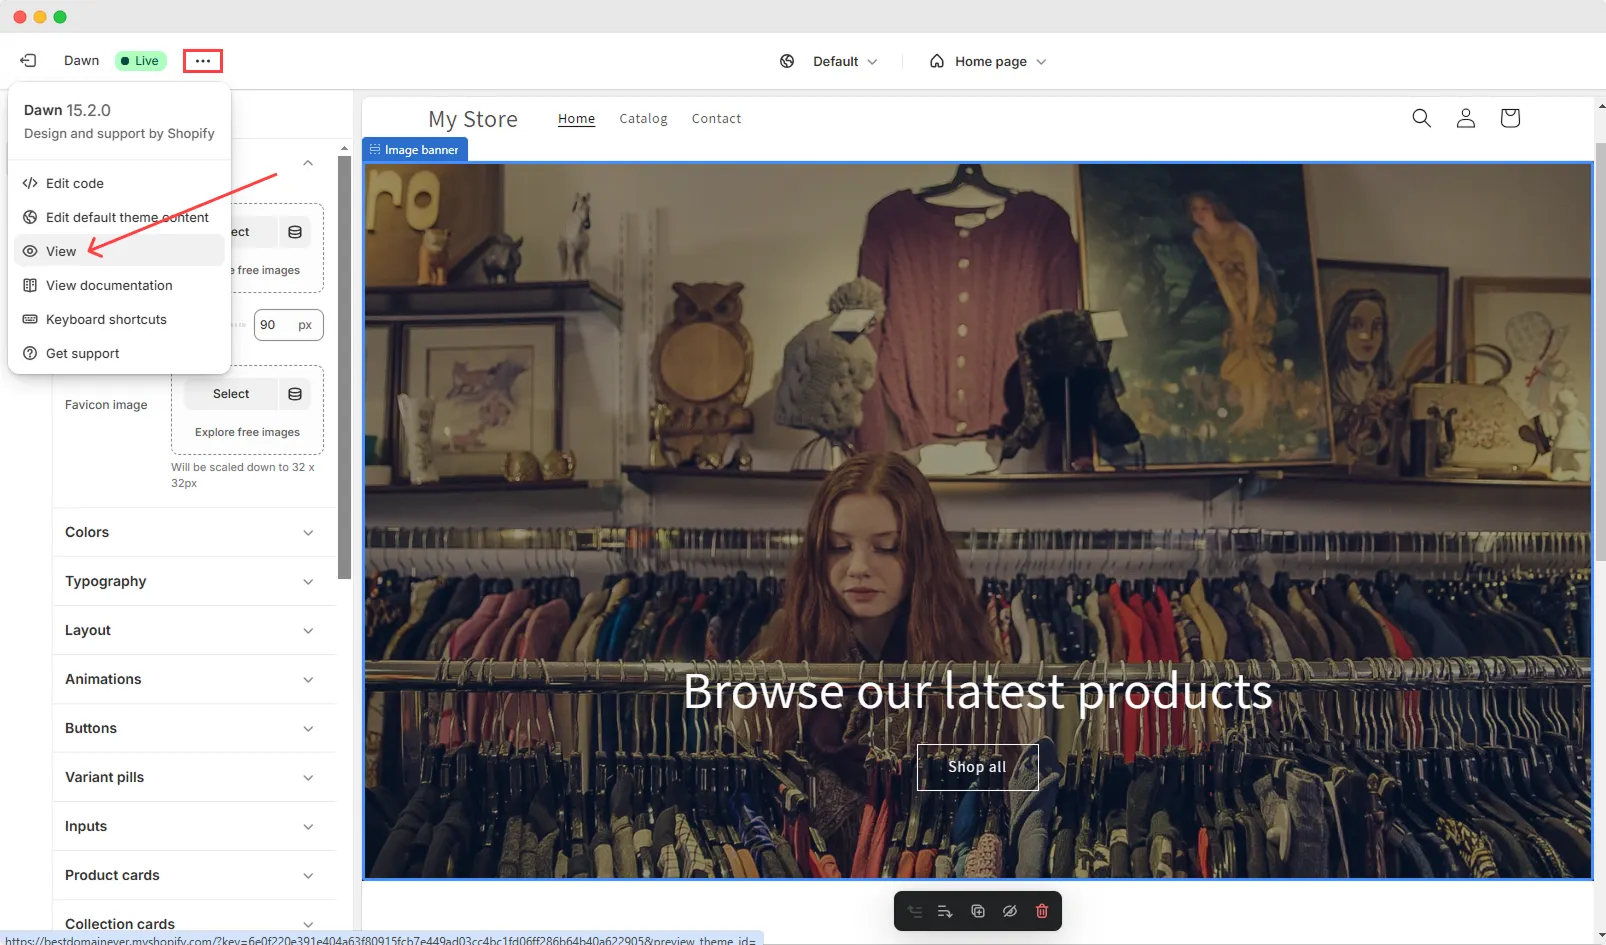
Now you can take a look at your store. Click on the three dots at the top and then click on View. At this point you probably haven’t made many changes, but you can familiarize yourself with the basic skeleton of your theme and figure out how you want to customize it.
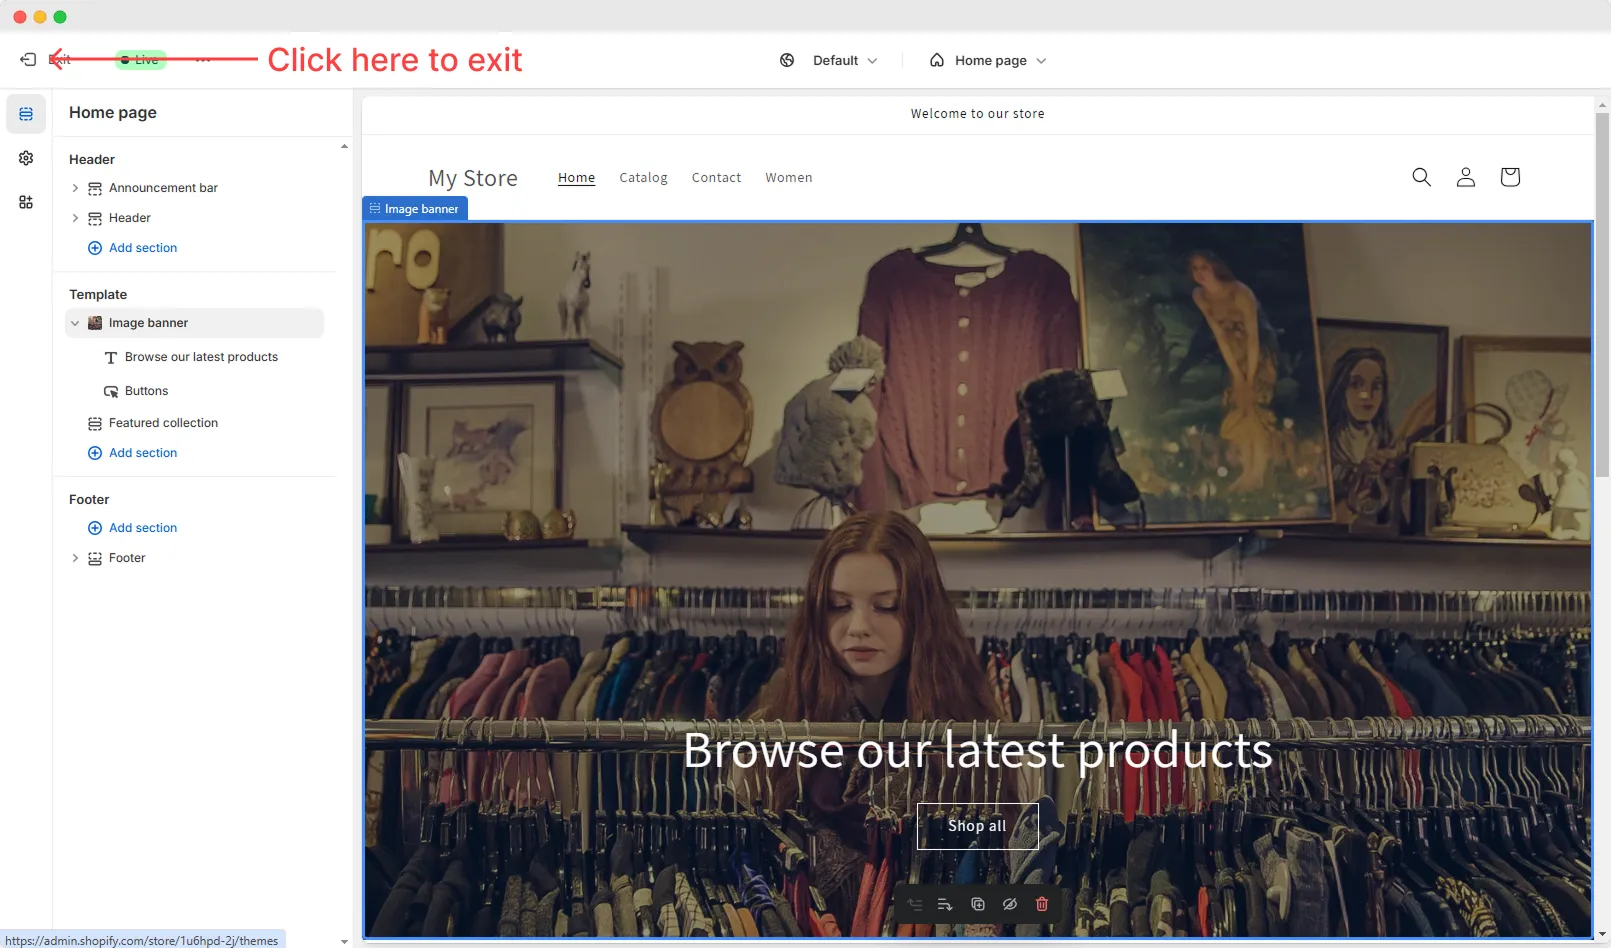
To exit the editor, click Exit in the top left corner and you’ll be returned to your Shopify admin panel.
Add Your Products
Let’s start adding products. Click on Products in the left-side menu to go to your Products page.
You have two ways to add products:
- Individually – Add products one by one.
- Bulk Import – Upload multiple products at once using a CSV file.
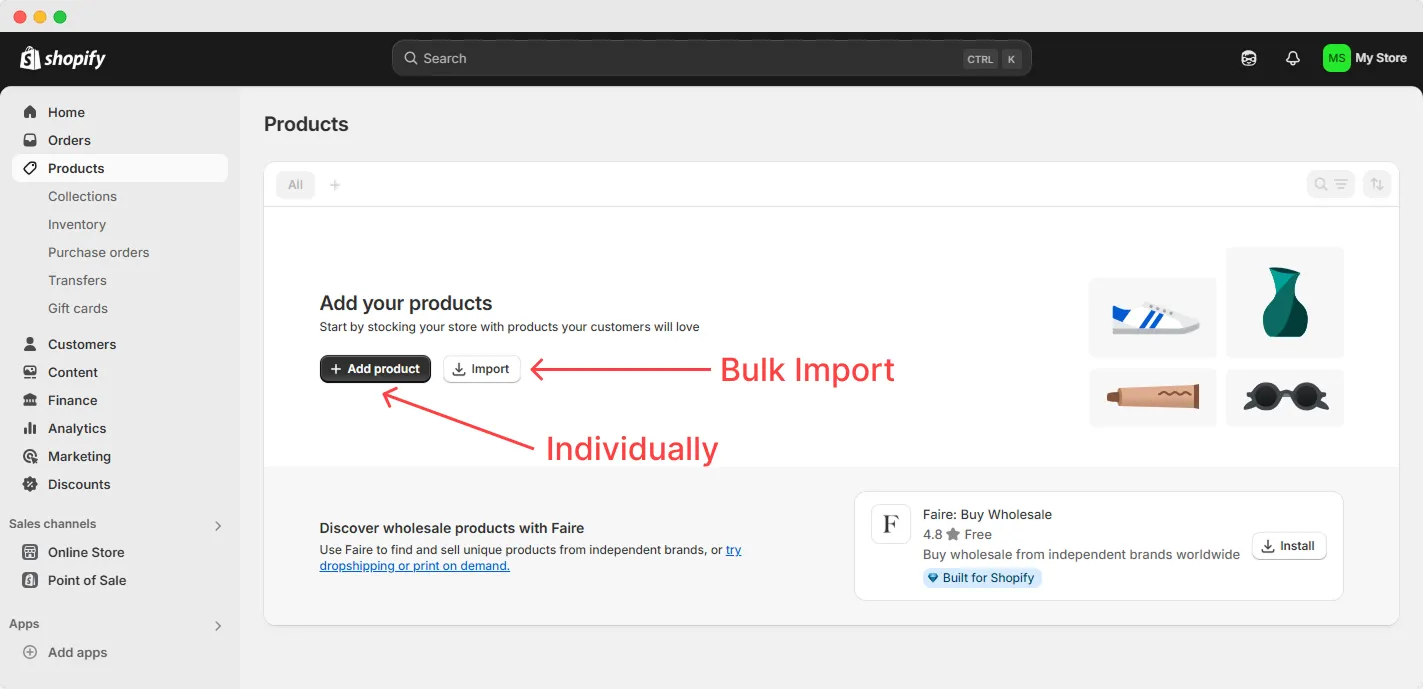
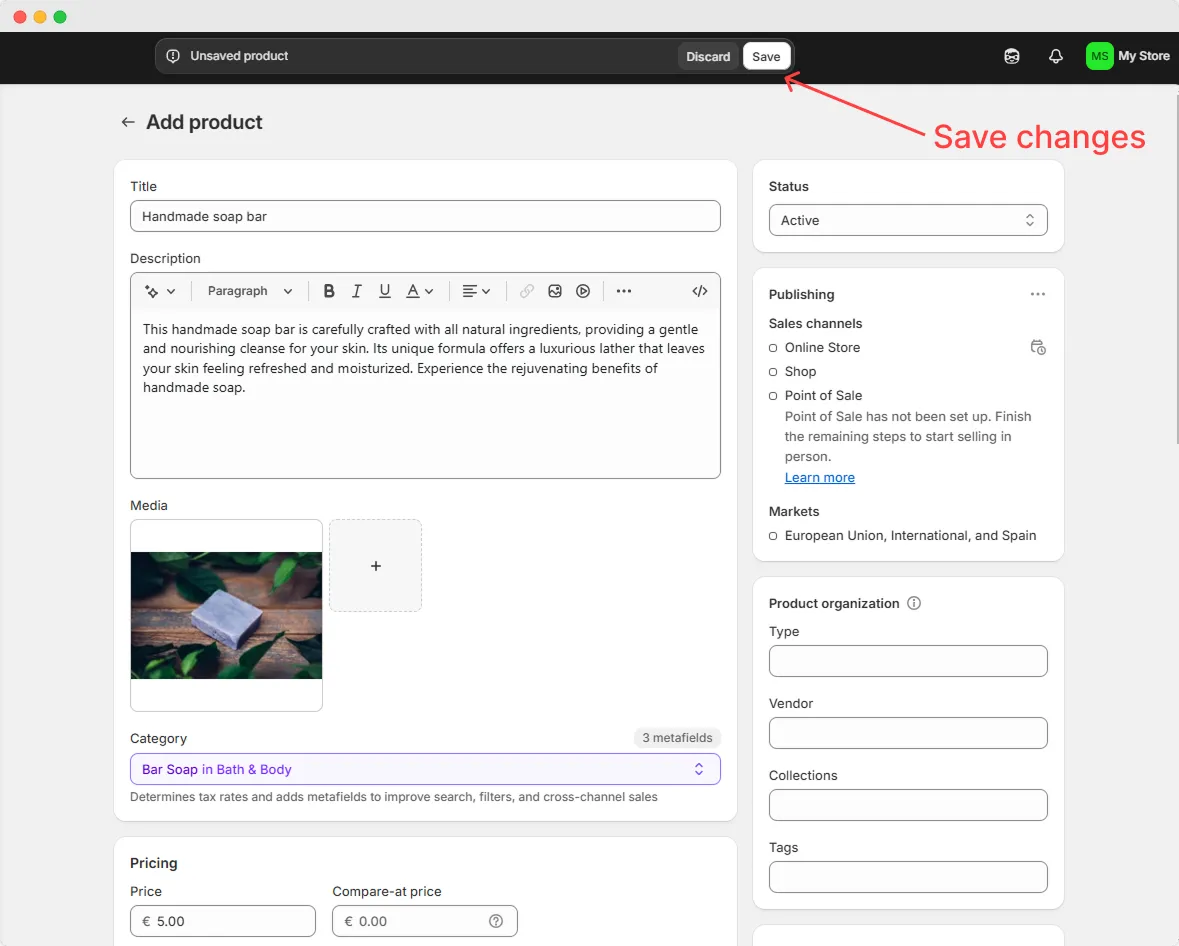
To add your first product, click Add product. This will open a full product page where you can enter a title, description, images, price, product type, and more.
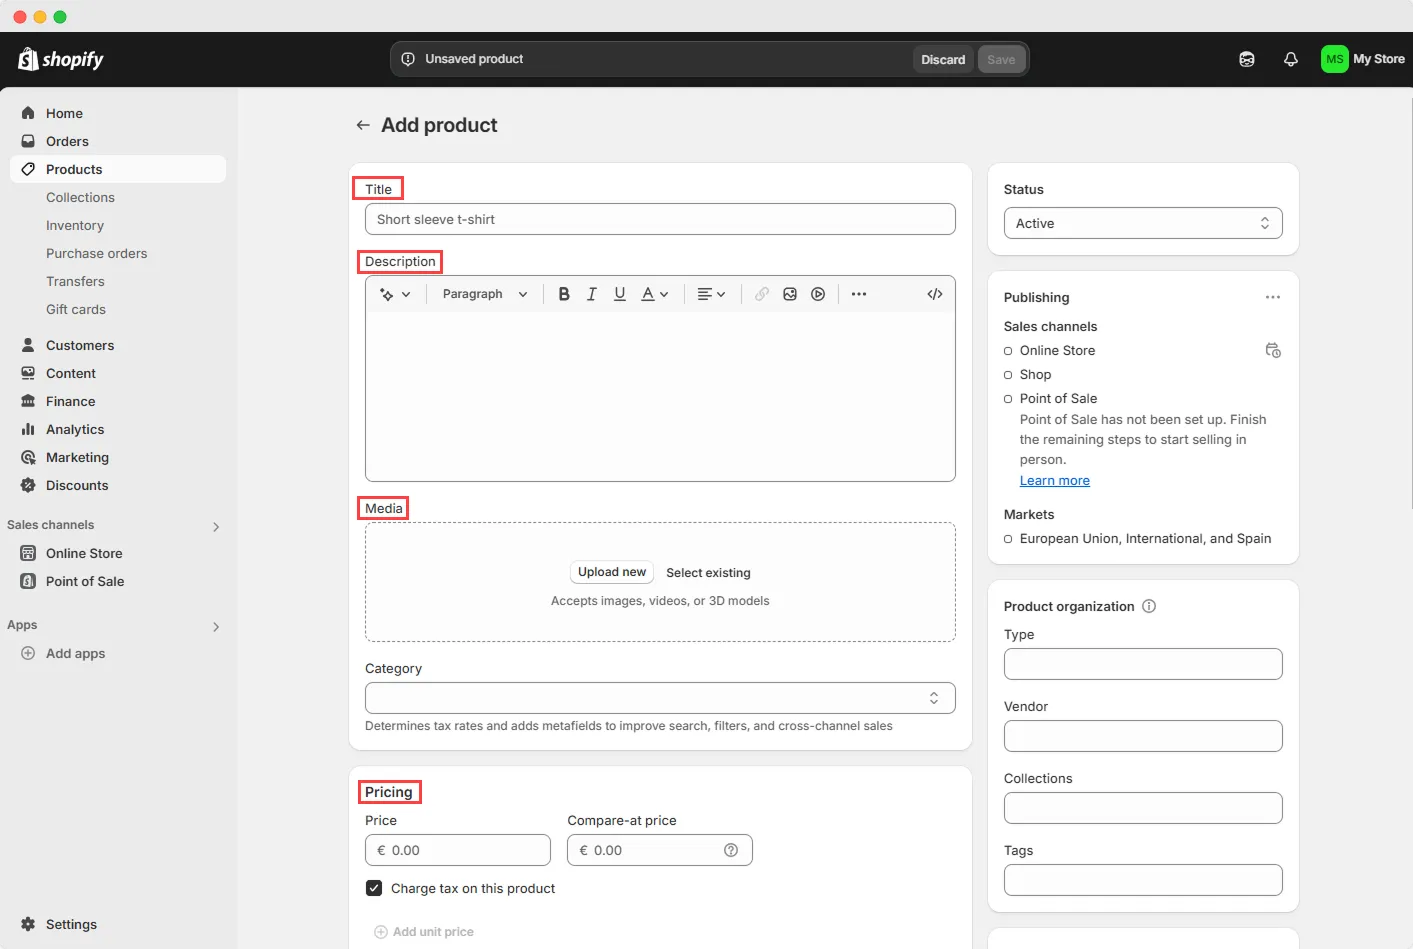
Once you’ve filled in all the necessary details, click Save.
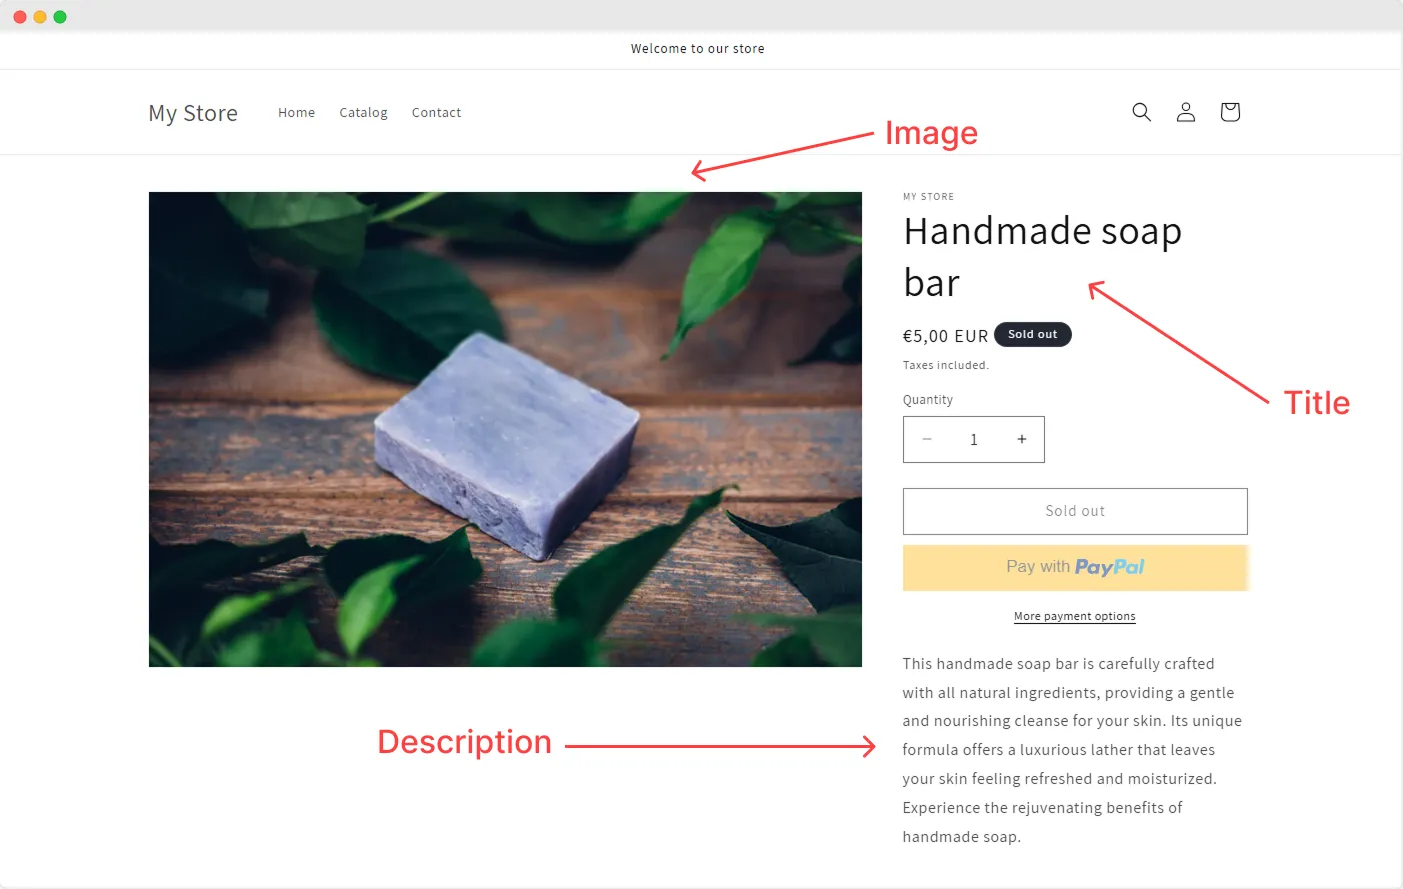
Your product is now active! To see how it looks in your store, click the Preview button in the top-right corner.
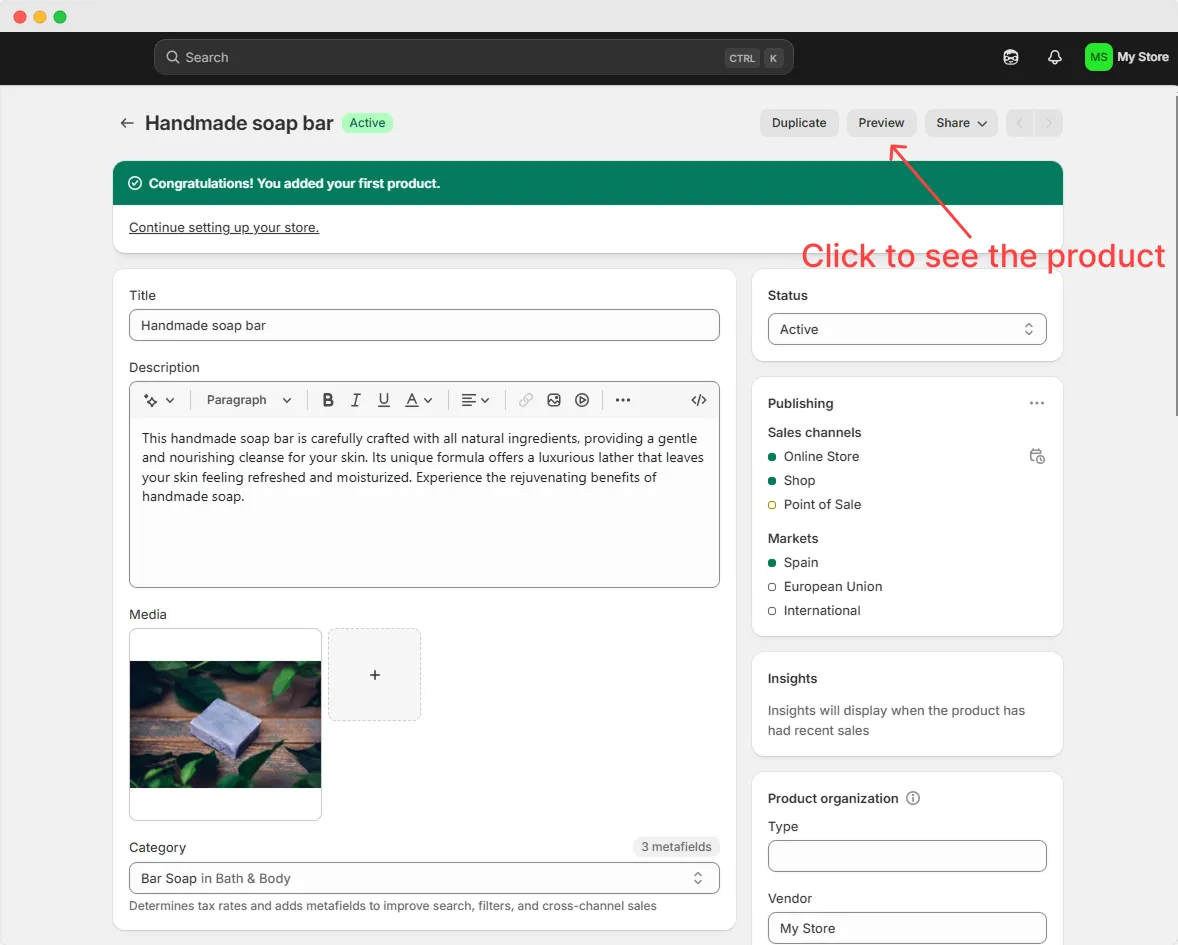
Congratulations! You’ve added your first product. You can keep going to add more products.
Create Collections
You’ve added your products. Now it’s time to organize them into collections, especially if you sell different types of items.
A collection is a group of similar products. Creating collections helps you categorize your products, making navigation easier and more intuitive for your customers.
To create a collection, click the Collections button under Products, then Create collection.
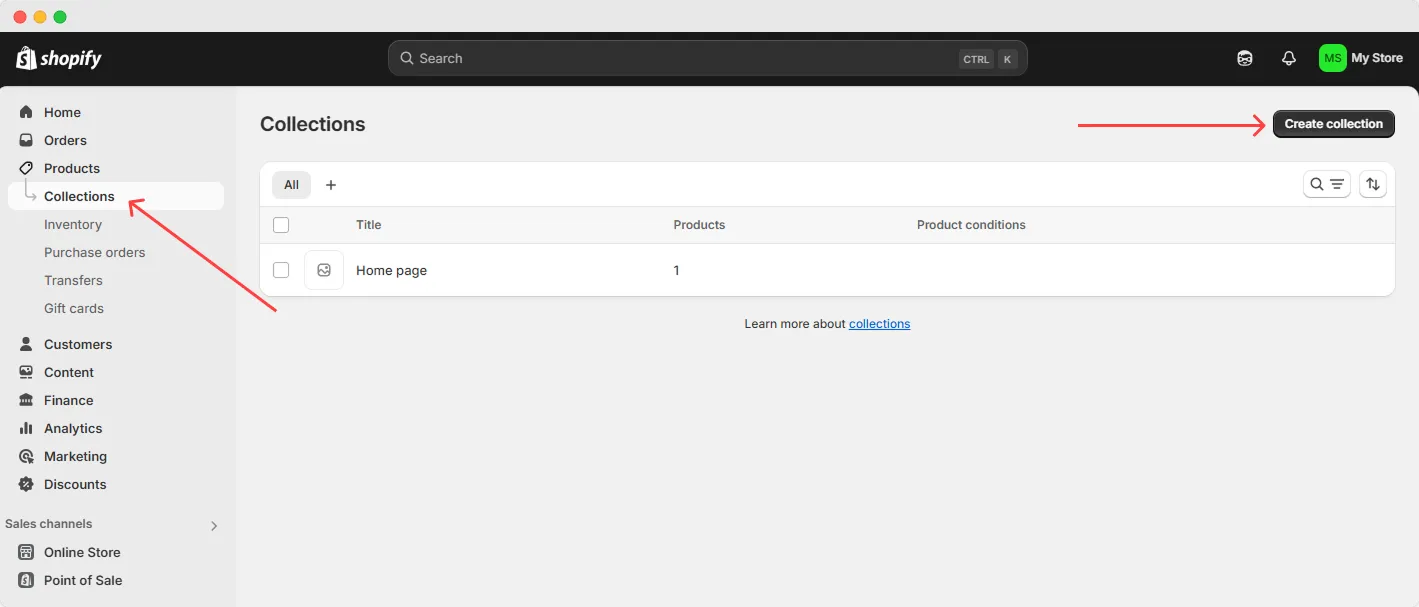
The Collection page looks similar to the Product page, but the key feature here is the collection type. You have two options: Manual and Smart.
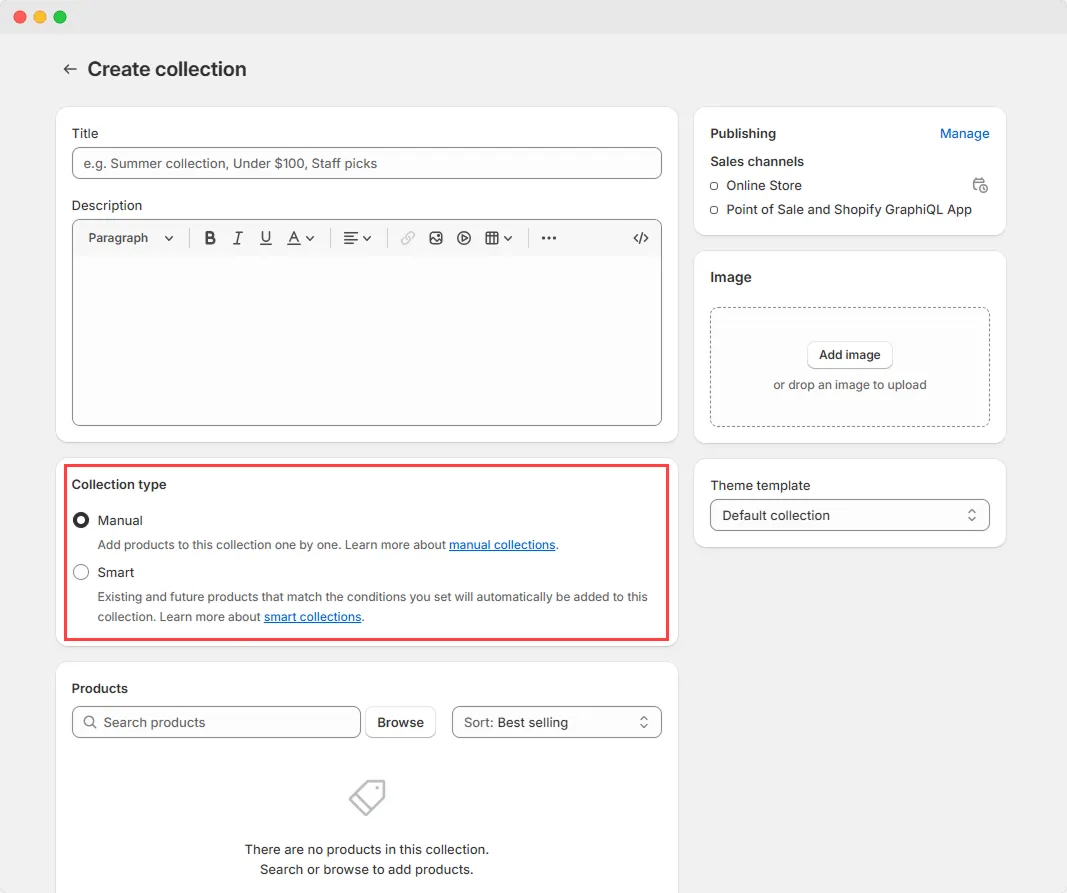
- Manual Collections – You manually select which products to include.
- Smart Collections – Products are automatically added based on set conditions.
The advantage of Smart Collections is that every time you add a new product that meets the conditions, it’s automatically added to the collection - saving you time and helping you keep your store organized.
I’m going to create a smart collection based on the Tag condition (default), and let’s pick women tag.
You can assign any tags to a product within the product form. And any product which has women tag is automatically added to this collection. Wonderful automation!

Try both options to better understand how it works. Add all the products that fit your collection, create a title and a compelling description, add an image, and Save. Done!
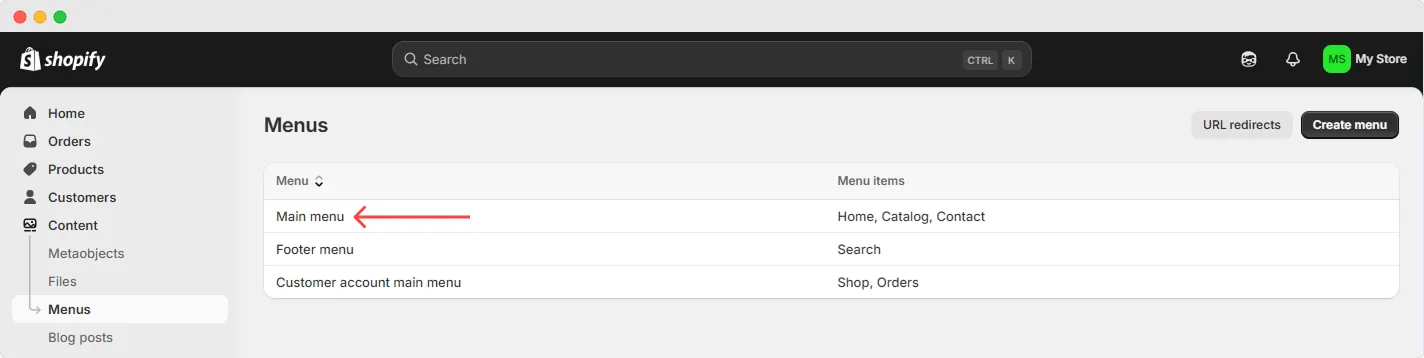
Add Collection to the Menu
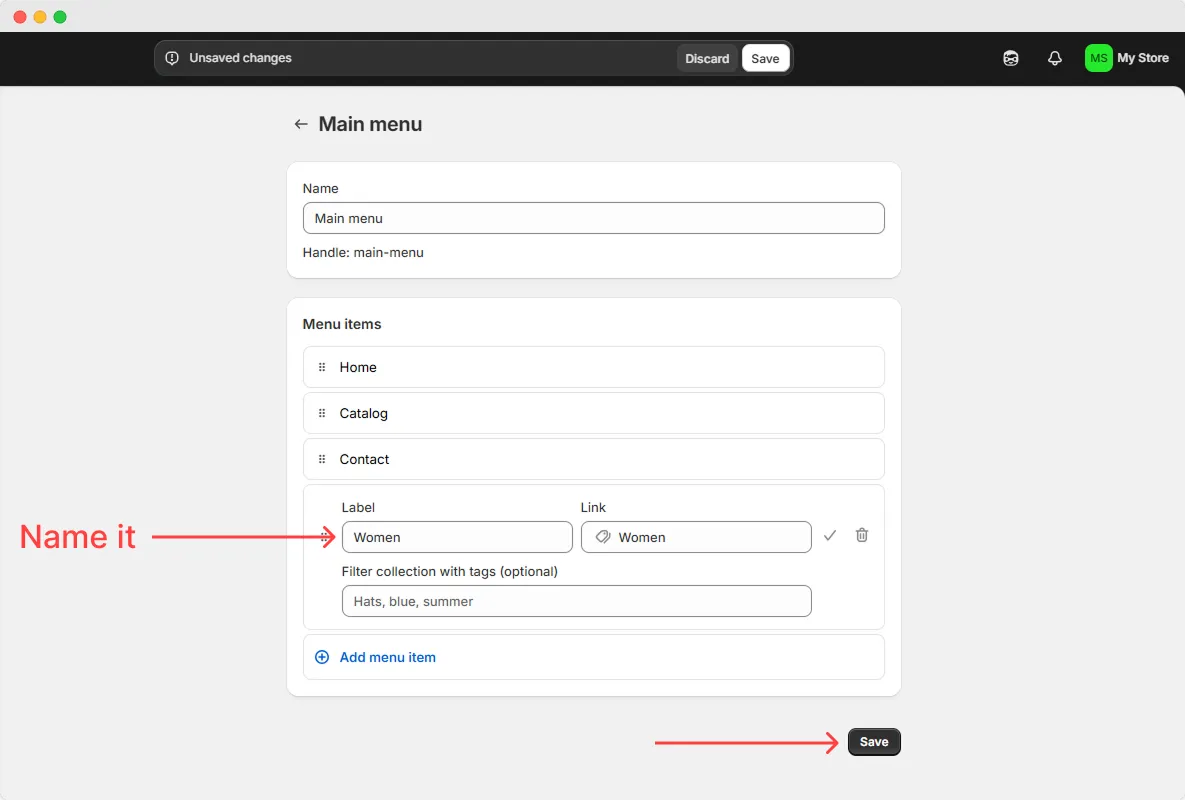
After saving your collection, Shopify will prompt you to update your menu. Click the update your menu link to proceed and let’s add the collection to the header menu.

A menu is a group of links that helps customers navigate your online store. By default Shopify adds a menu to the header and another to the footer of your website.
Let’s add your collection to the Main menu (the menu which is displayed in the header of your store page) so customers can easily find what the collection.
Steps to add your collection:
- Click on Main menu
- Click Add menu item
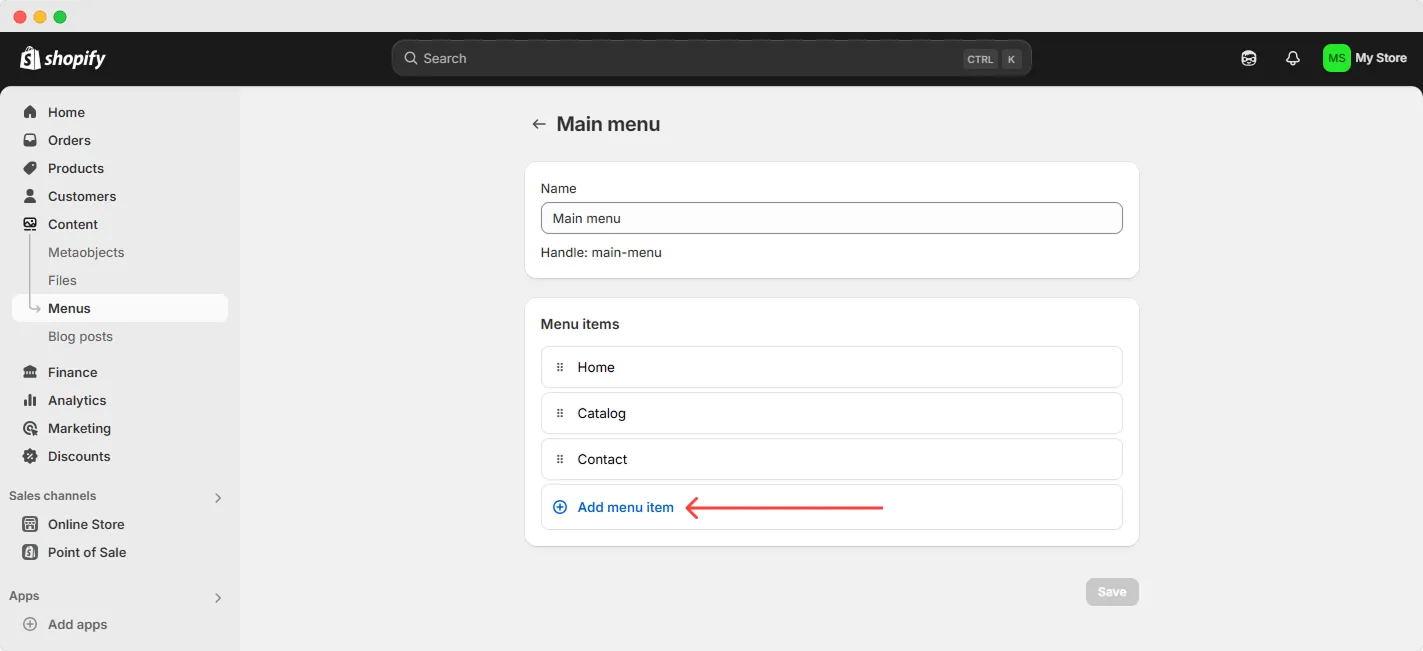
- Search for your collection
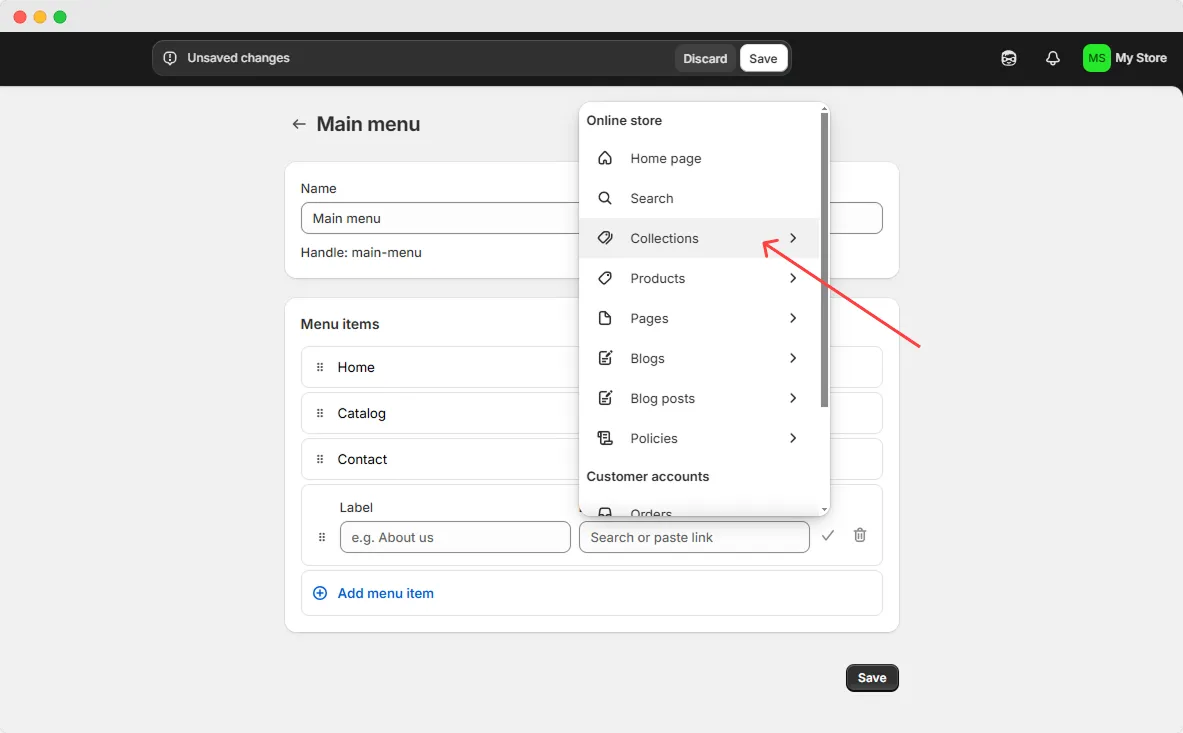

- Enter the collection title in the label field and Save
Now, let’s see how it looks in your store. On the left-side bar, click the eye icon next to Online Store to preview your website.
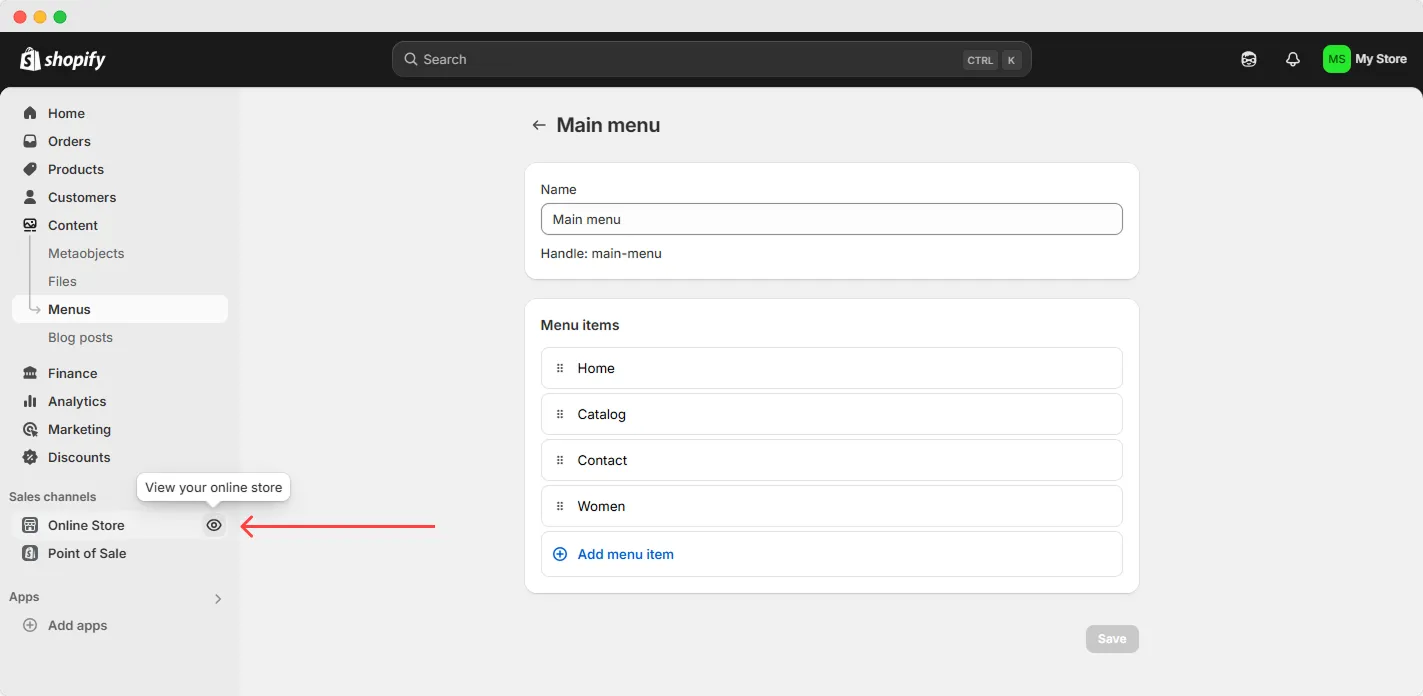
Your collection should now appear in the main menu. Click on it (e.g., Women) to navigate to the collection page.
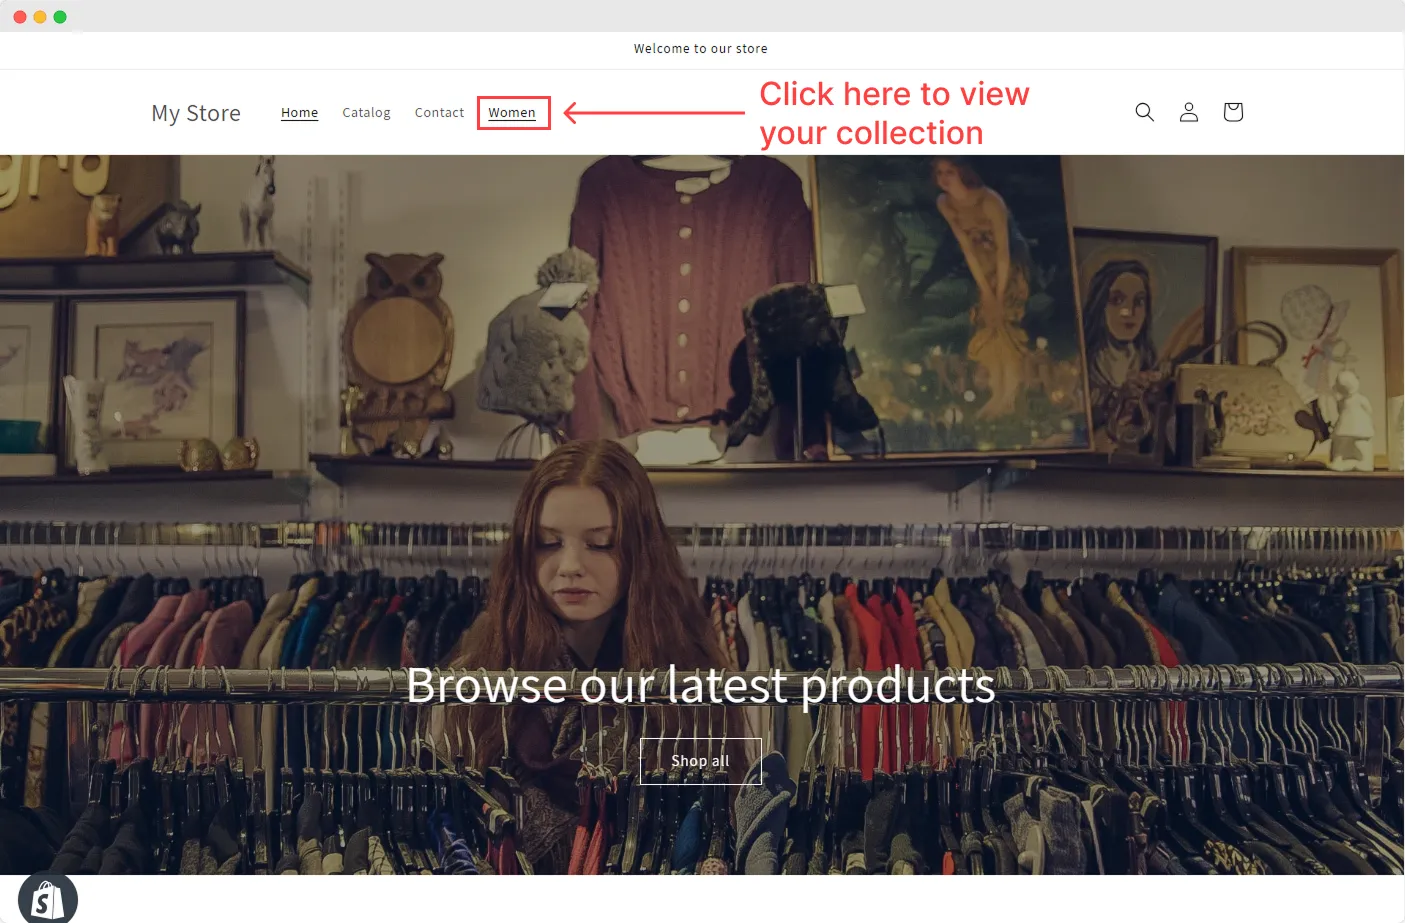

That’s it! Your collection is now accessible from the main menu. You should see all the products you have added to your collection.
Customize Customer Notifications
Now that you have products on your website, it’s time to set up sender email and customer notifications. Customer notifications in Shopify are automated emails sent to customers based on specific order or account activity events.
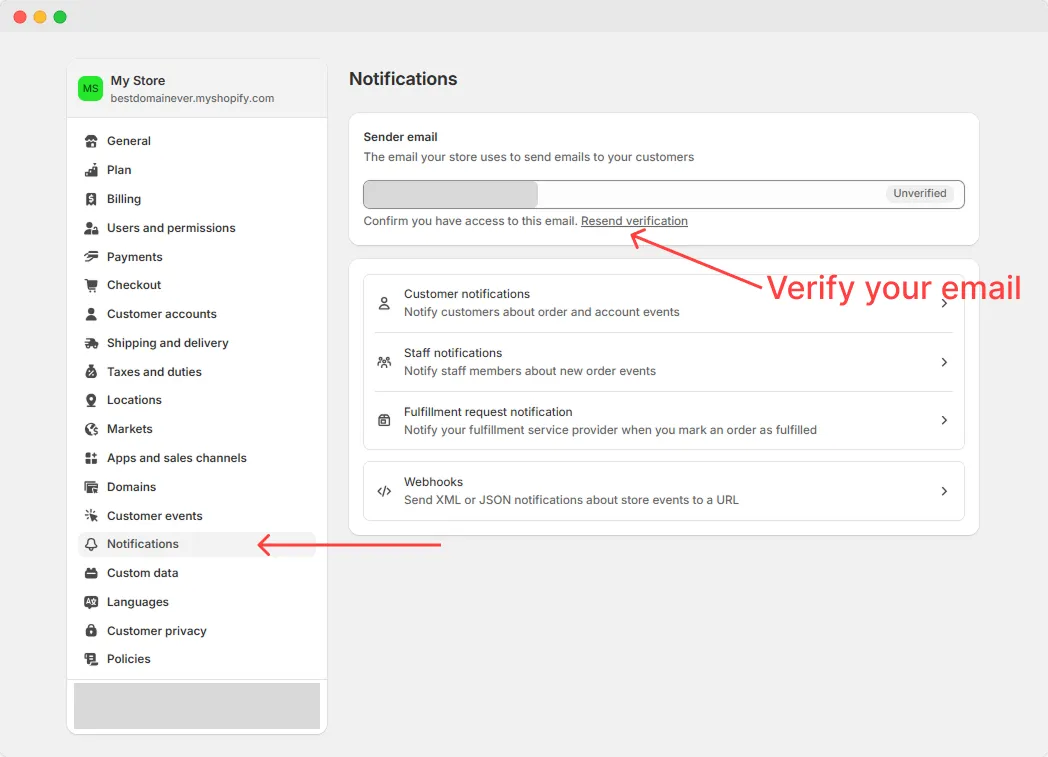
In your Shopify admin, go to Settings and click on Notifications.
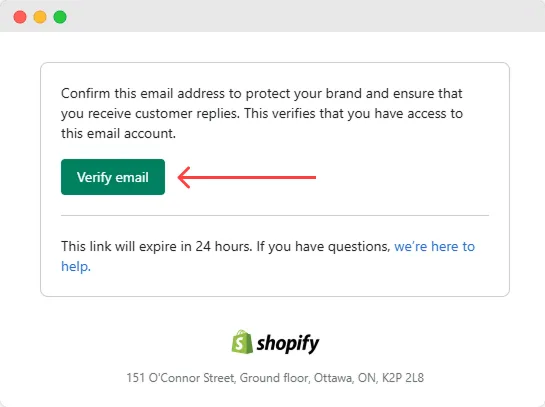
First, you need to verify your store email address. Shopify will send you a verification email. Open it and follow the instructions to verify your store email address.
Once the store email is verified, go back to Customer Notifications. Click on it and, you’ll find multiple notification templates.
In this tutorial we’ll only customize email template. Click on Customize email templates to personalize your email notifications.

You can add a logo or change the color scheme.
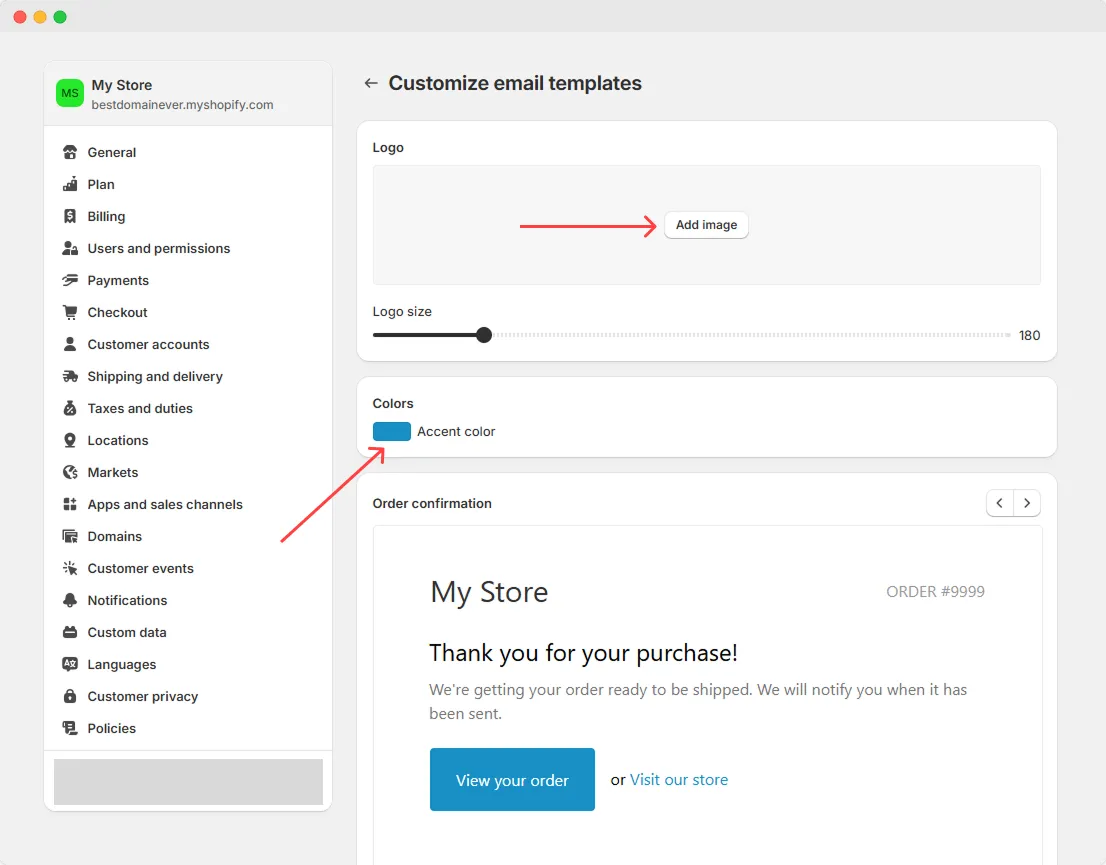
Make your adjustments, then Save - your changes won’t be visible until you do.
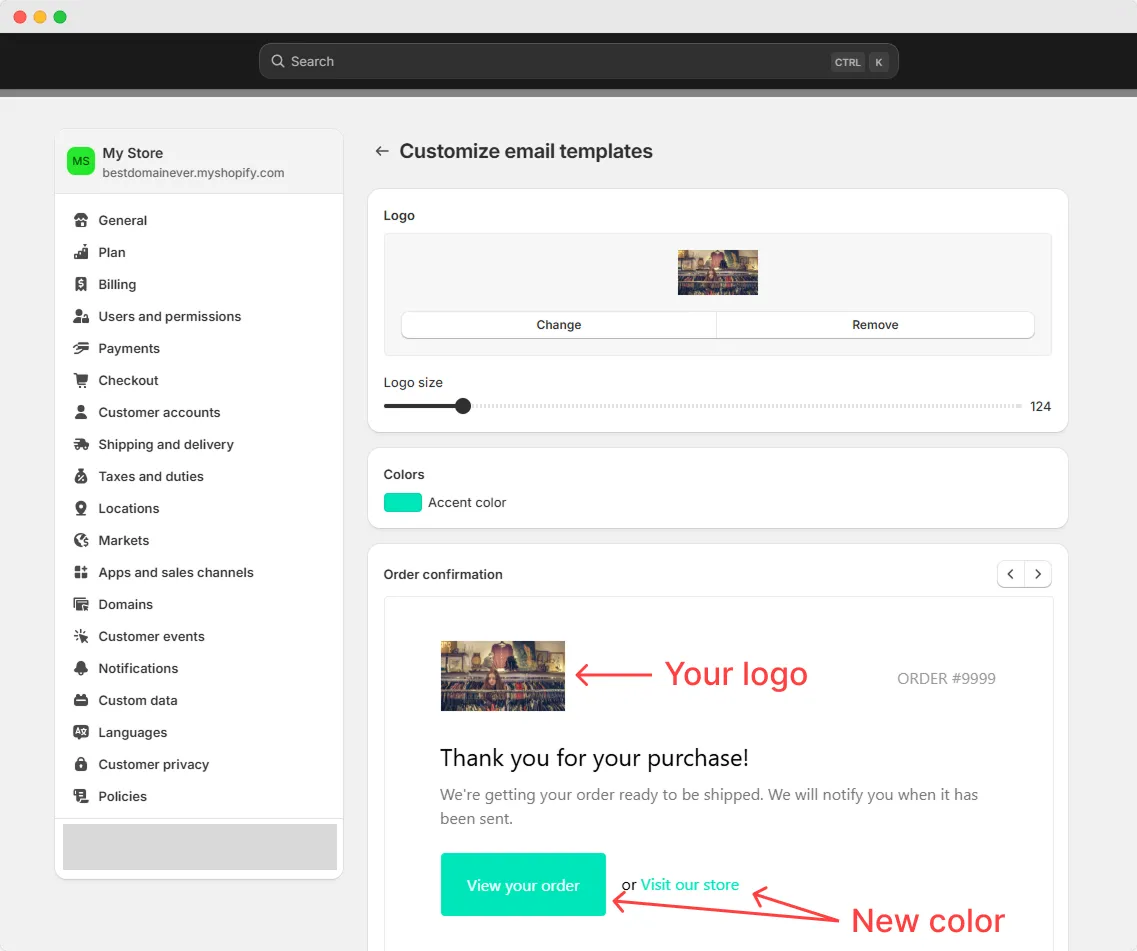
This ensures your emails match your brand and provide a professional experience for your customers.
Set up Shopify Payments
The last step before you can start selling is to set up your payment options.
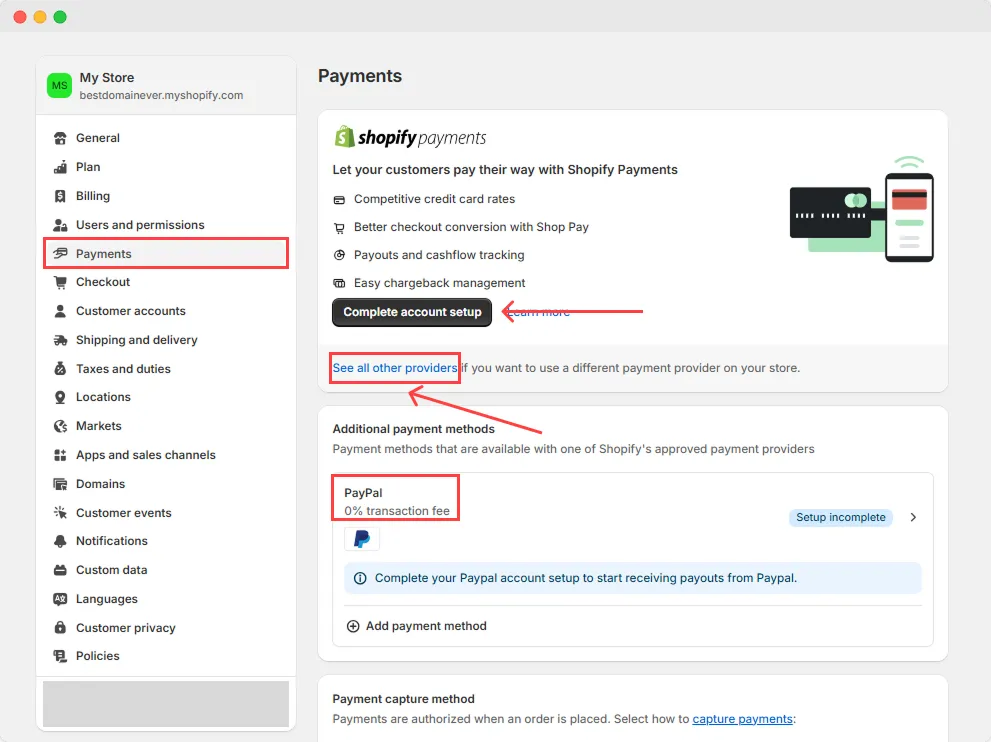
In your Shopify Admin, go to Settings and click Payments.
You have some options:
- Shopify Payments (recommended for a seamless experience)
- Paypal (available in more countries than Shopify Payments)
- Other third-party payment provider if you don’t fit Shopify Payments requirements (requires additional setup)
I recommend watching this tutorial if you’d like to learn more about all the payment options.
Shopify Payments is the easiest way to accept payments, allowing you to process all major payment methods automatically.
Click Complete account setup and follow the steps to get it set up on your website. Fill in the required information, including your store information and bank details. Also, for security reasons, establish two-factor authentication for your account.
Launch Your Store
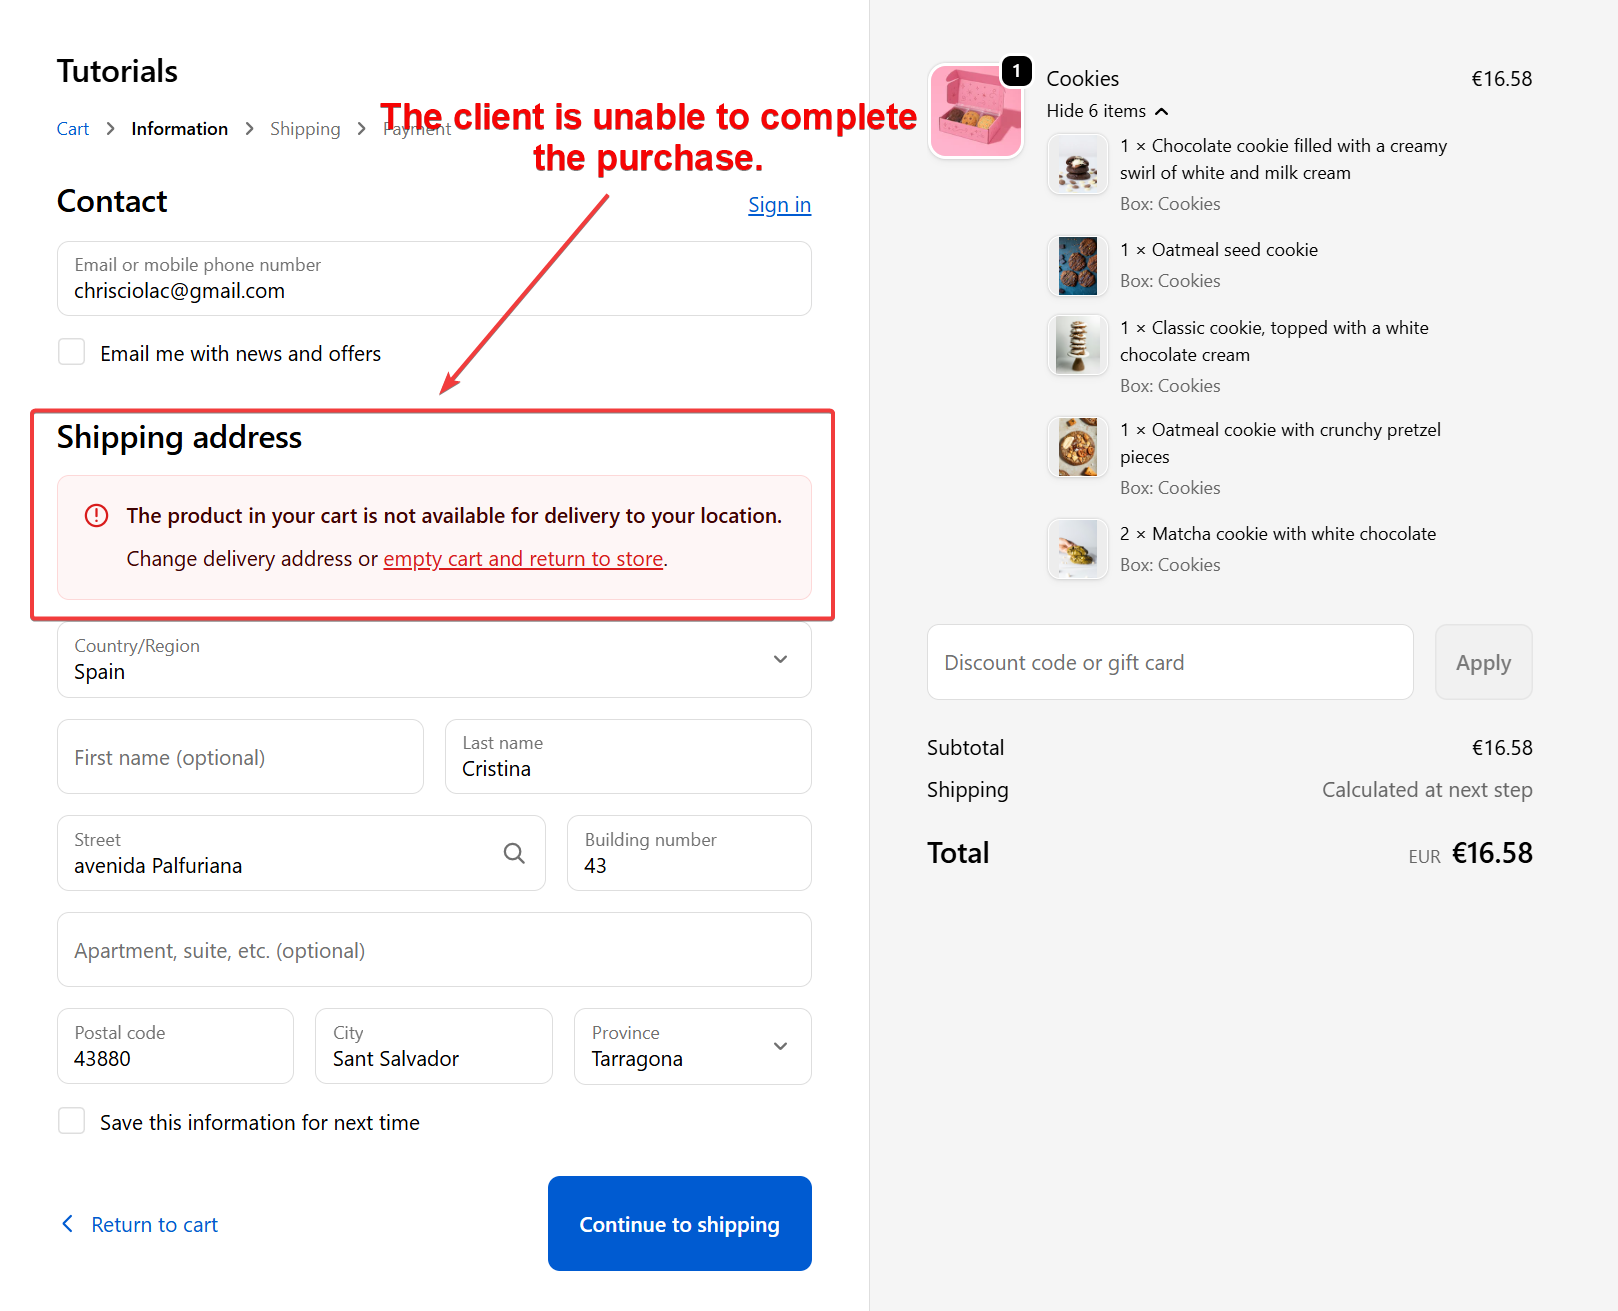
Before launching your store, place a few test orders to see how the checkout process works. When ready (choose a subscription plan if you haven’t already), remove the password from your store so it’s open to your customers.
Your store is live and you can start selling!
What to do next
Congratulations! You’ve built your store and you’re ready to sell.
But launching your store is just the beginning. I recommend:
- exploring Shopify’s resources
- reading marketing blogs
- staying up to date on e-commerce trends
- also, if you need some customization or help, I highly recommend hiring a qualified Shopify expert.
The more you learn, the better you can optimize your store for success.
Good luck in your new adventure!