· Dmitri Pavlutin · Shopify Tutorials · 3 min read
How to Add a Drop-down Menu to Shopify Store
Nobody likes stores that are difficult to navigate. If your customers can’t find the products they’re interested in, they’ll never buy anything. That’s why you should continually improve the store navigation.
A menu in Shopify is a collection of links that help customers navigate your store more quickly. Common are the header and footer menus, with the header menu being the most important.
Space in the header is limited, so you may need to create a drop-down menu item that itself contains multiple links.
Let’s see how to create drop-down menus in a Shopify store in just a few clicks.
Contents
Add drop-down menu
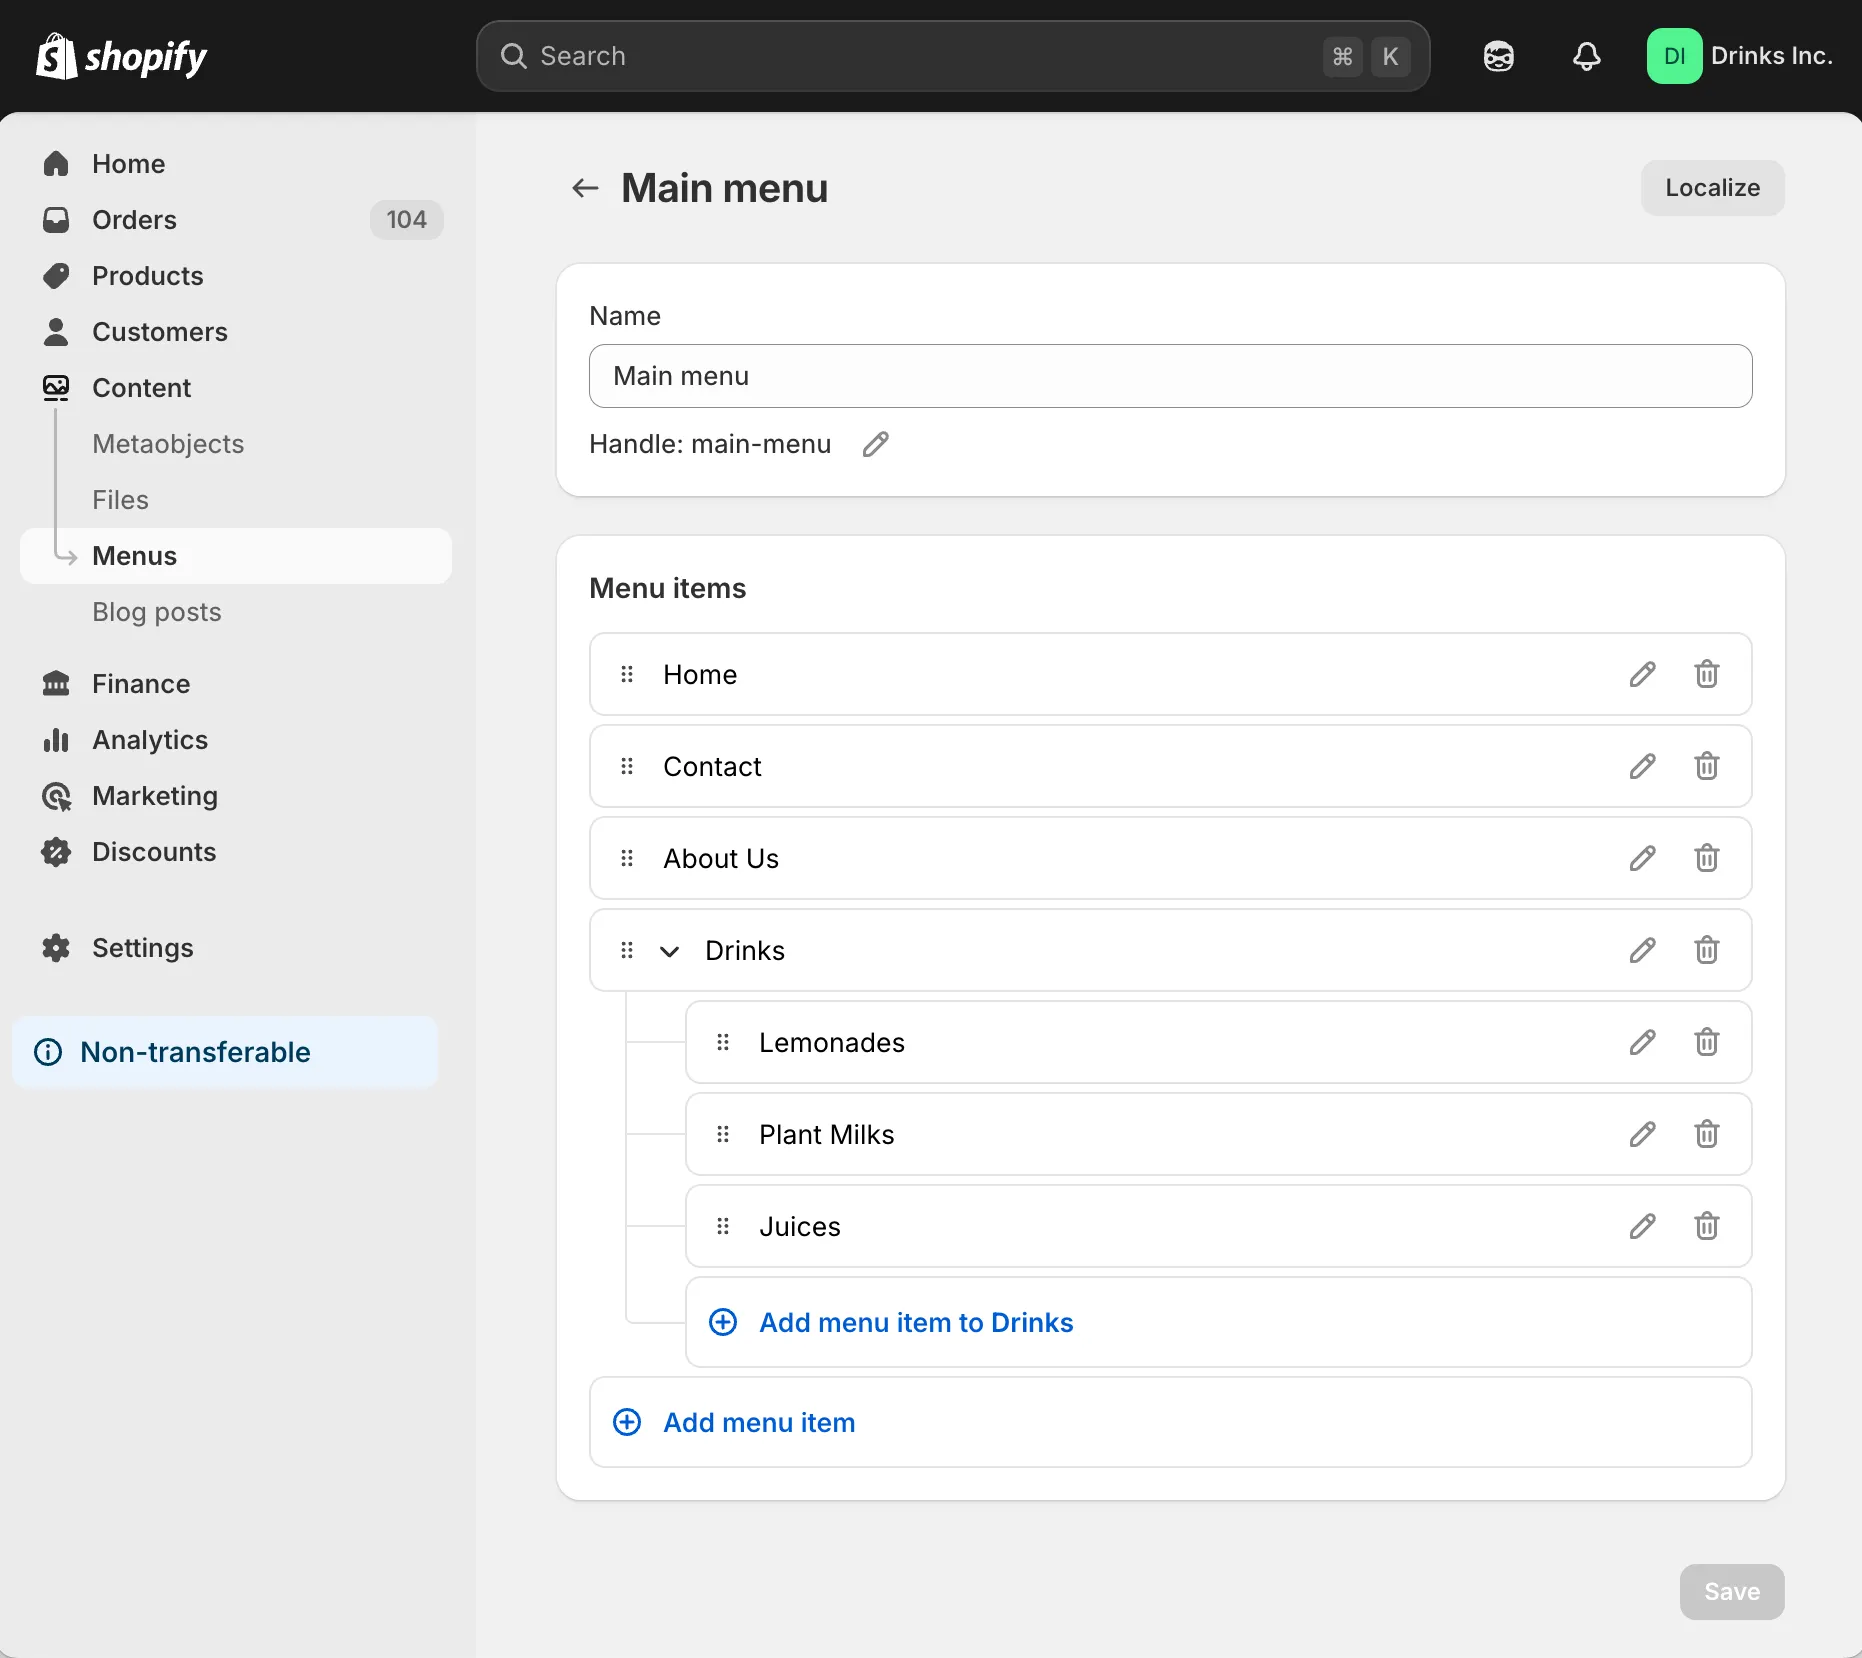
The Drinks Inc. shop currently has 3 header menu items: Home, Contact and About Us. These are regular links.
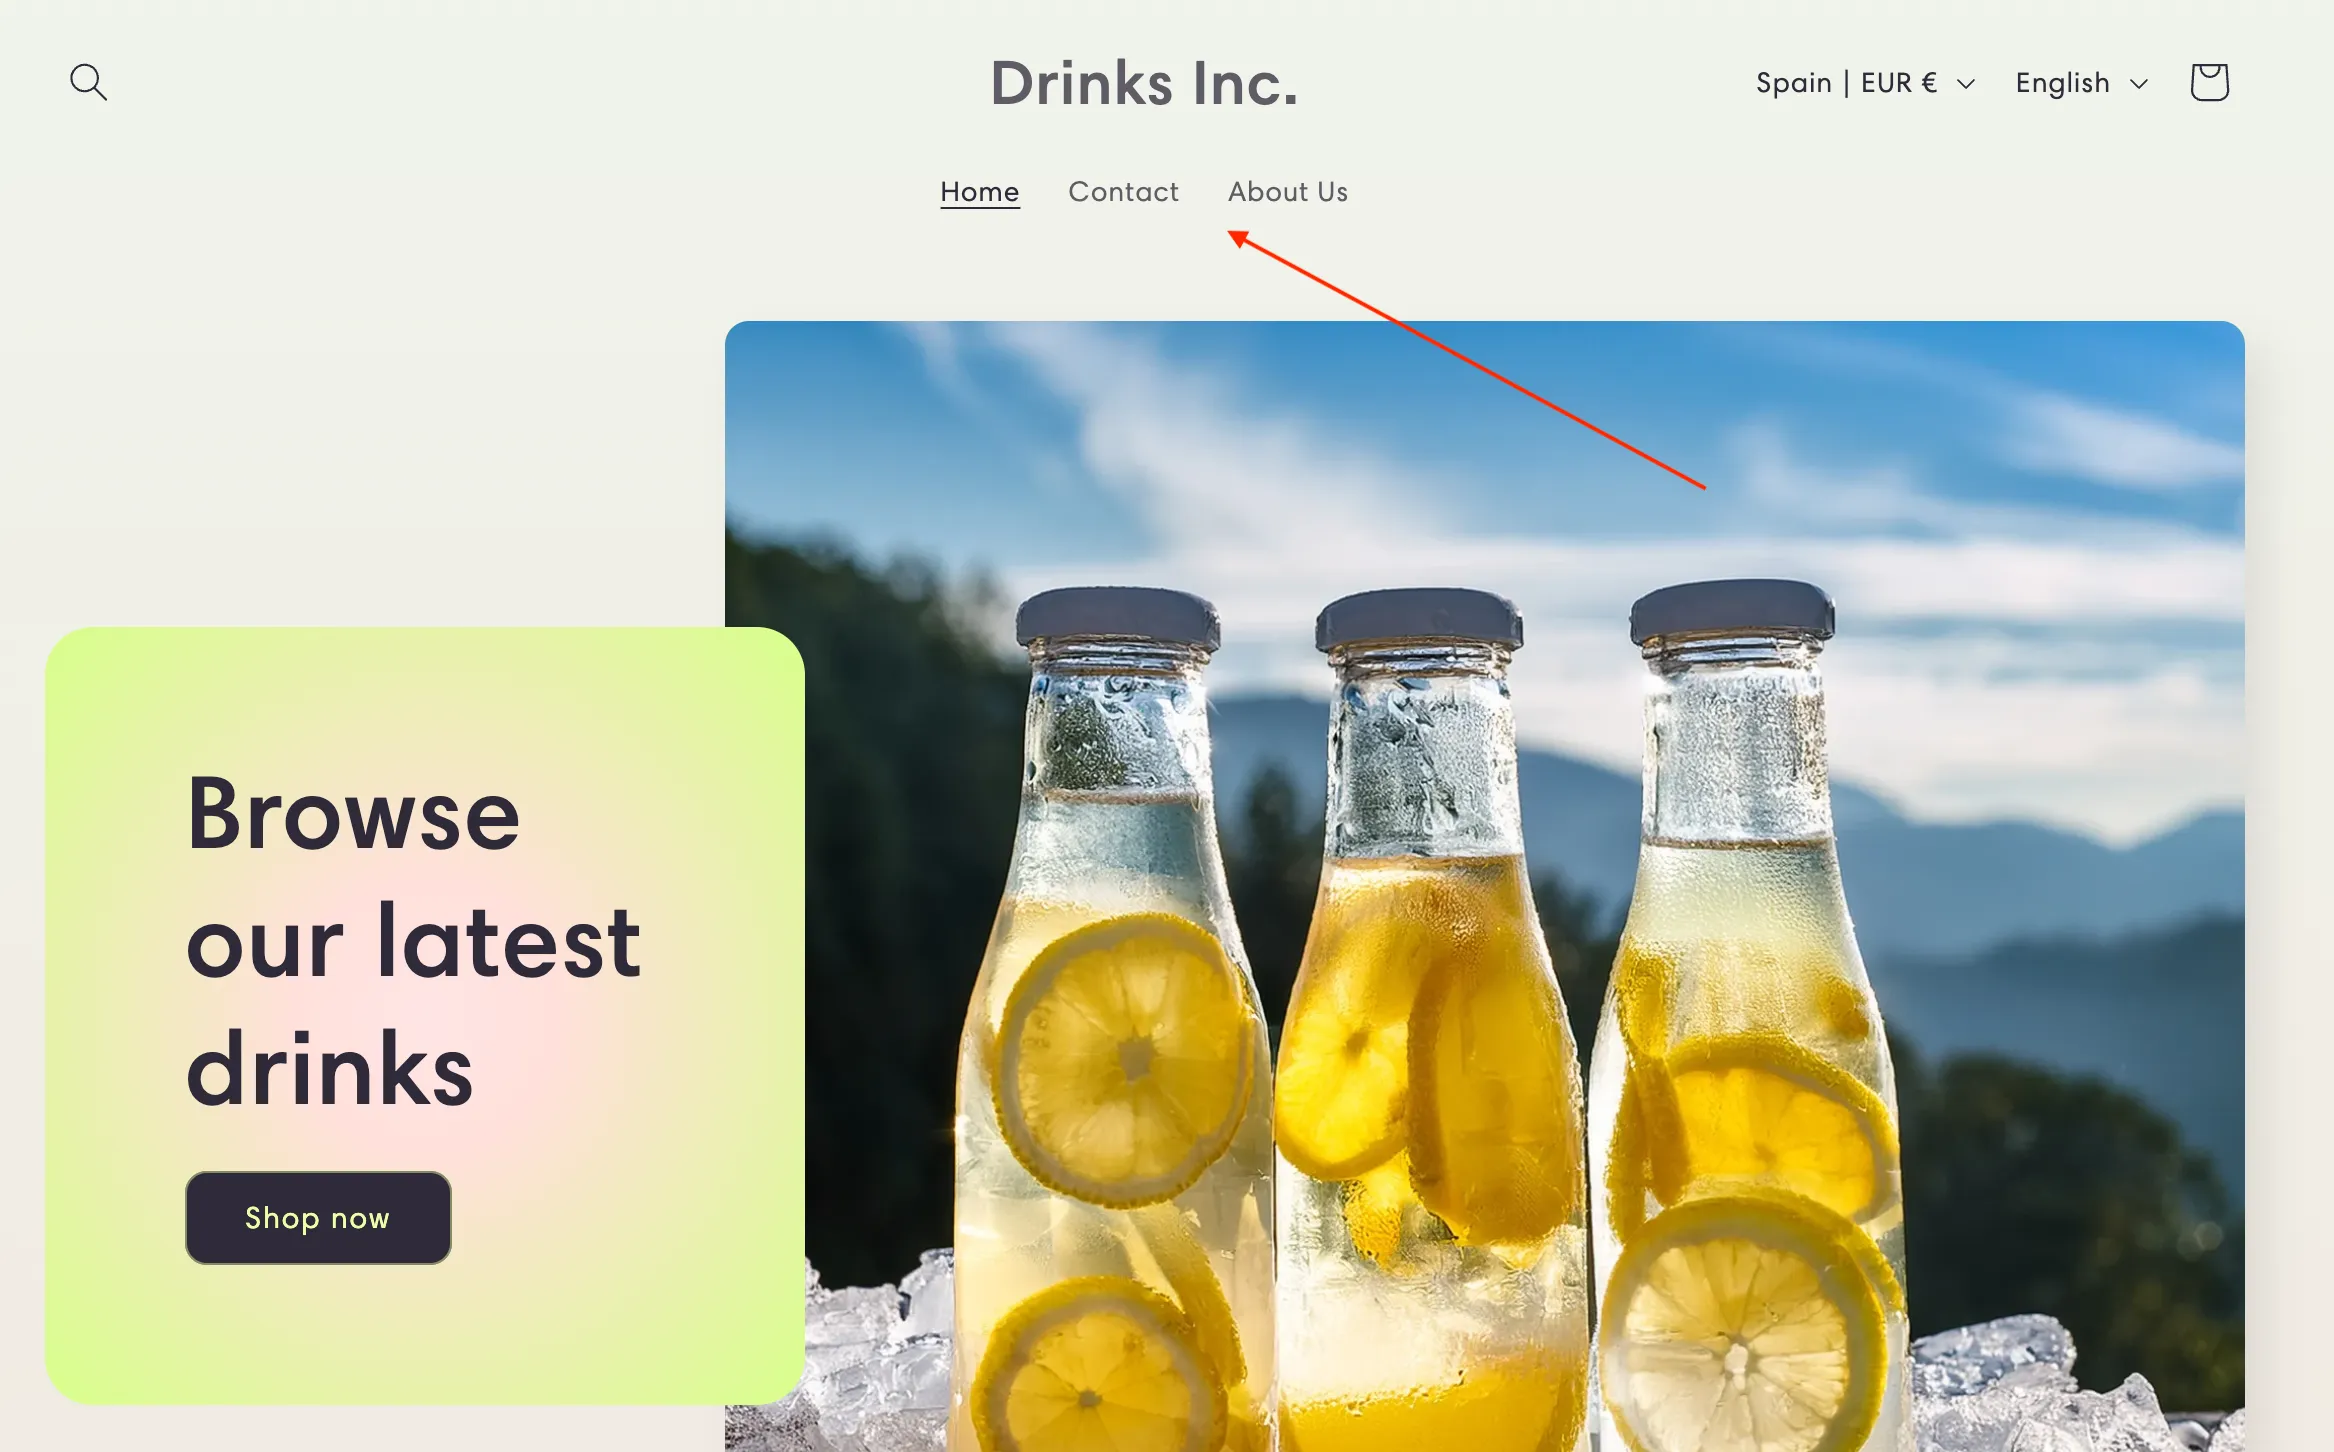
Let’s add a Drinks drop-down menu to the header, with links to 3 popular collections: Lemonades, Juices and Plant Milks.
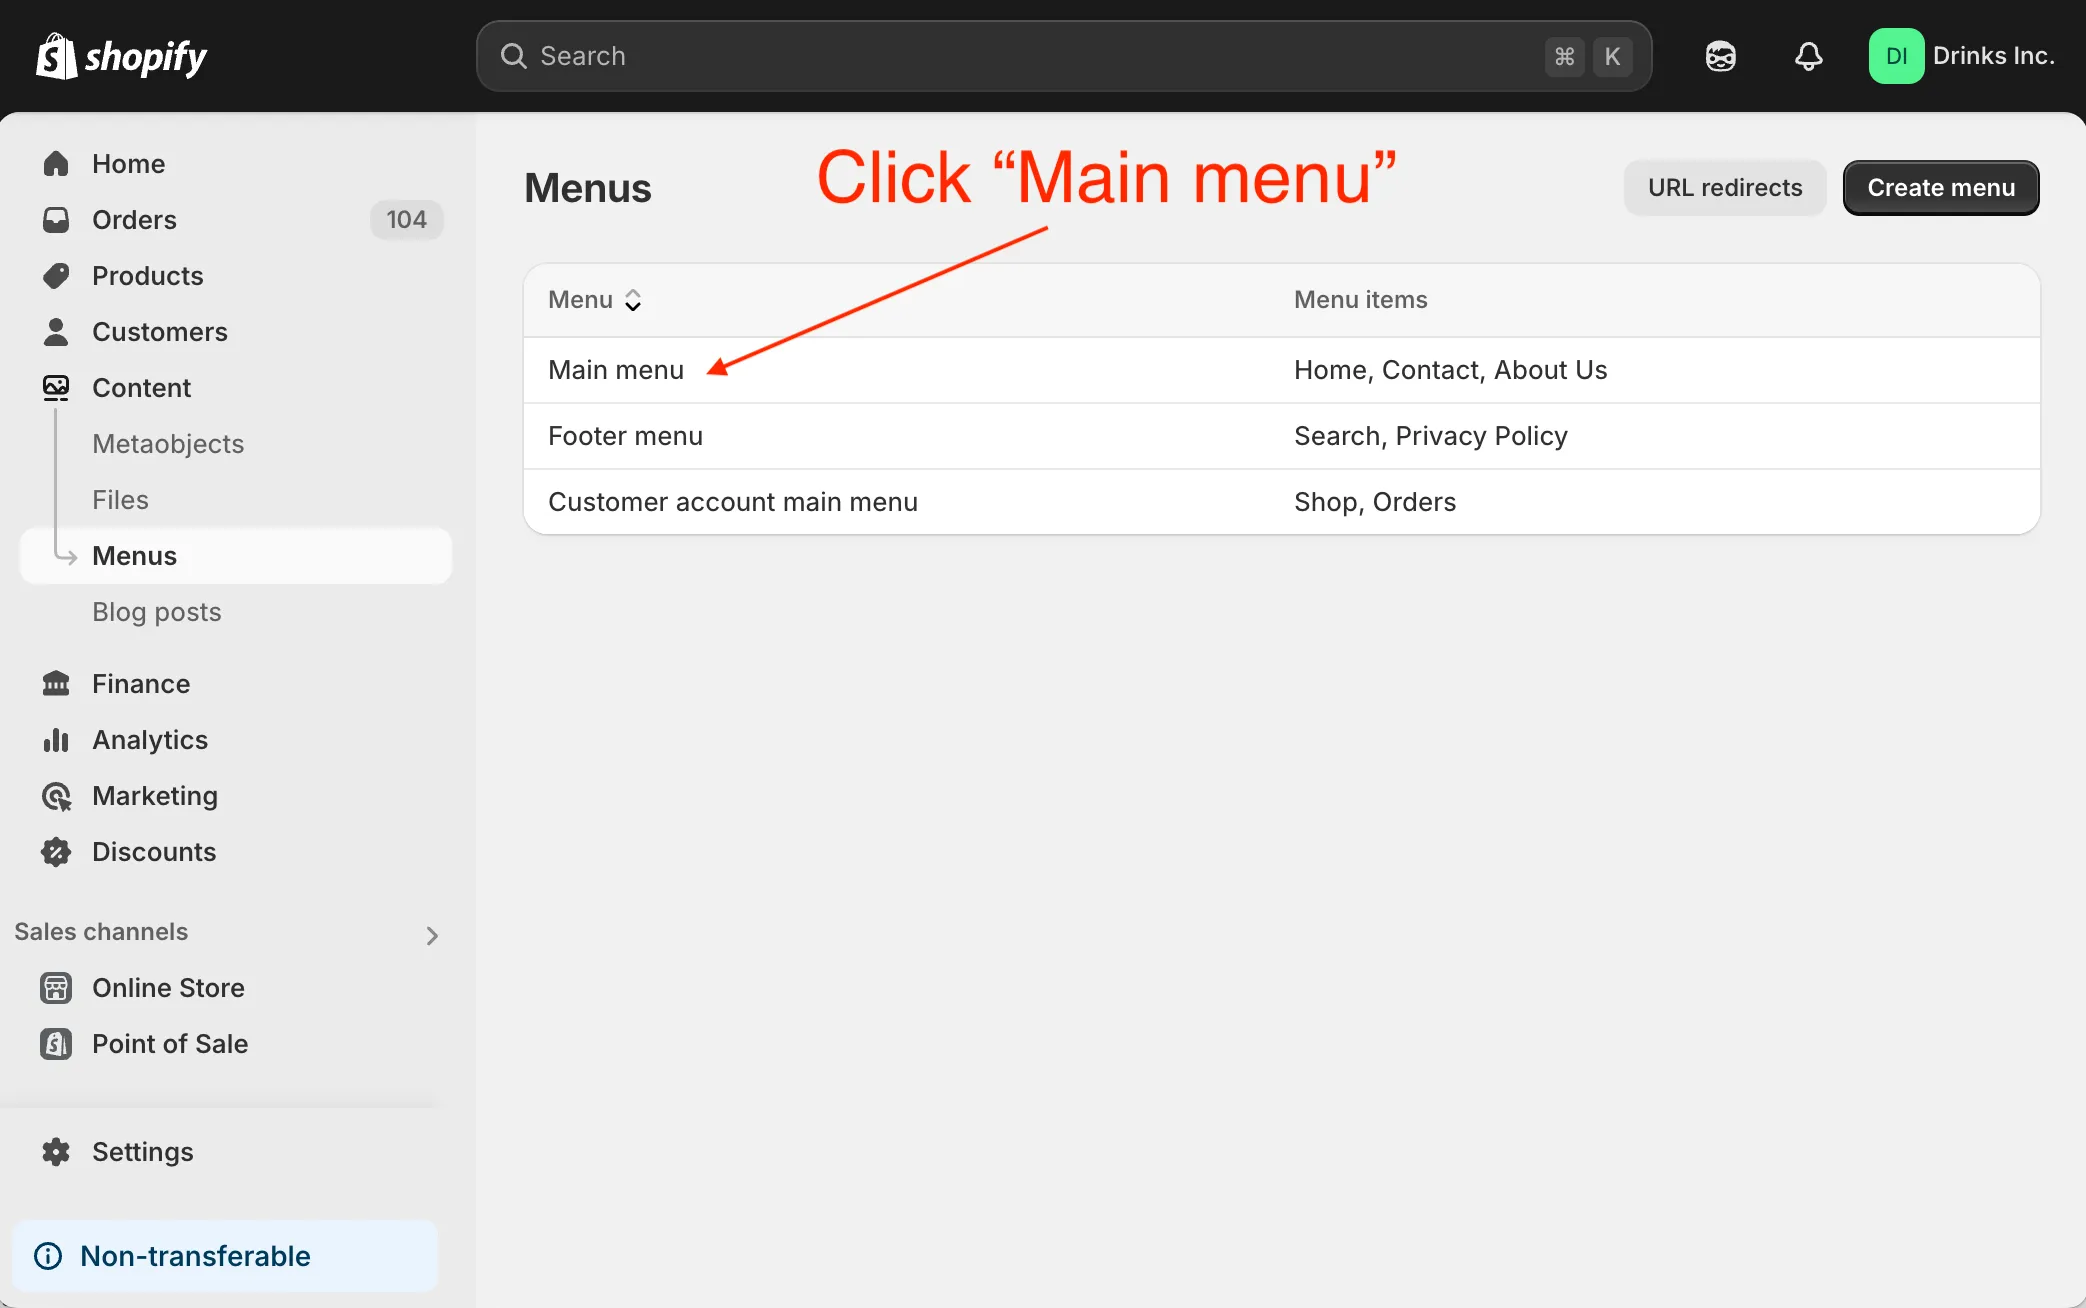
First, navigate to menu list in your Shopify admin
Click Main menu from the list (or the name of the menu where you’d like to add a drop-down menu).
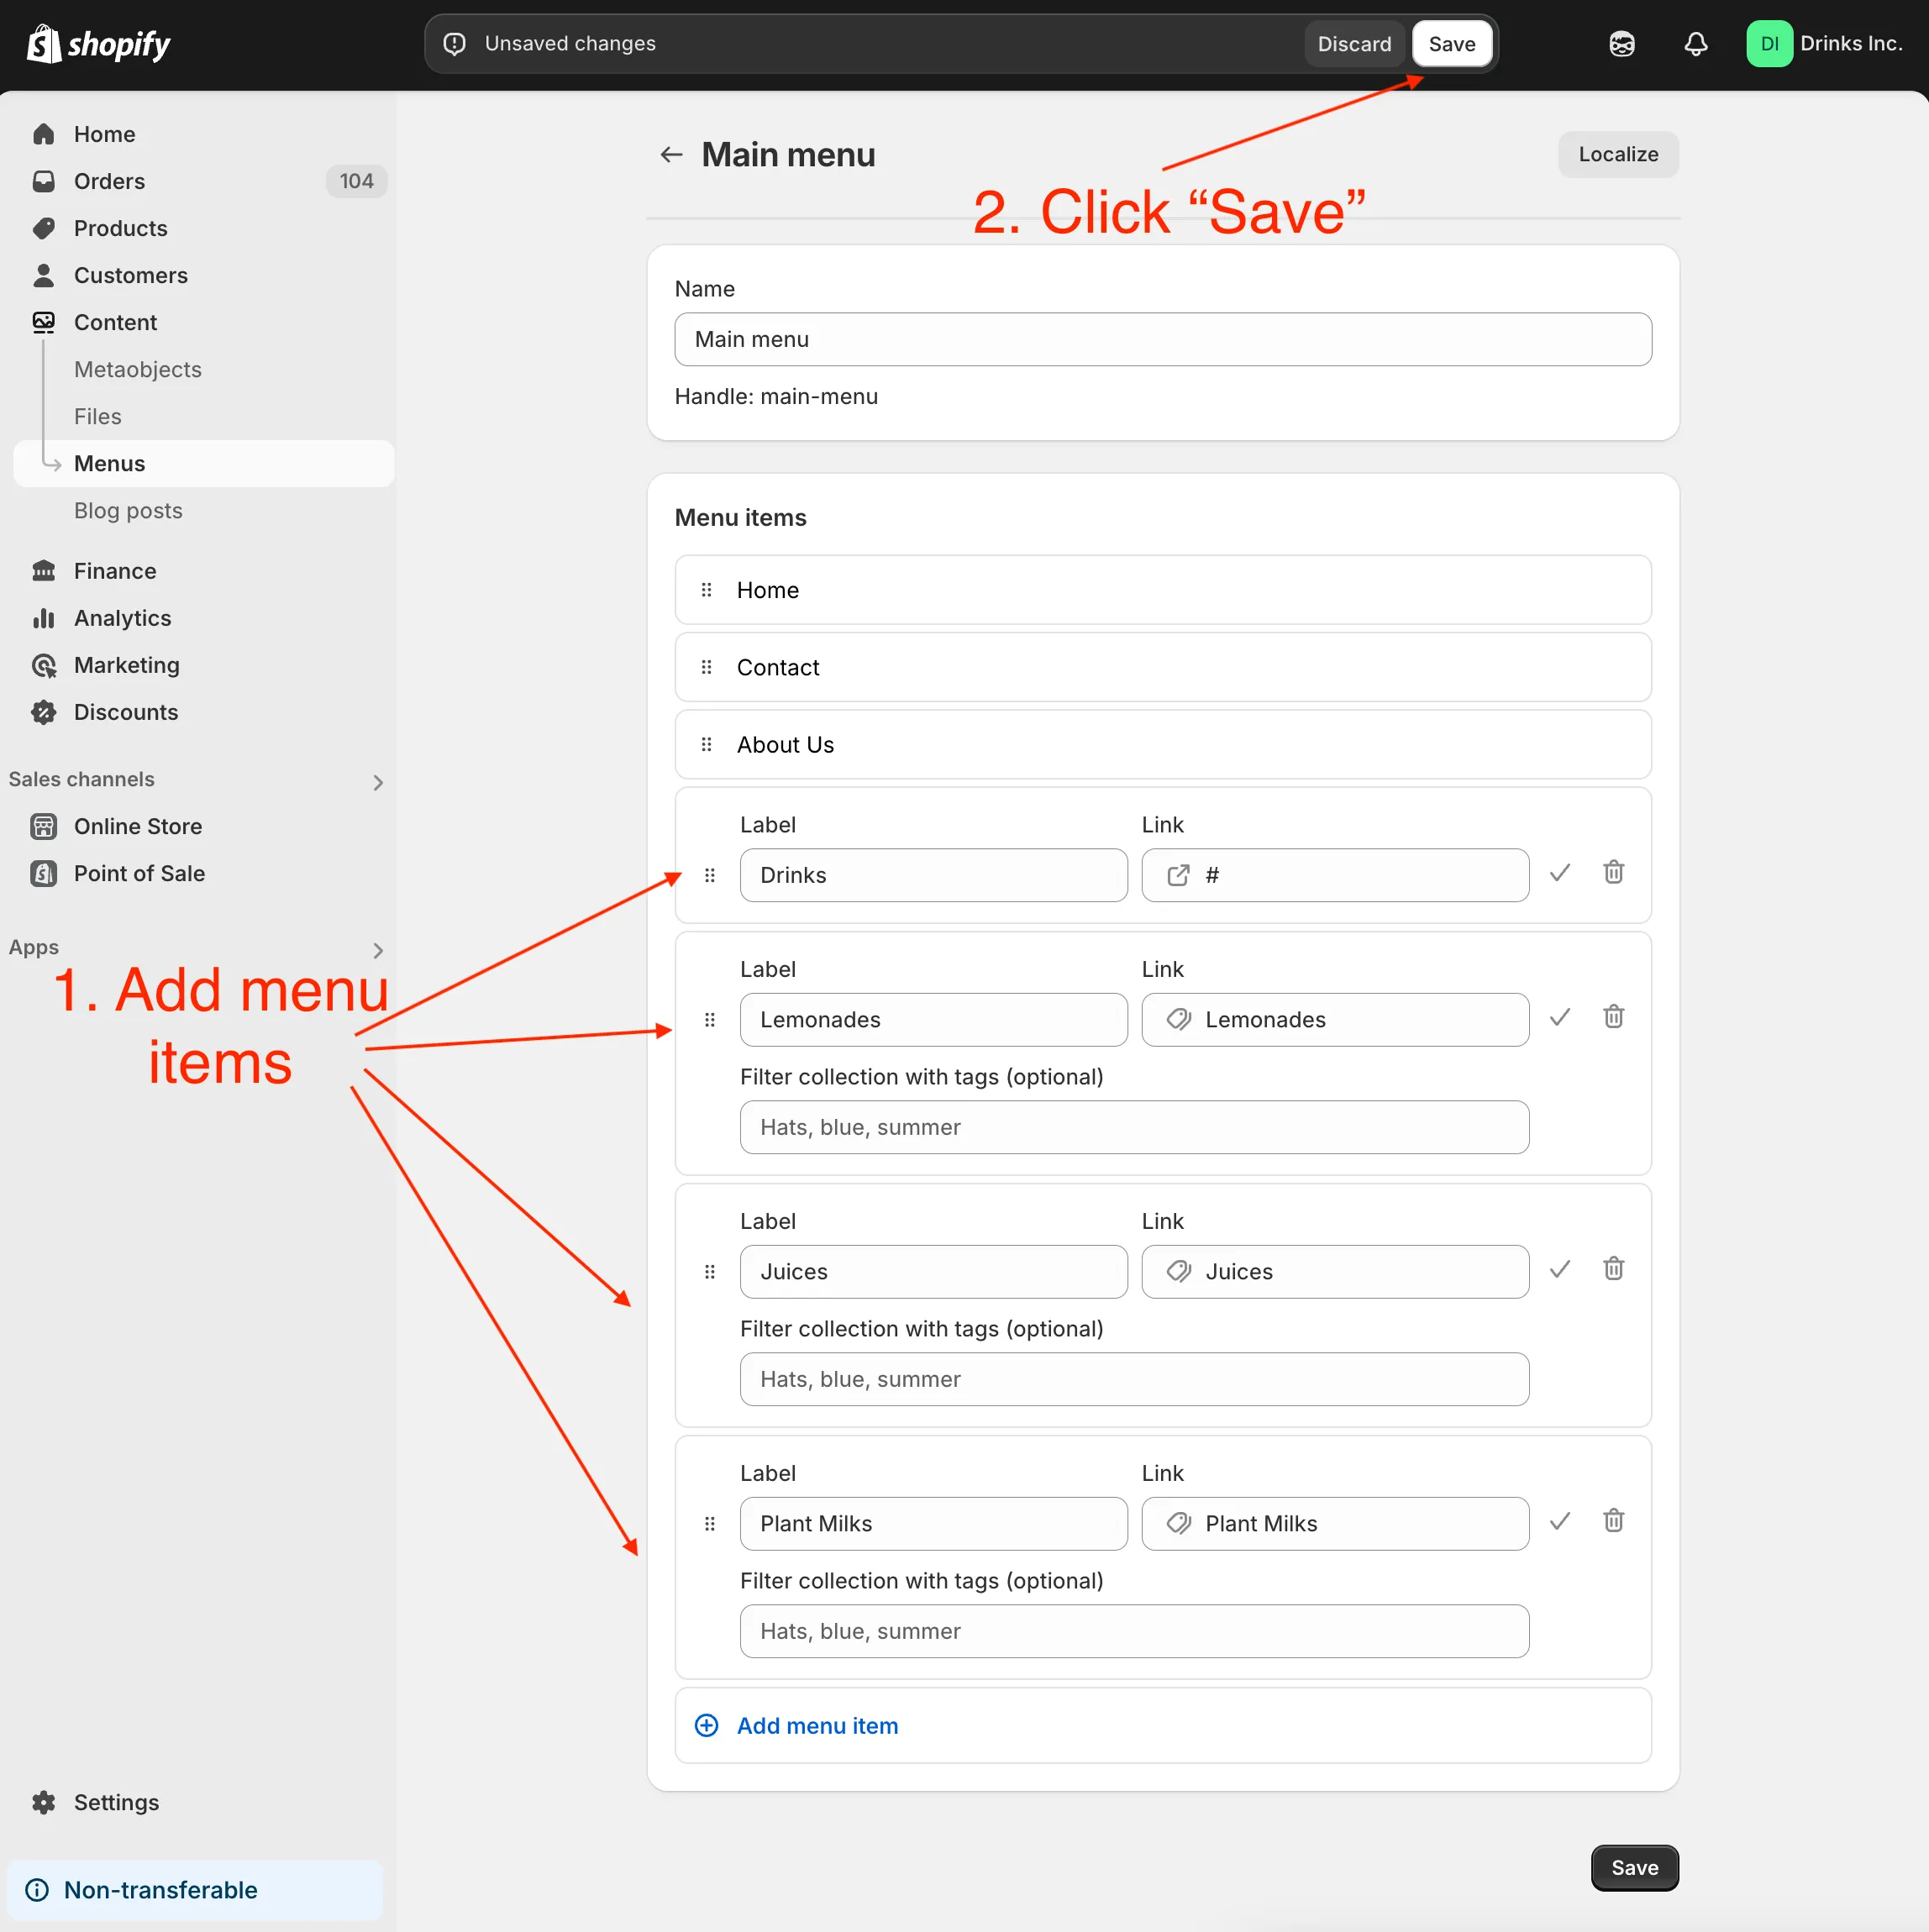
- Add 4 menu items to the form: Drinks (which will become a dropwn-menu item, use ”#” as its link) and 3 menu items (links to collections). Click Save.
- Now comes the most interesting part: nesting the 3 links under the Drinks drop-down menu.
Drag the Lemonades, Juices and Plant Milks items one by one and drop them under Drinks. This should nest the 3 links inside the Drinks menu — creating a drop-down menu.
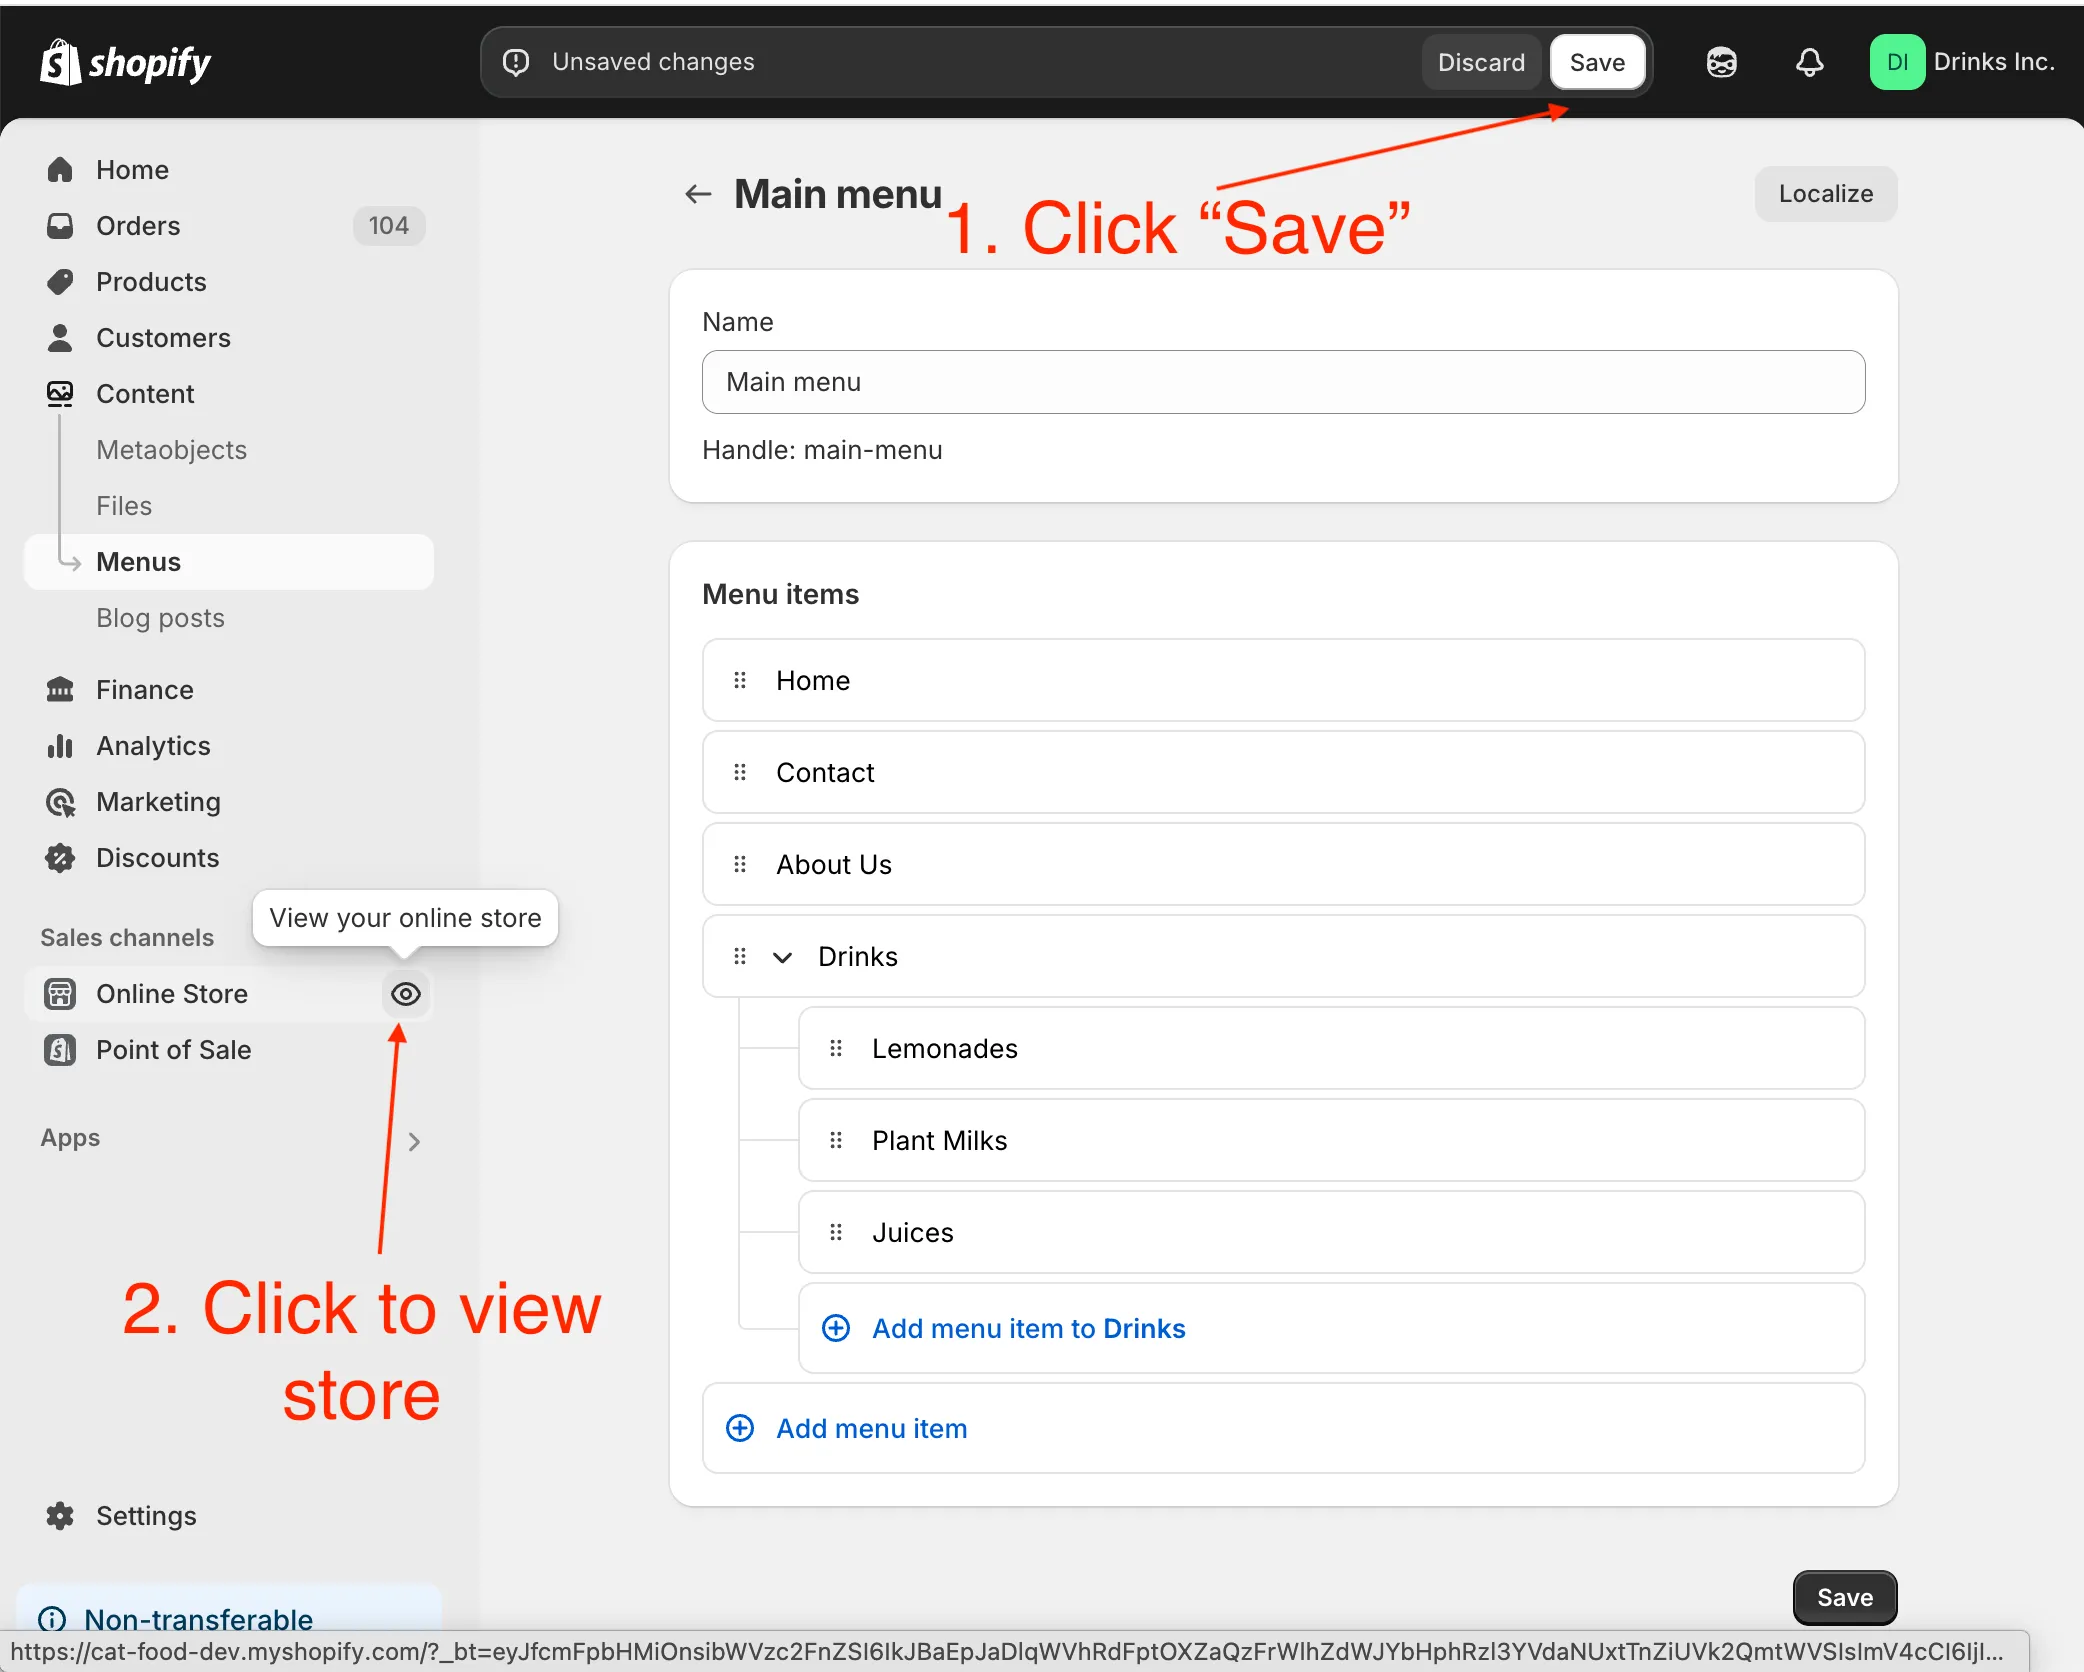
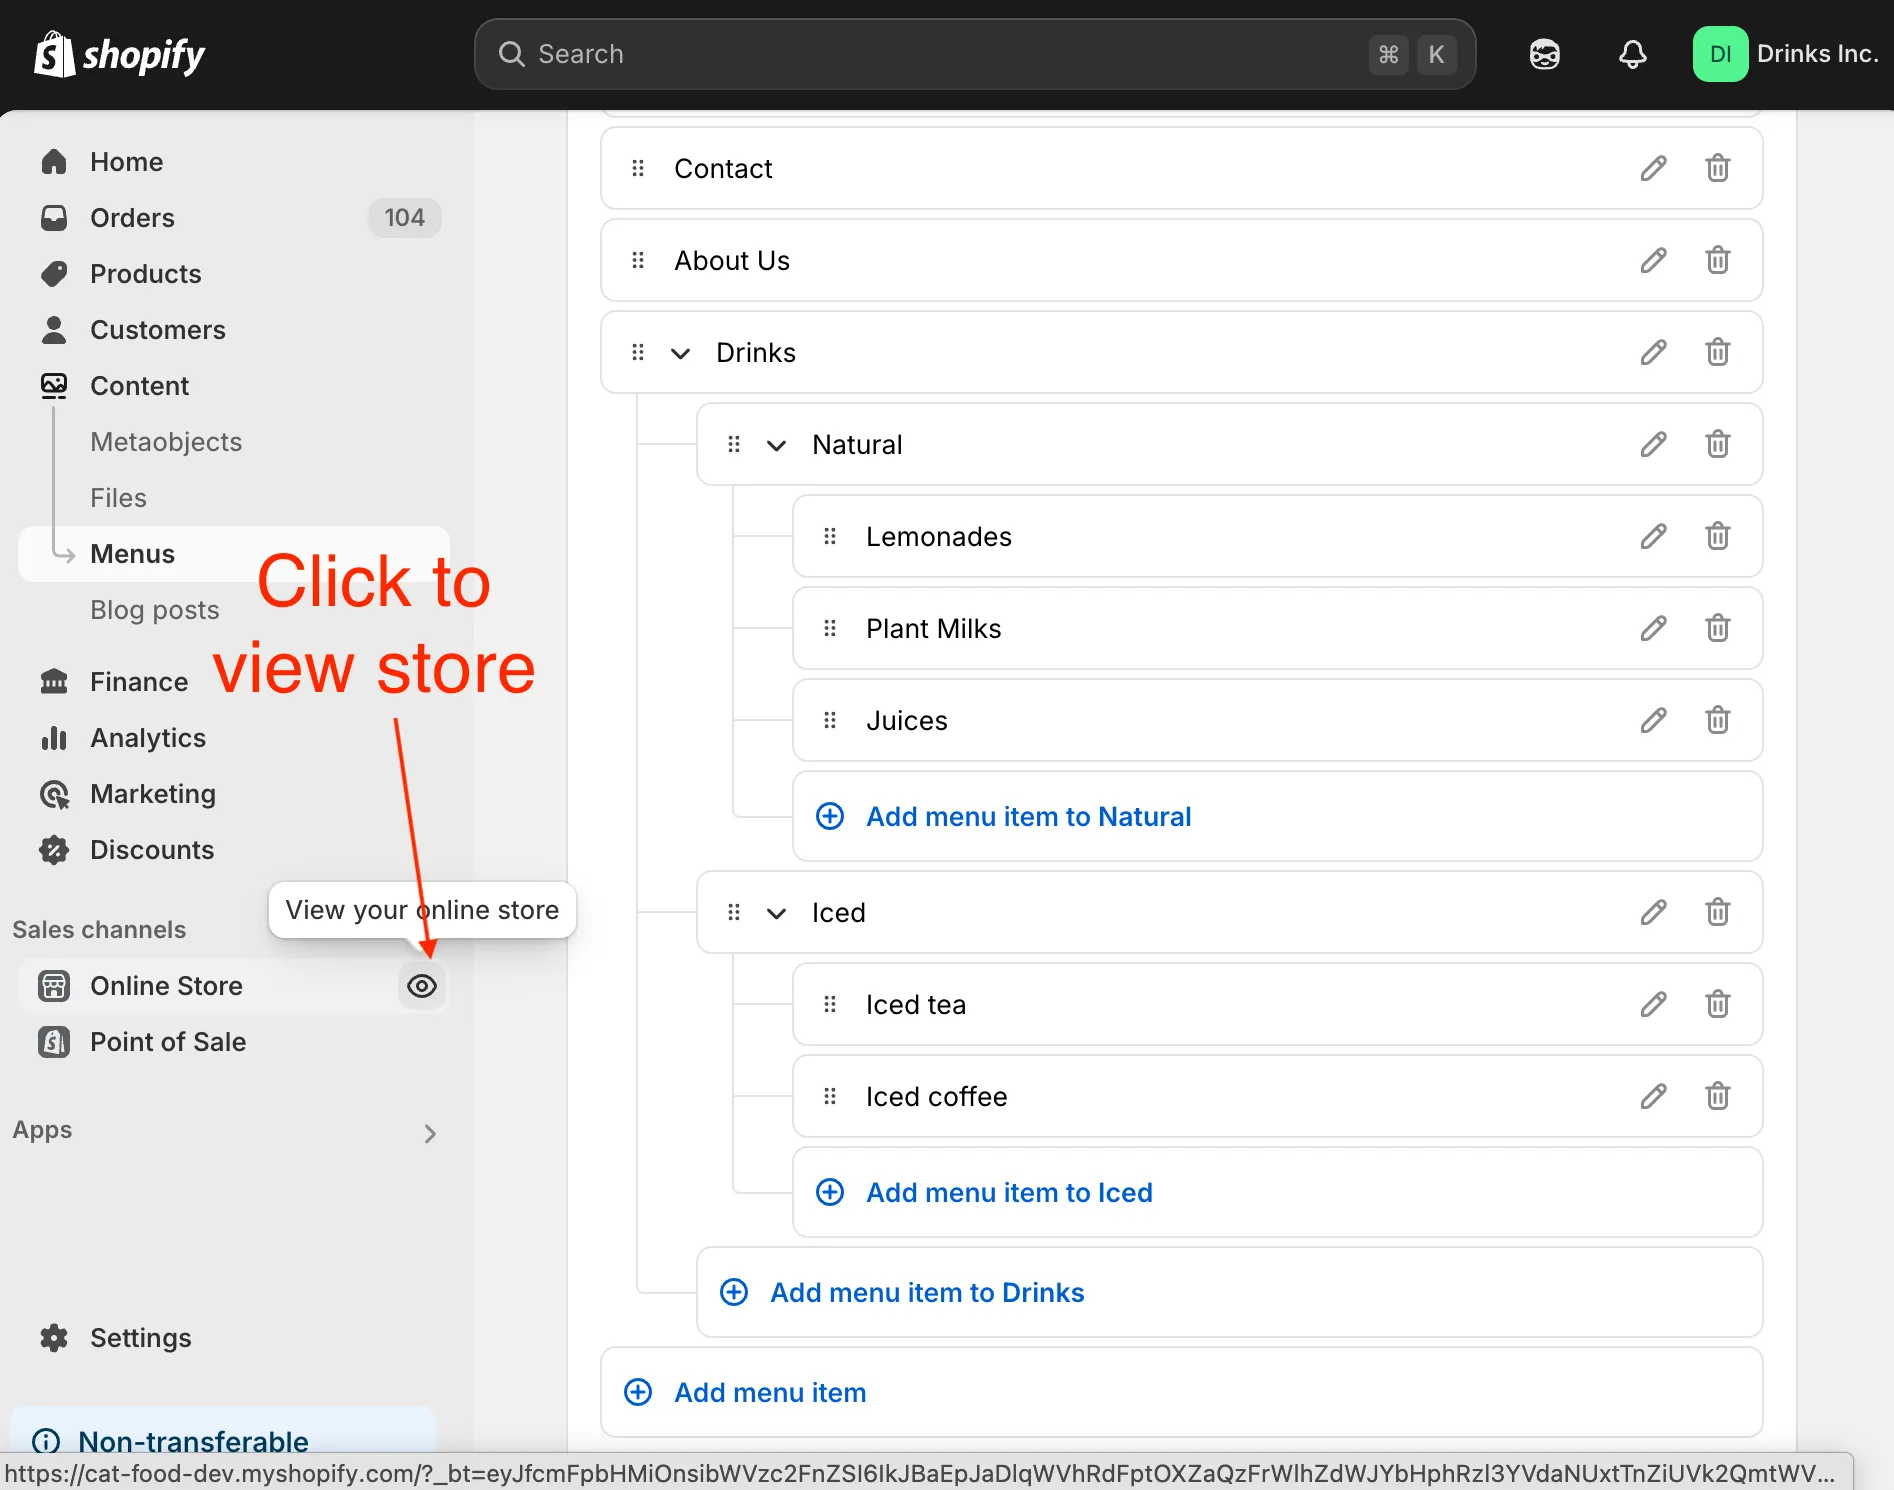
- Done! Now you should have 3 links nested under Drinks and the drop-down menu is created.
Click Save to save the menu changes, then click to view your online store to see how it looks.
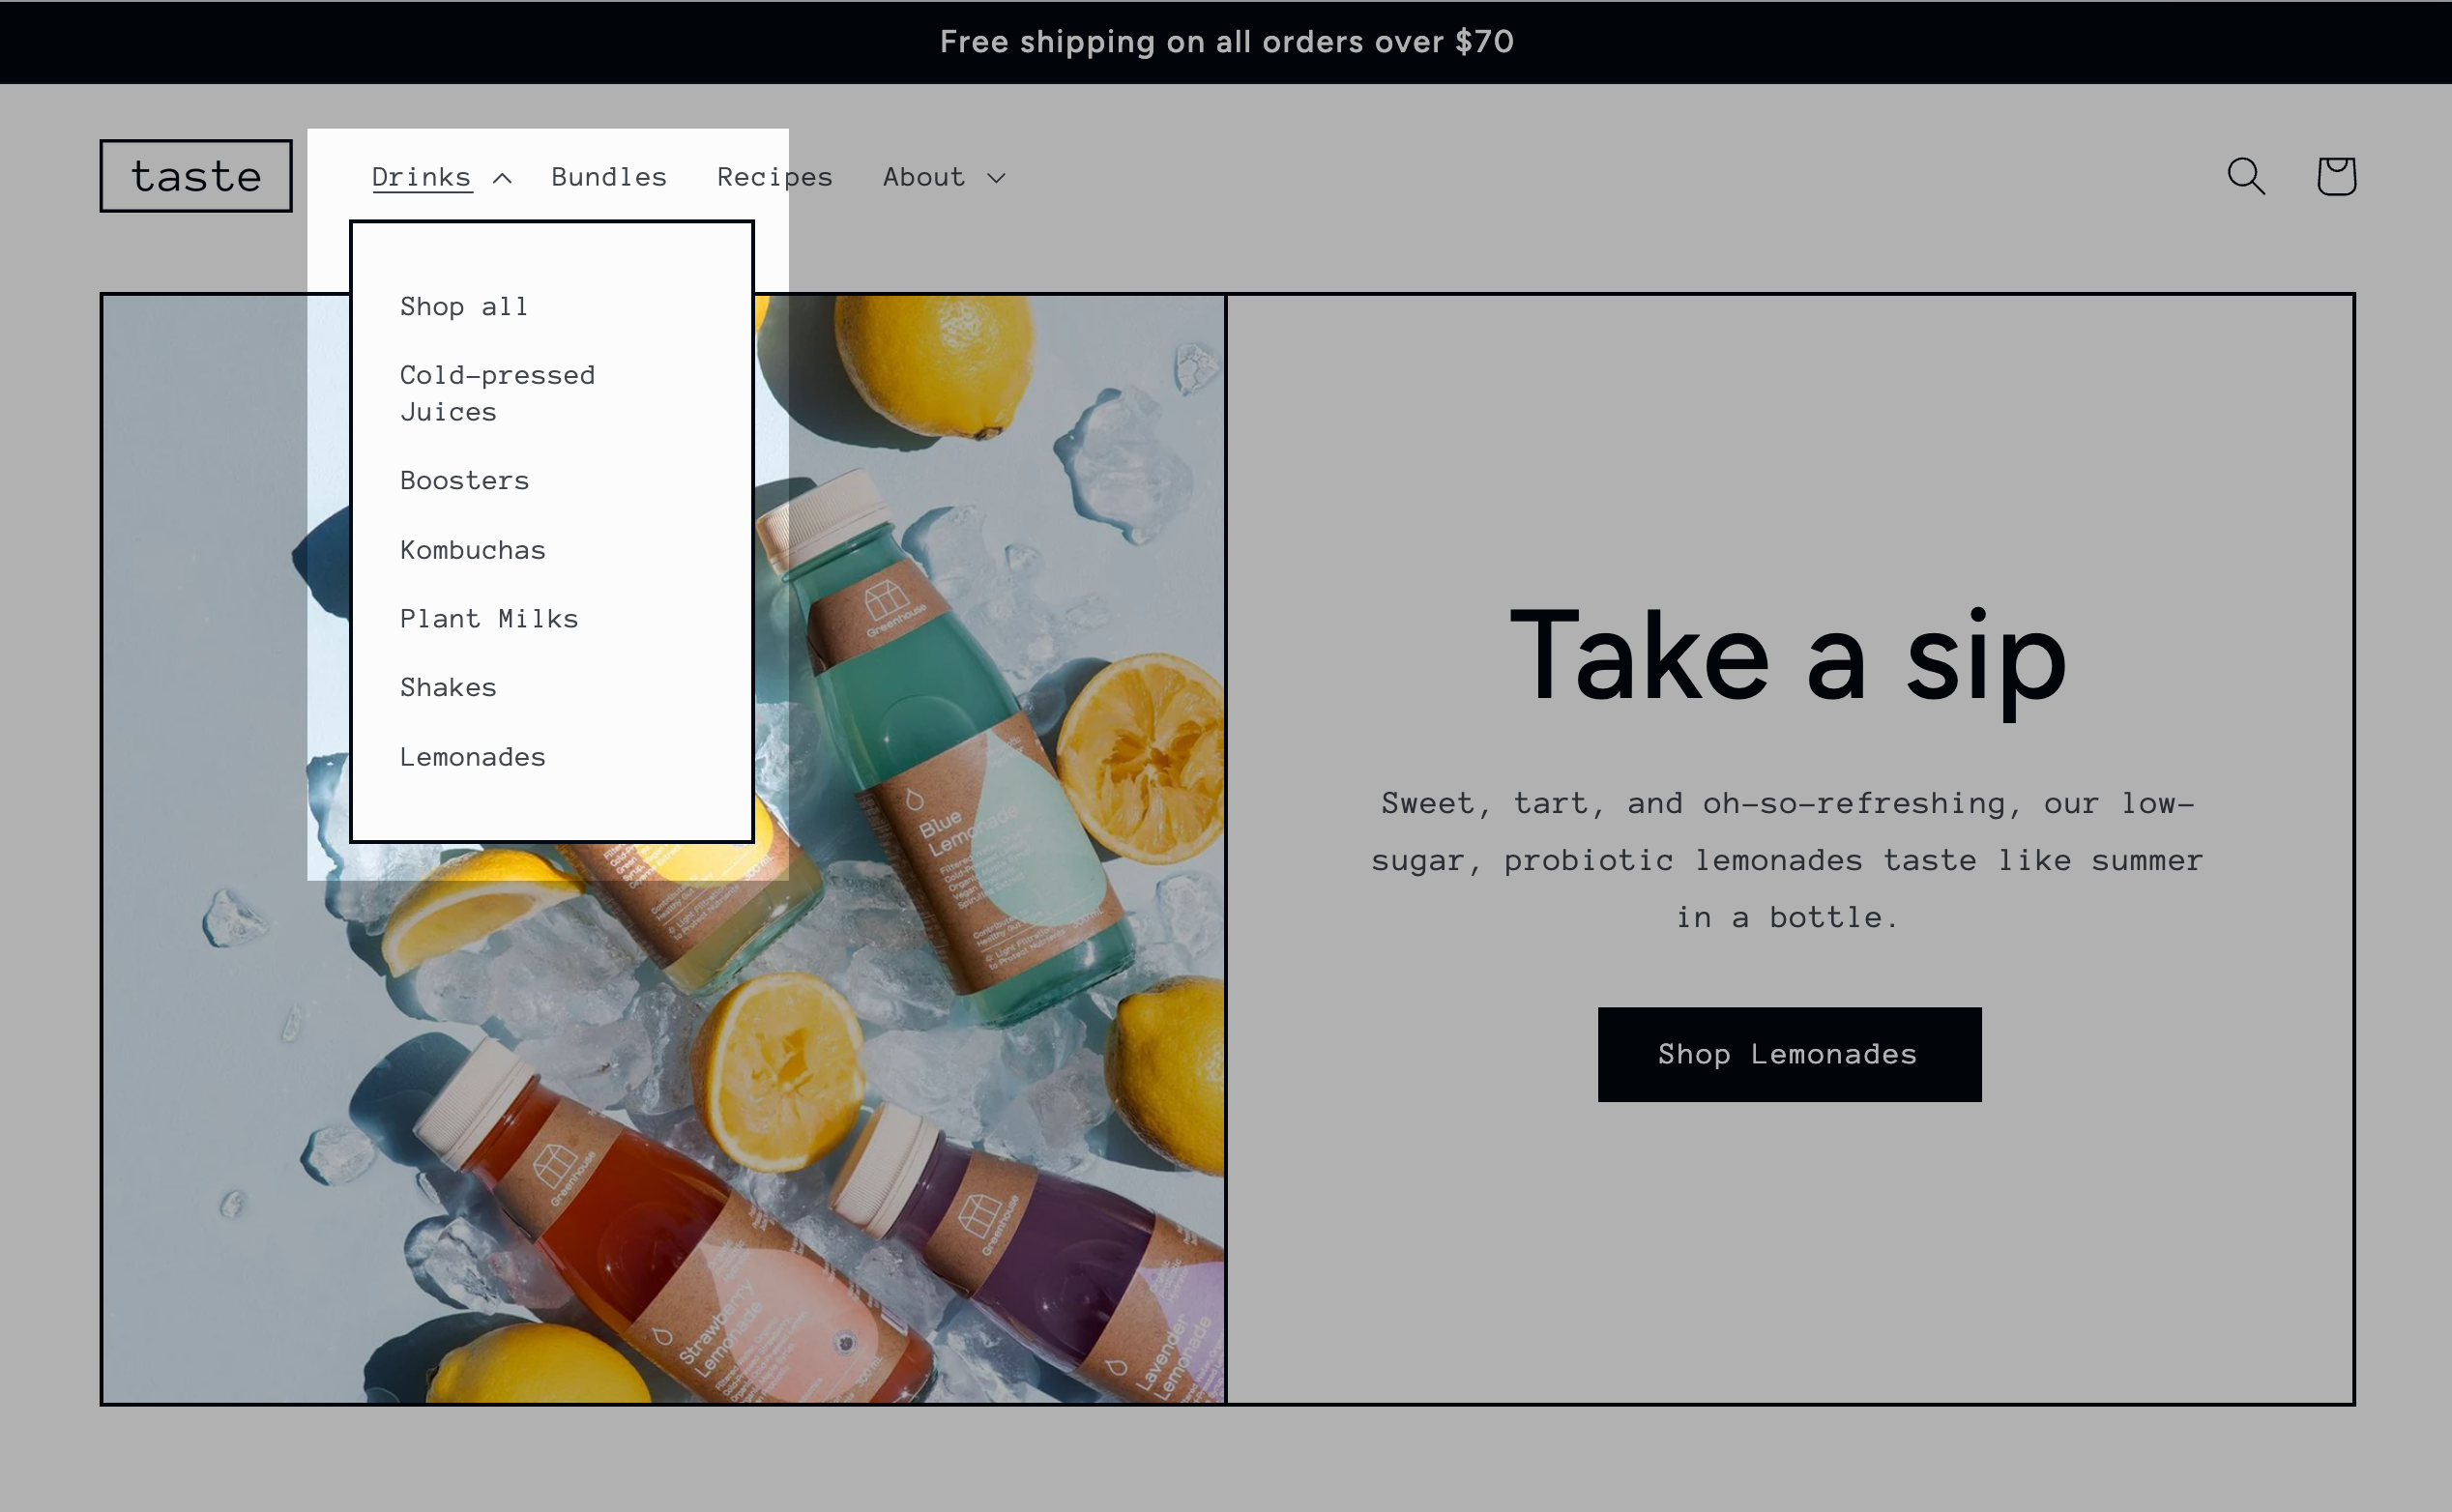
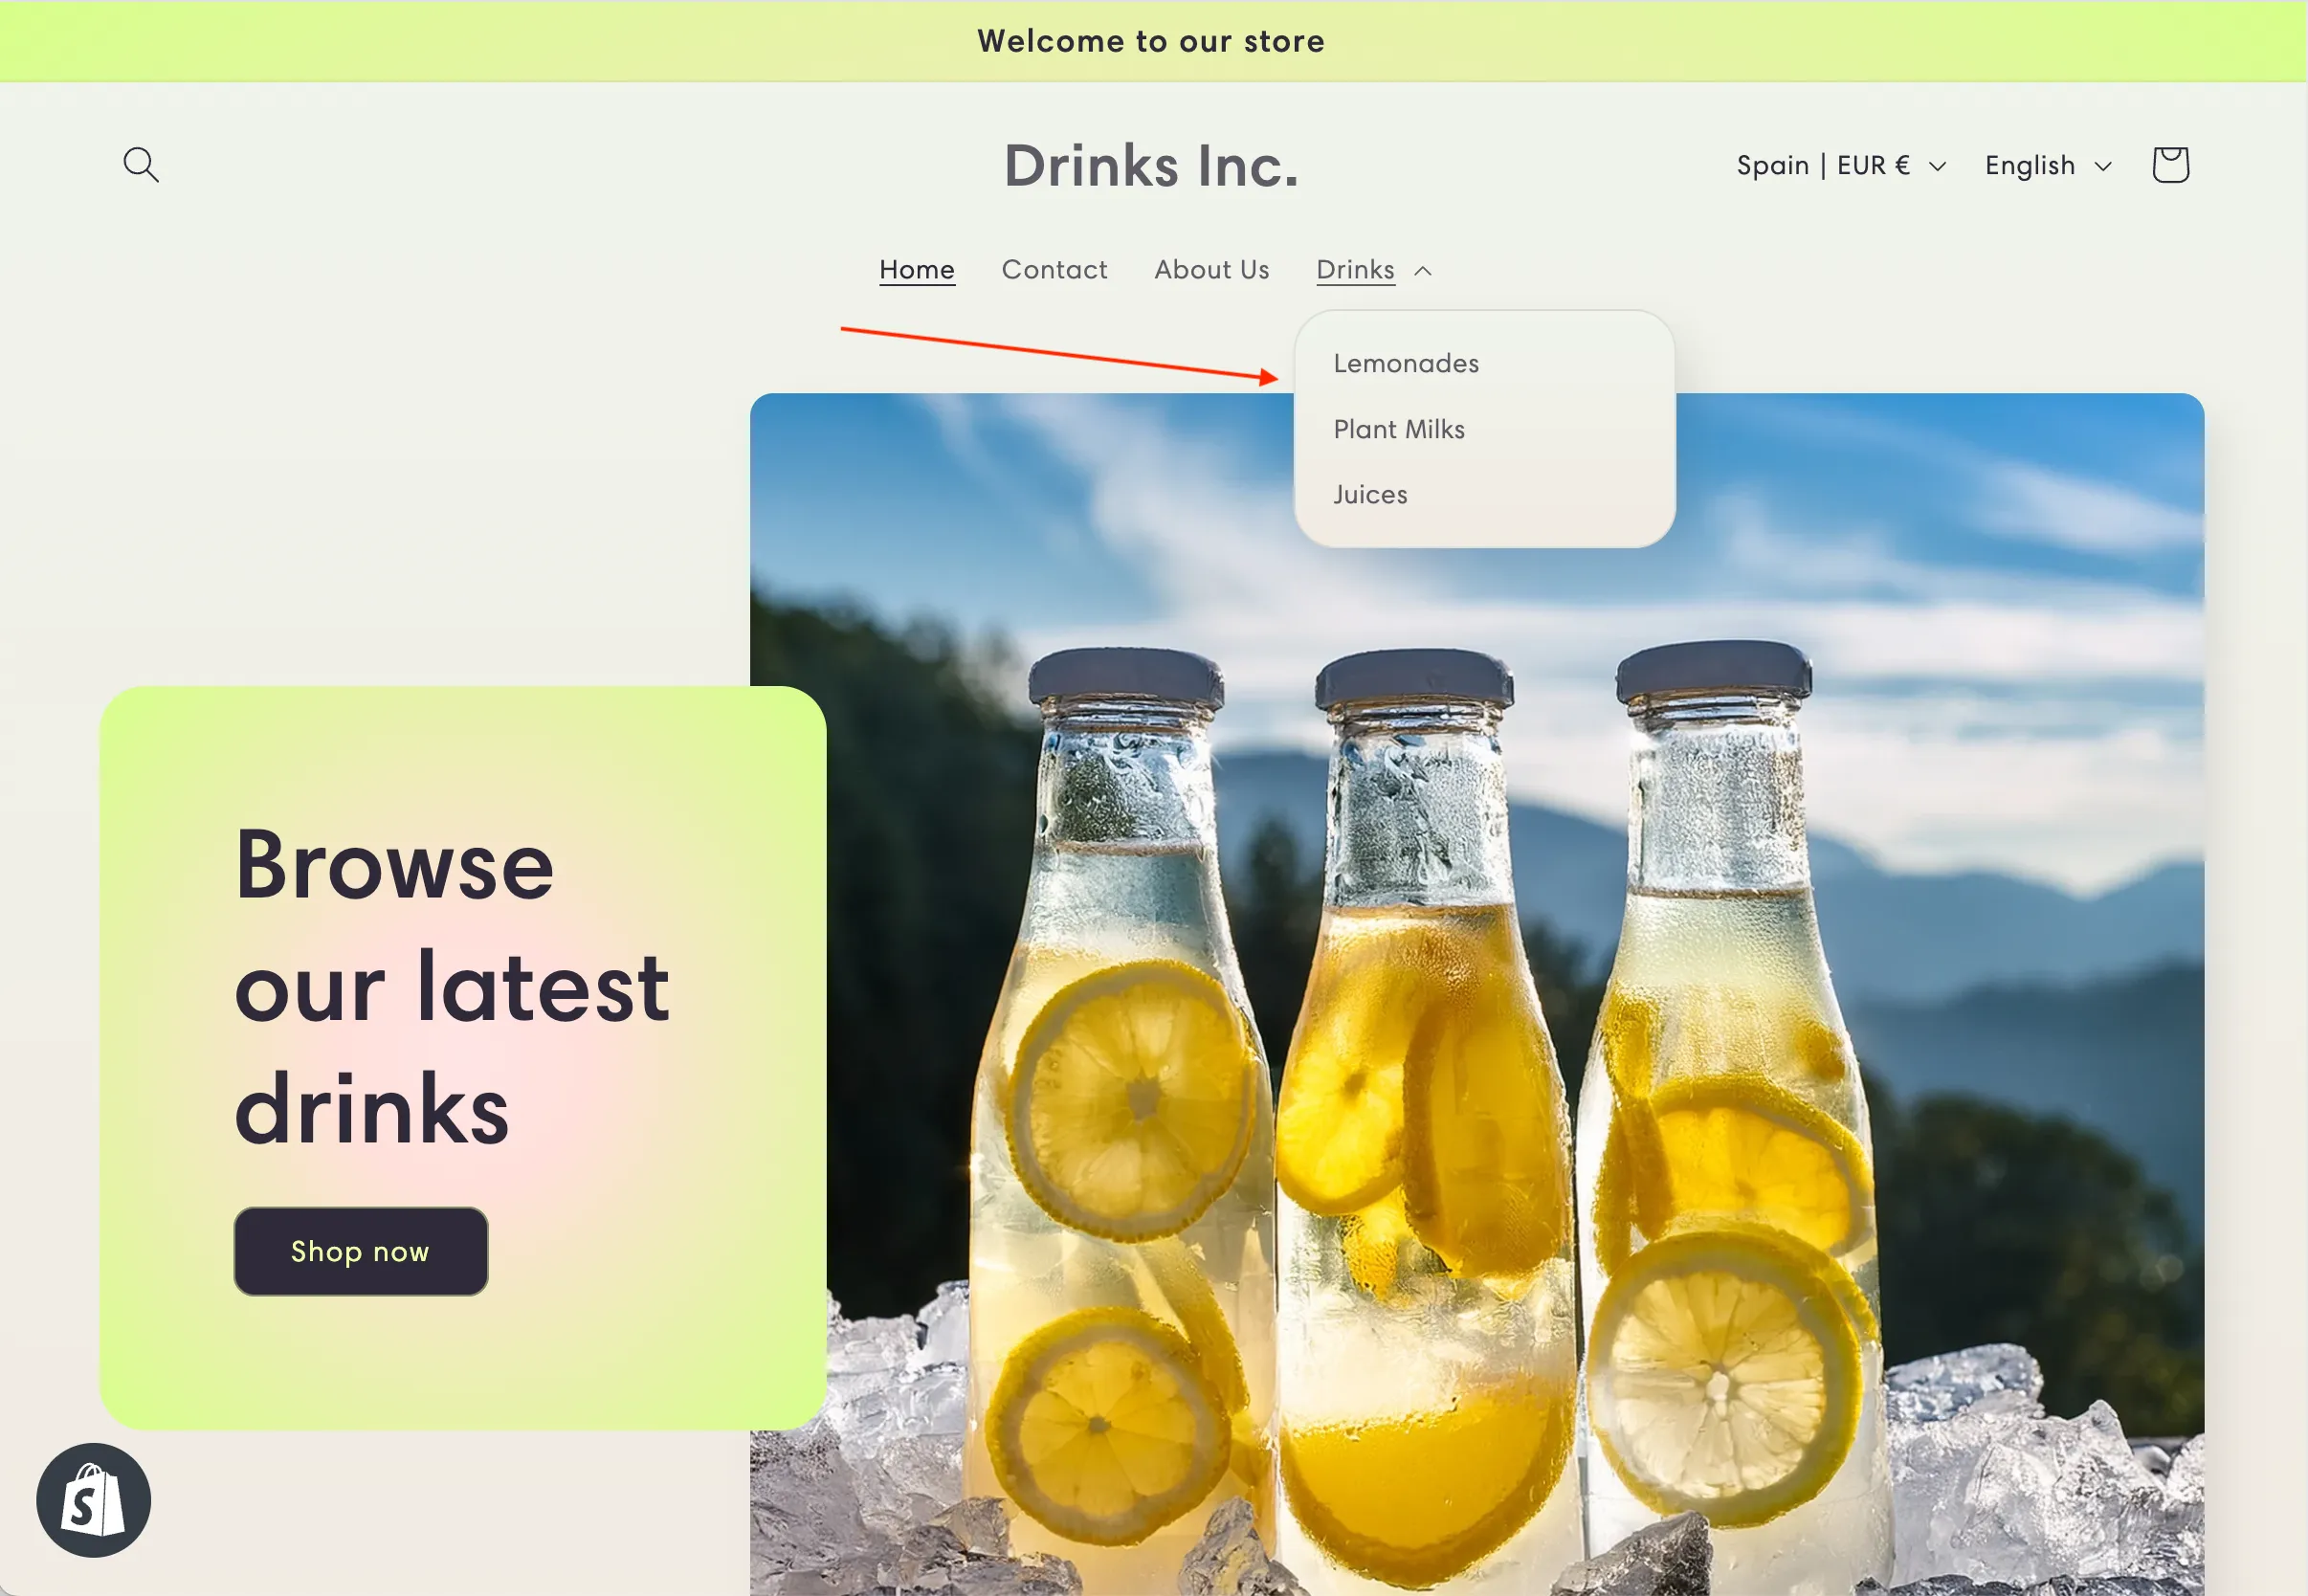
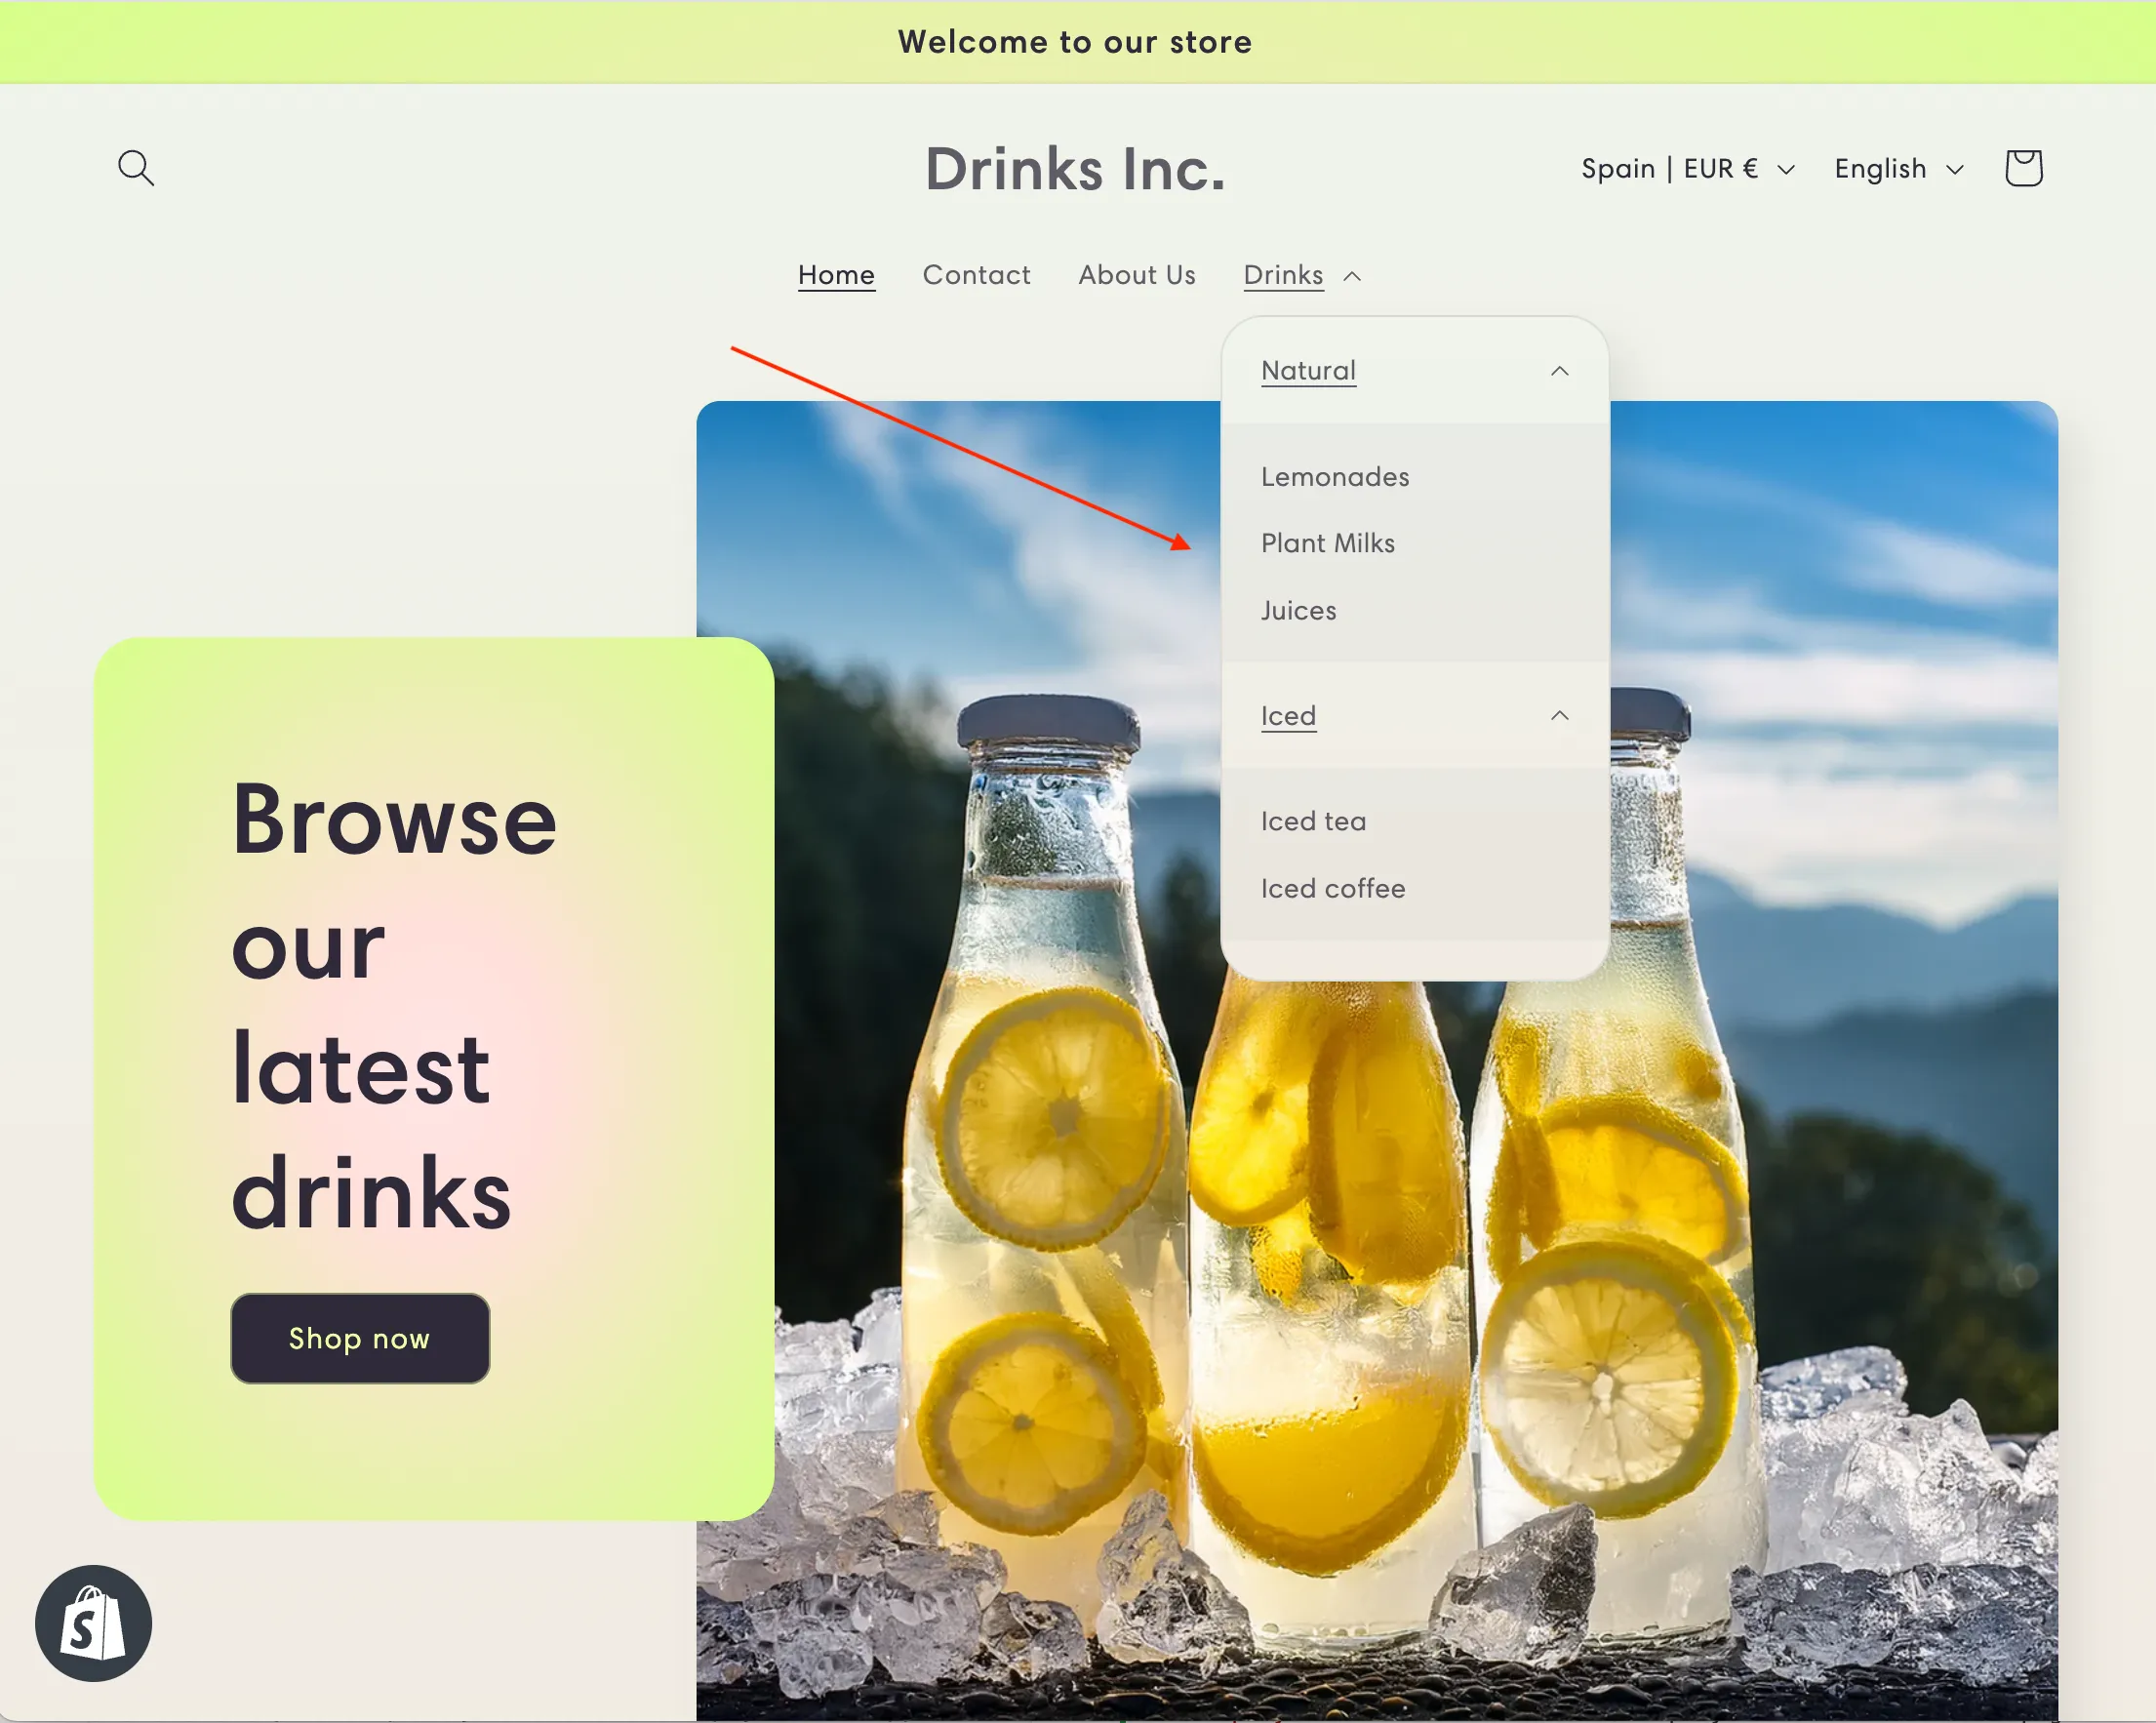
Wonderful! The drop-down menu has appeared in the header of your store!
Add 2-level drop-down menu
In most cases a 1-level nested drop-down menu is sufficient to organize a small to medium sized menu.
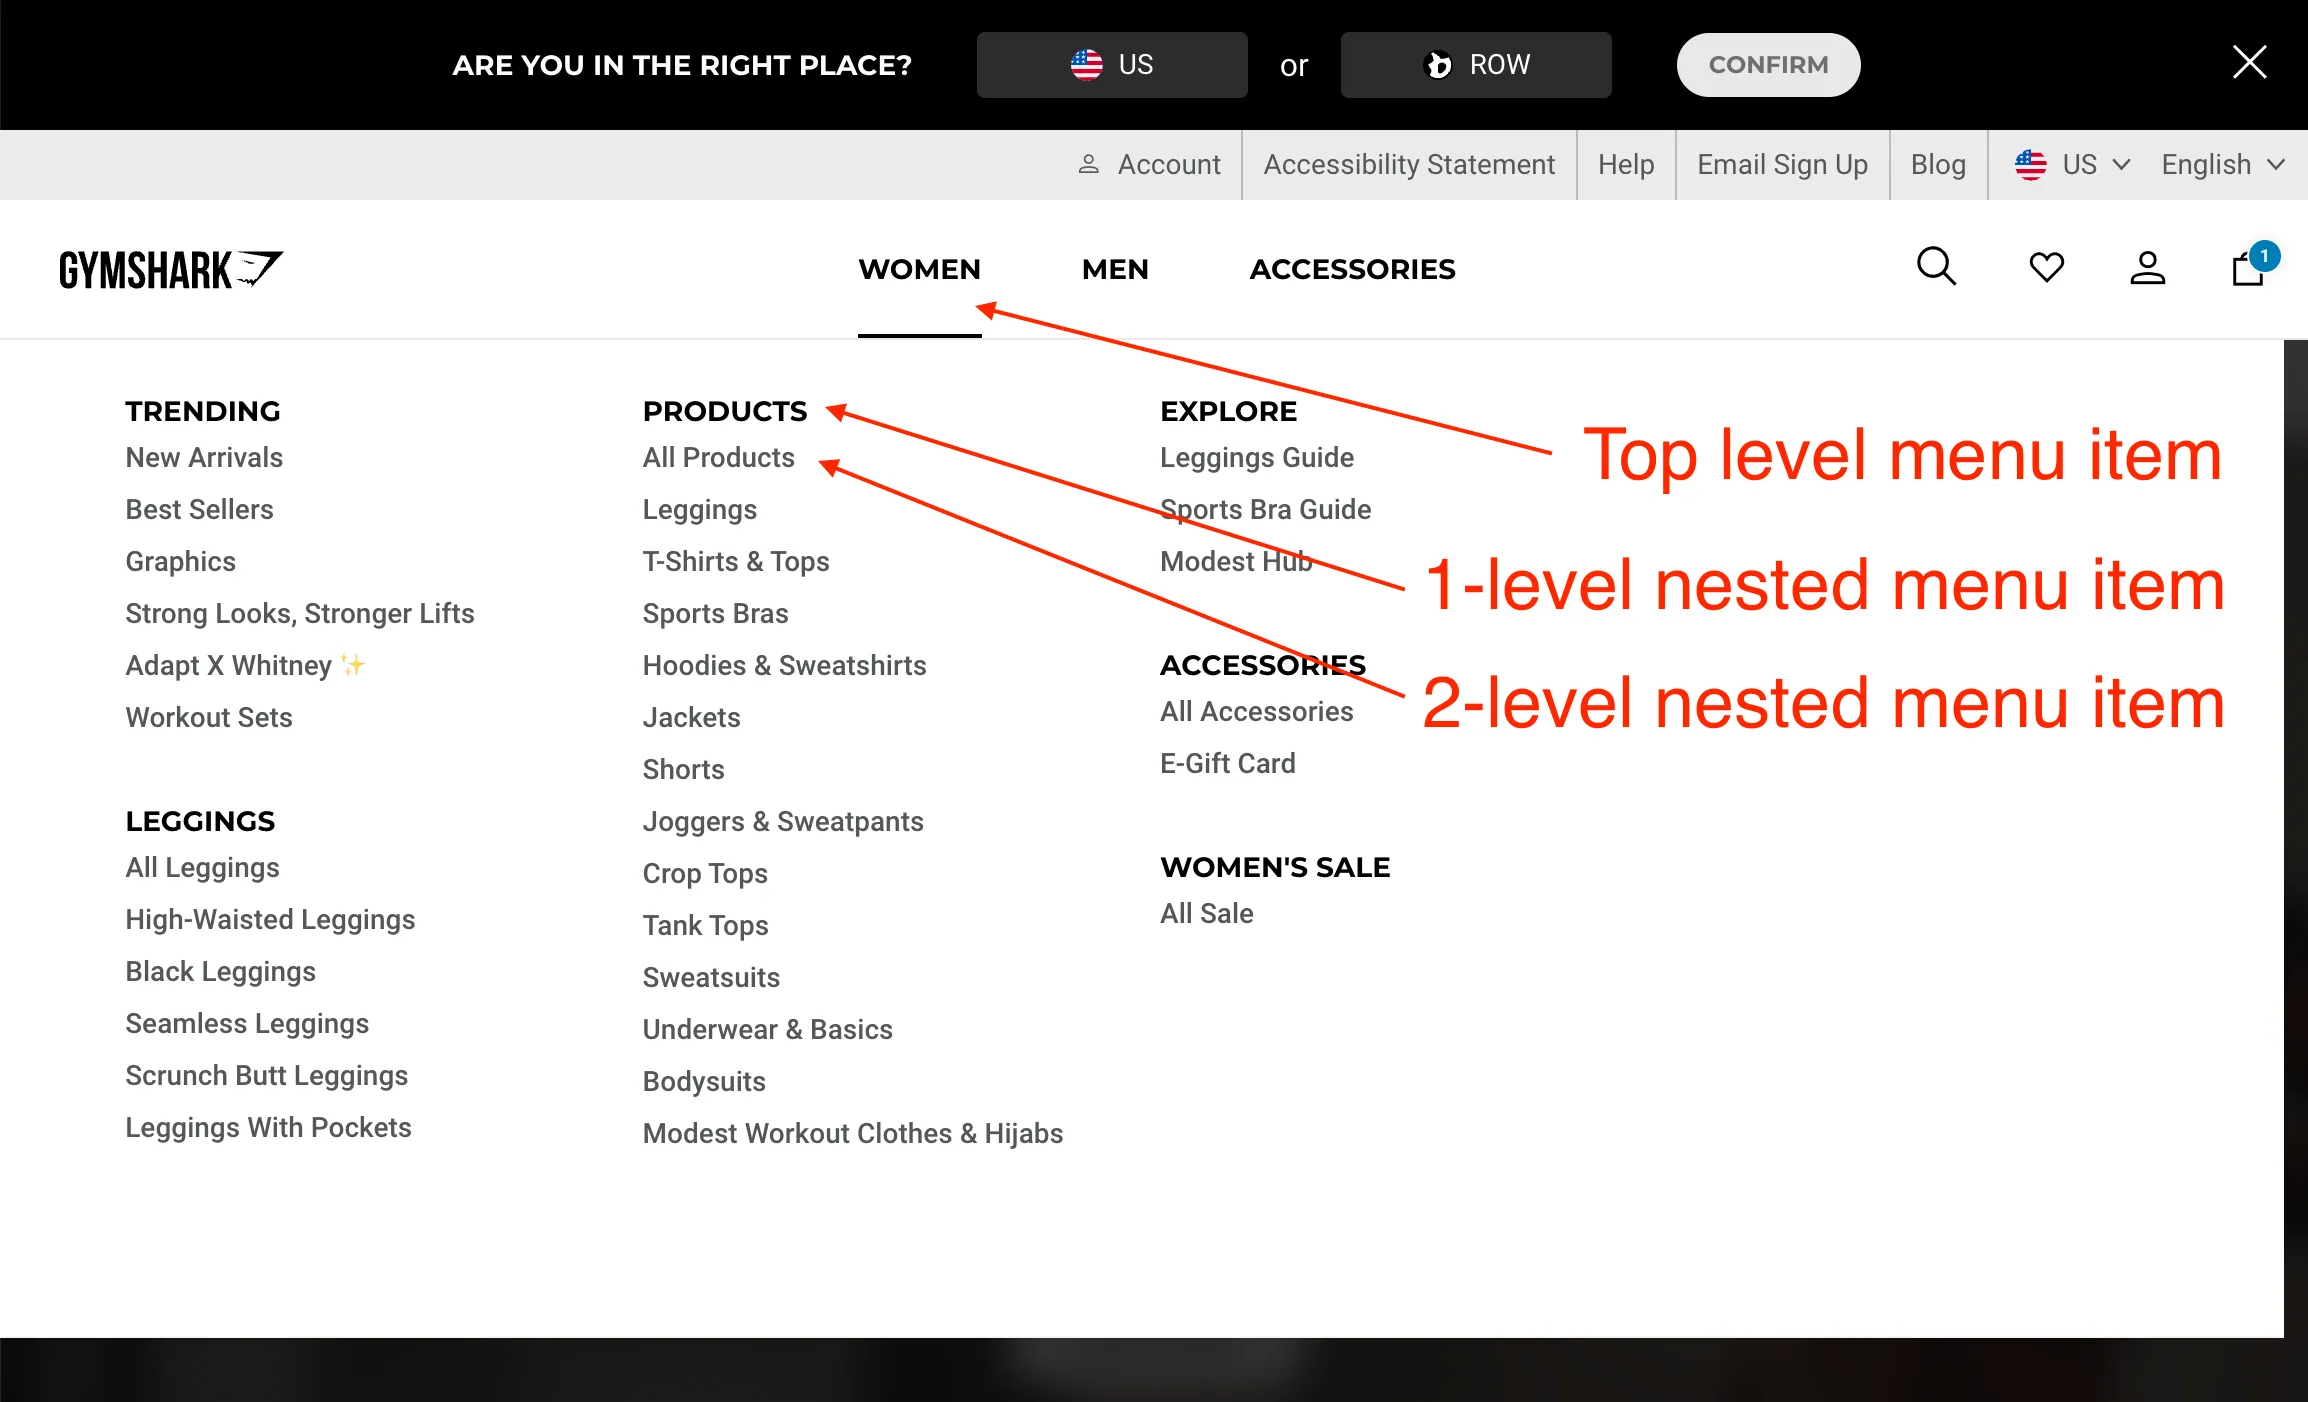
However, if you have lots of links to add to the header, 1-level nesting may not be enough. Gymshark store uses 2-level nested menus because it has lots of collections and a complex categorization of products in the header menu.
Ok, let’s add to the Drinks Inc. store a 2-level nested menu.
I’m going to further split Drinks into Natural and Iced. The new menu structure looks as follows:
- Drinks
- Natural
- Lemonades
- Juices
- Plant Milks
- Iced
- Iced tea
- Iced coffee
- Natural
Fortunately, creating 2-level nested menus in Shopify is easy.
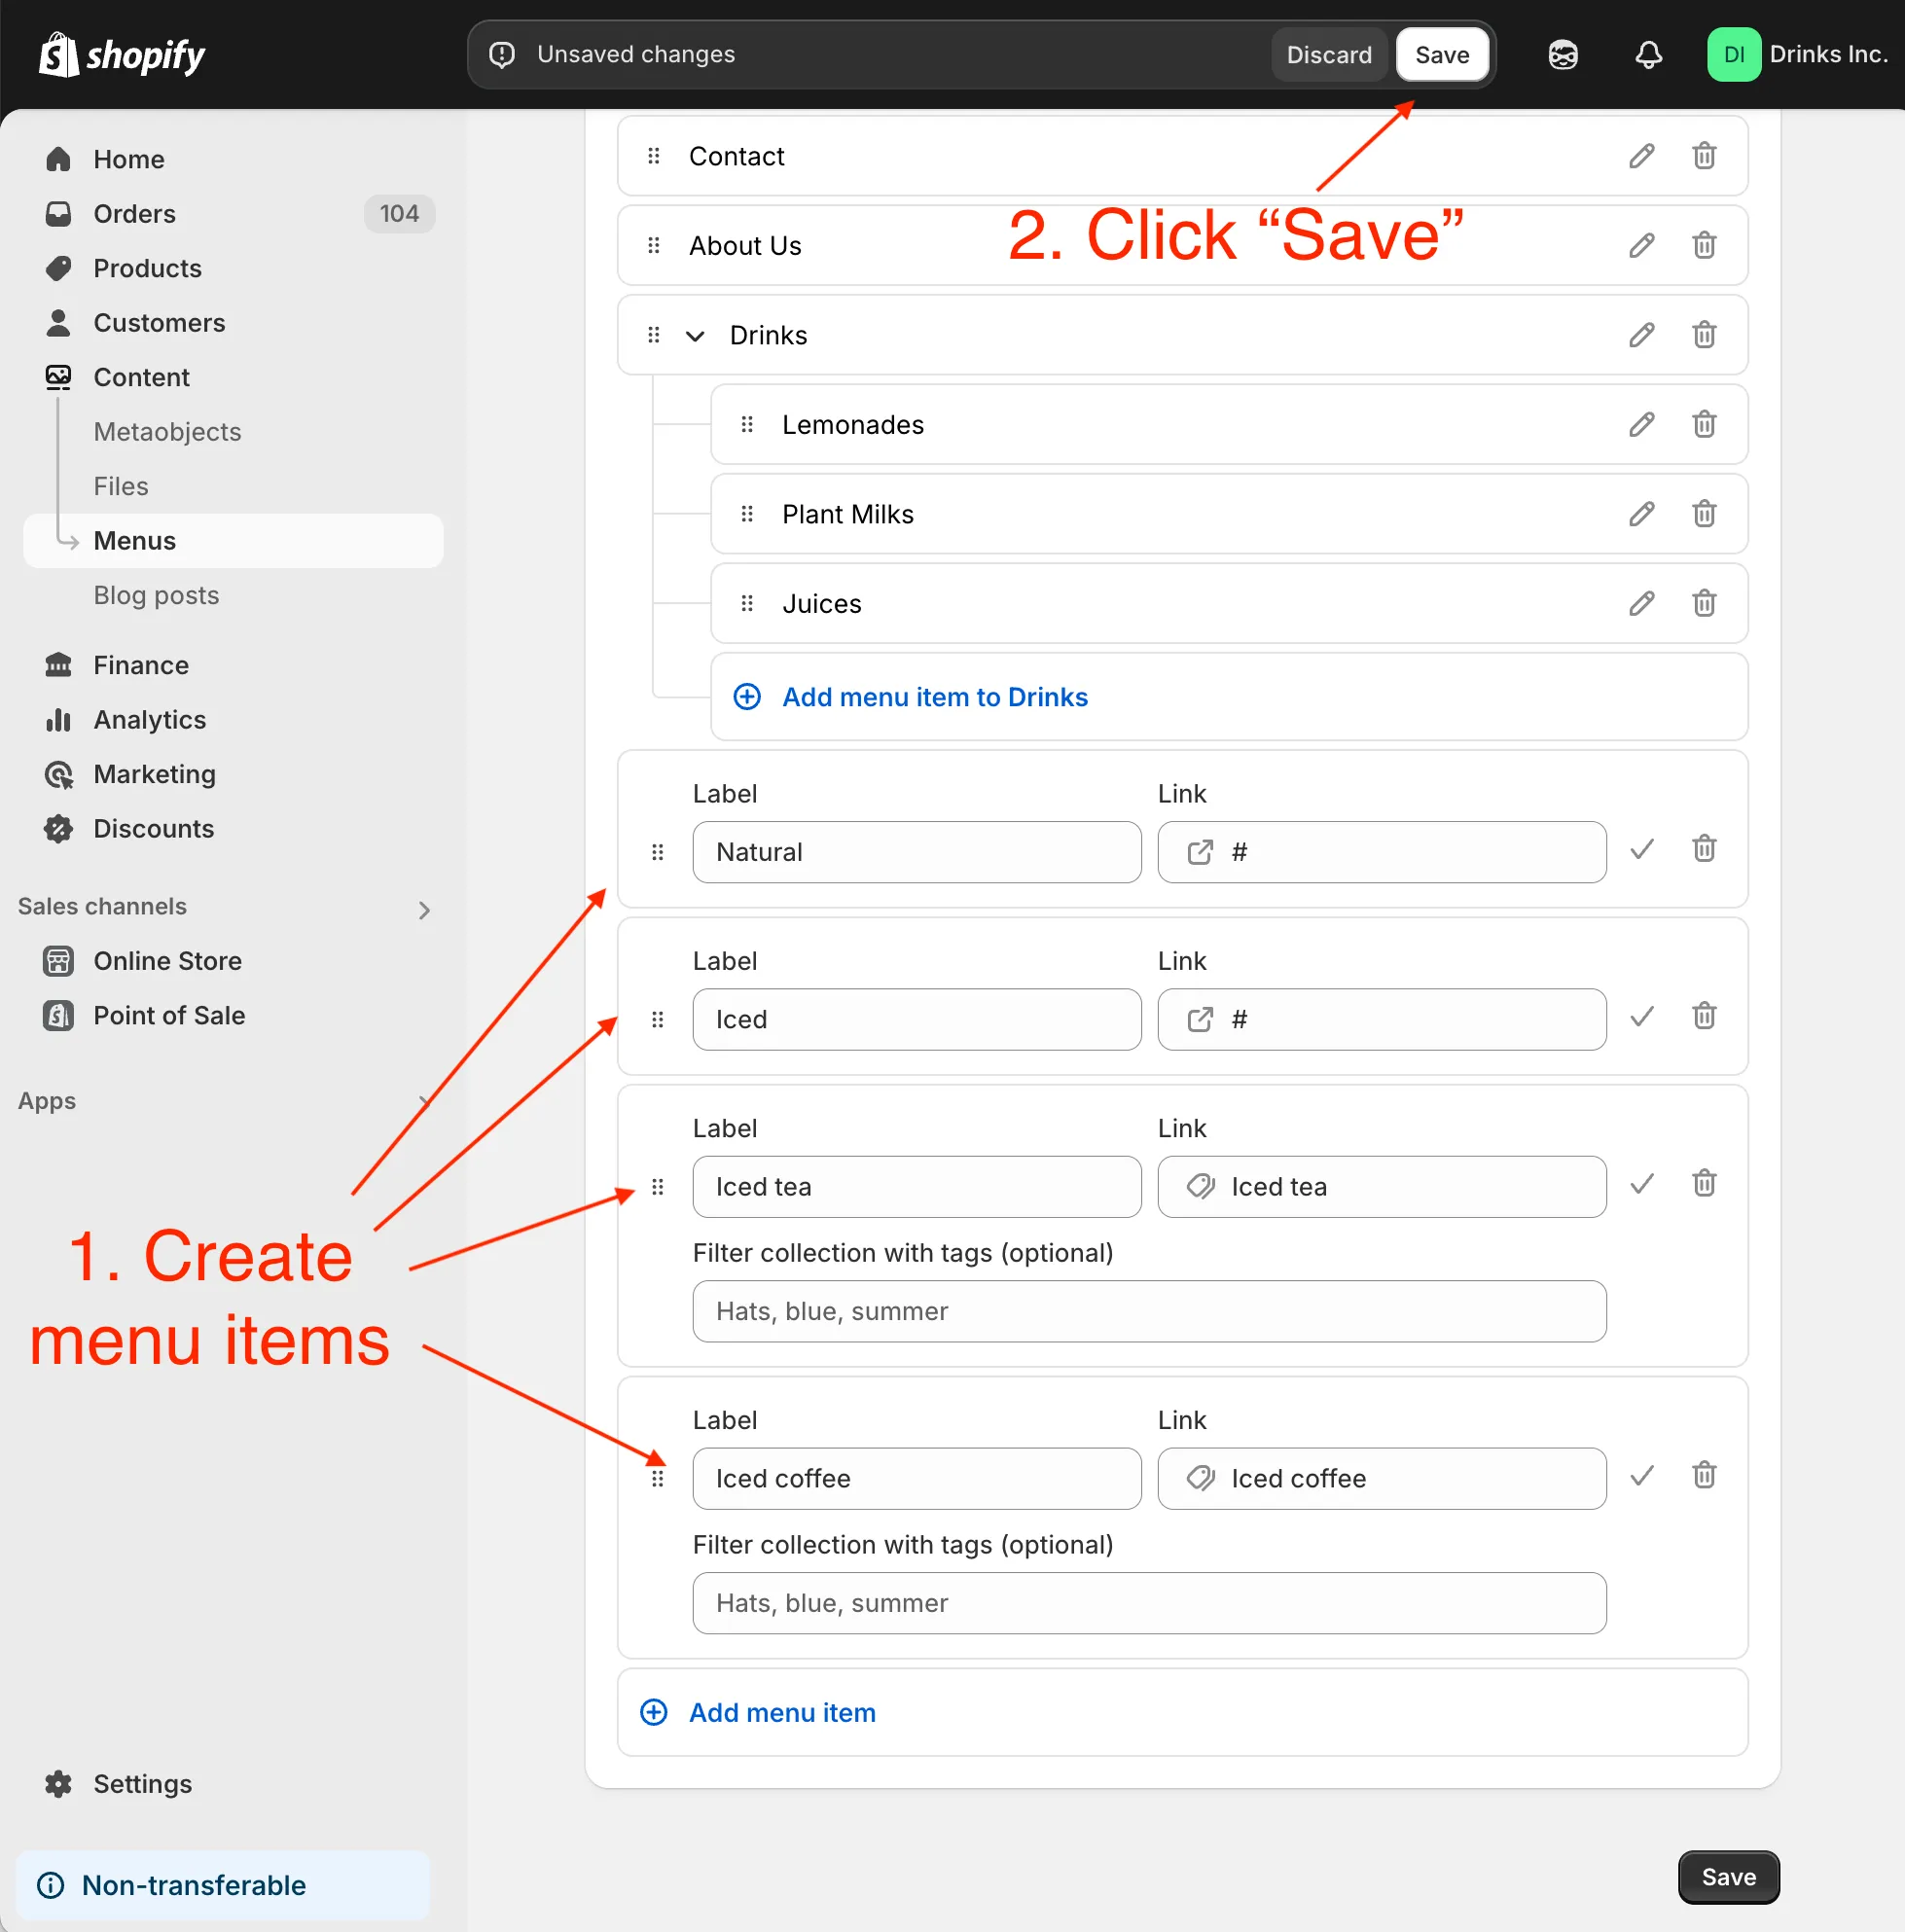
- Make sure you’re on the Main menu form with the Drinks menu item created in the previous section.
- Create the Natural, Iced, Iced tea and Iced coffee menu items. Click Save. Don’t worry about nesting yet.
- Now’s the interesting part. As shown in the video below, nest your menus to create a 2-level nested menu. Click Save again.
- Finally, visit your store to see what the Drinks menu item looks like.
Wonderful! Now you know how to create even 2-level nested drop-down menus in your Shopify store.
Correctly organizing the header menu is an important step in improving your store’s navigation. Better navigation makes your customers happier because it takes less effort to find their favourite products!