· Cristina Ciolac · Shopify Apps · 6 min read
Build Your Own Bundle (BYOB) using Boxi Shopify App

Build Your Own Bundle (BYOB) is a powerful sales strategy that allows customers to select the products they love and create their own personalized bundle of products.
For you as a marchent its one of the best ways to increase Average Order Value (AOV).
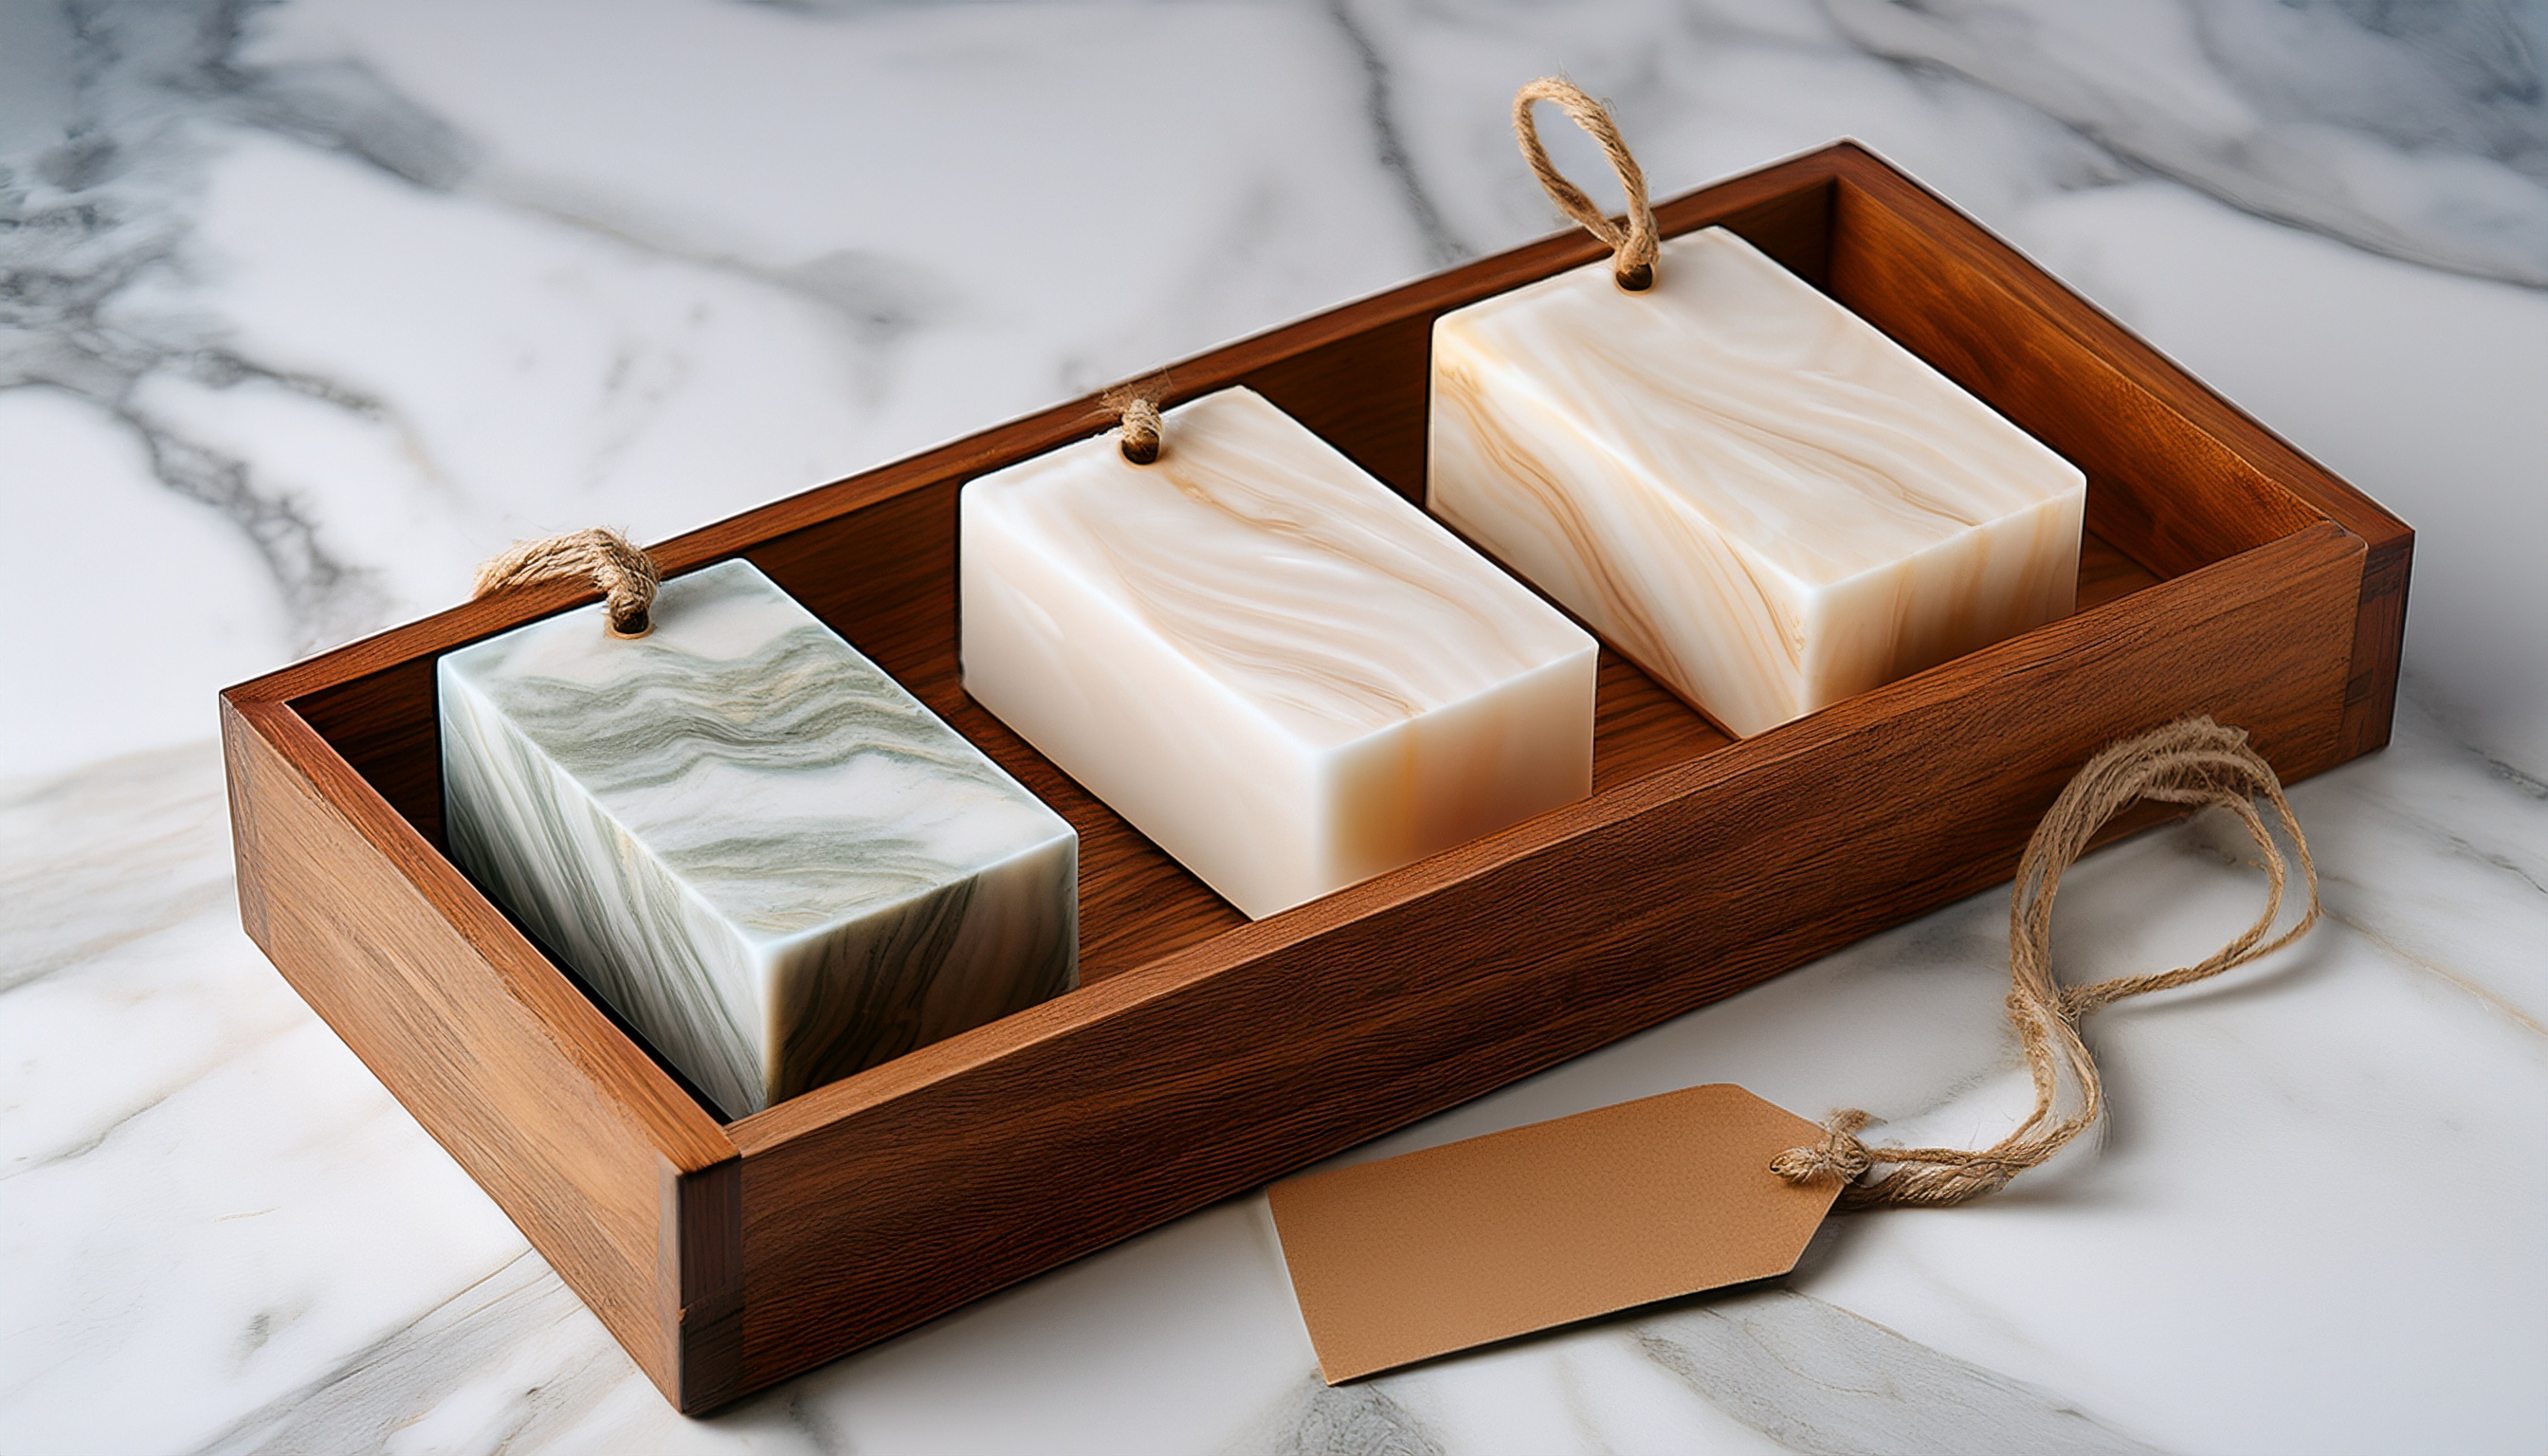
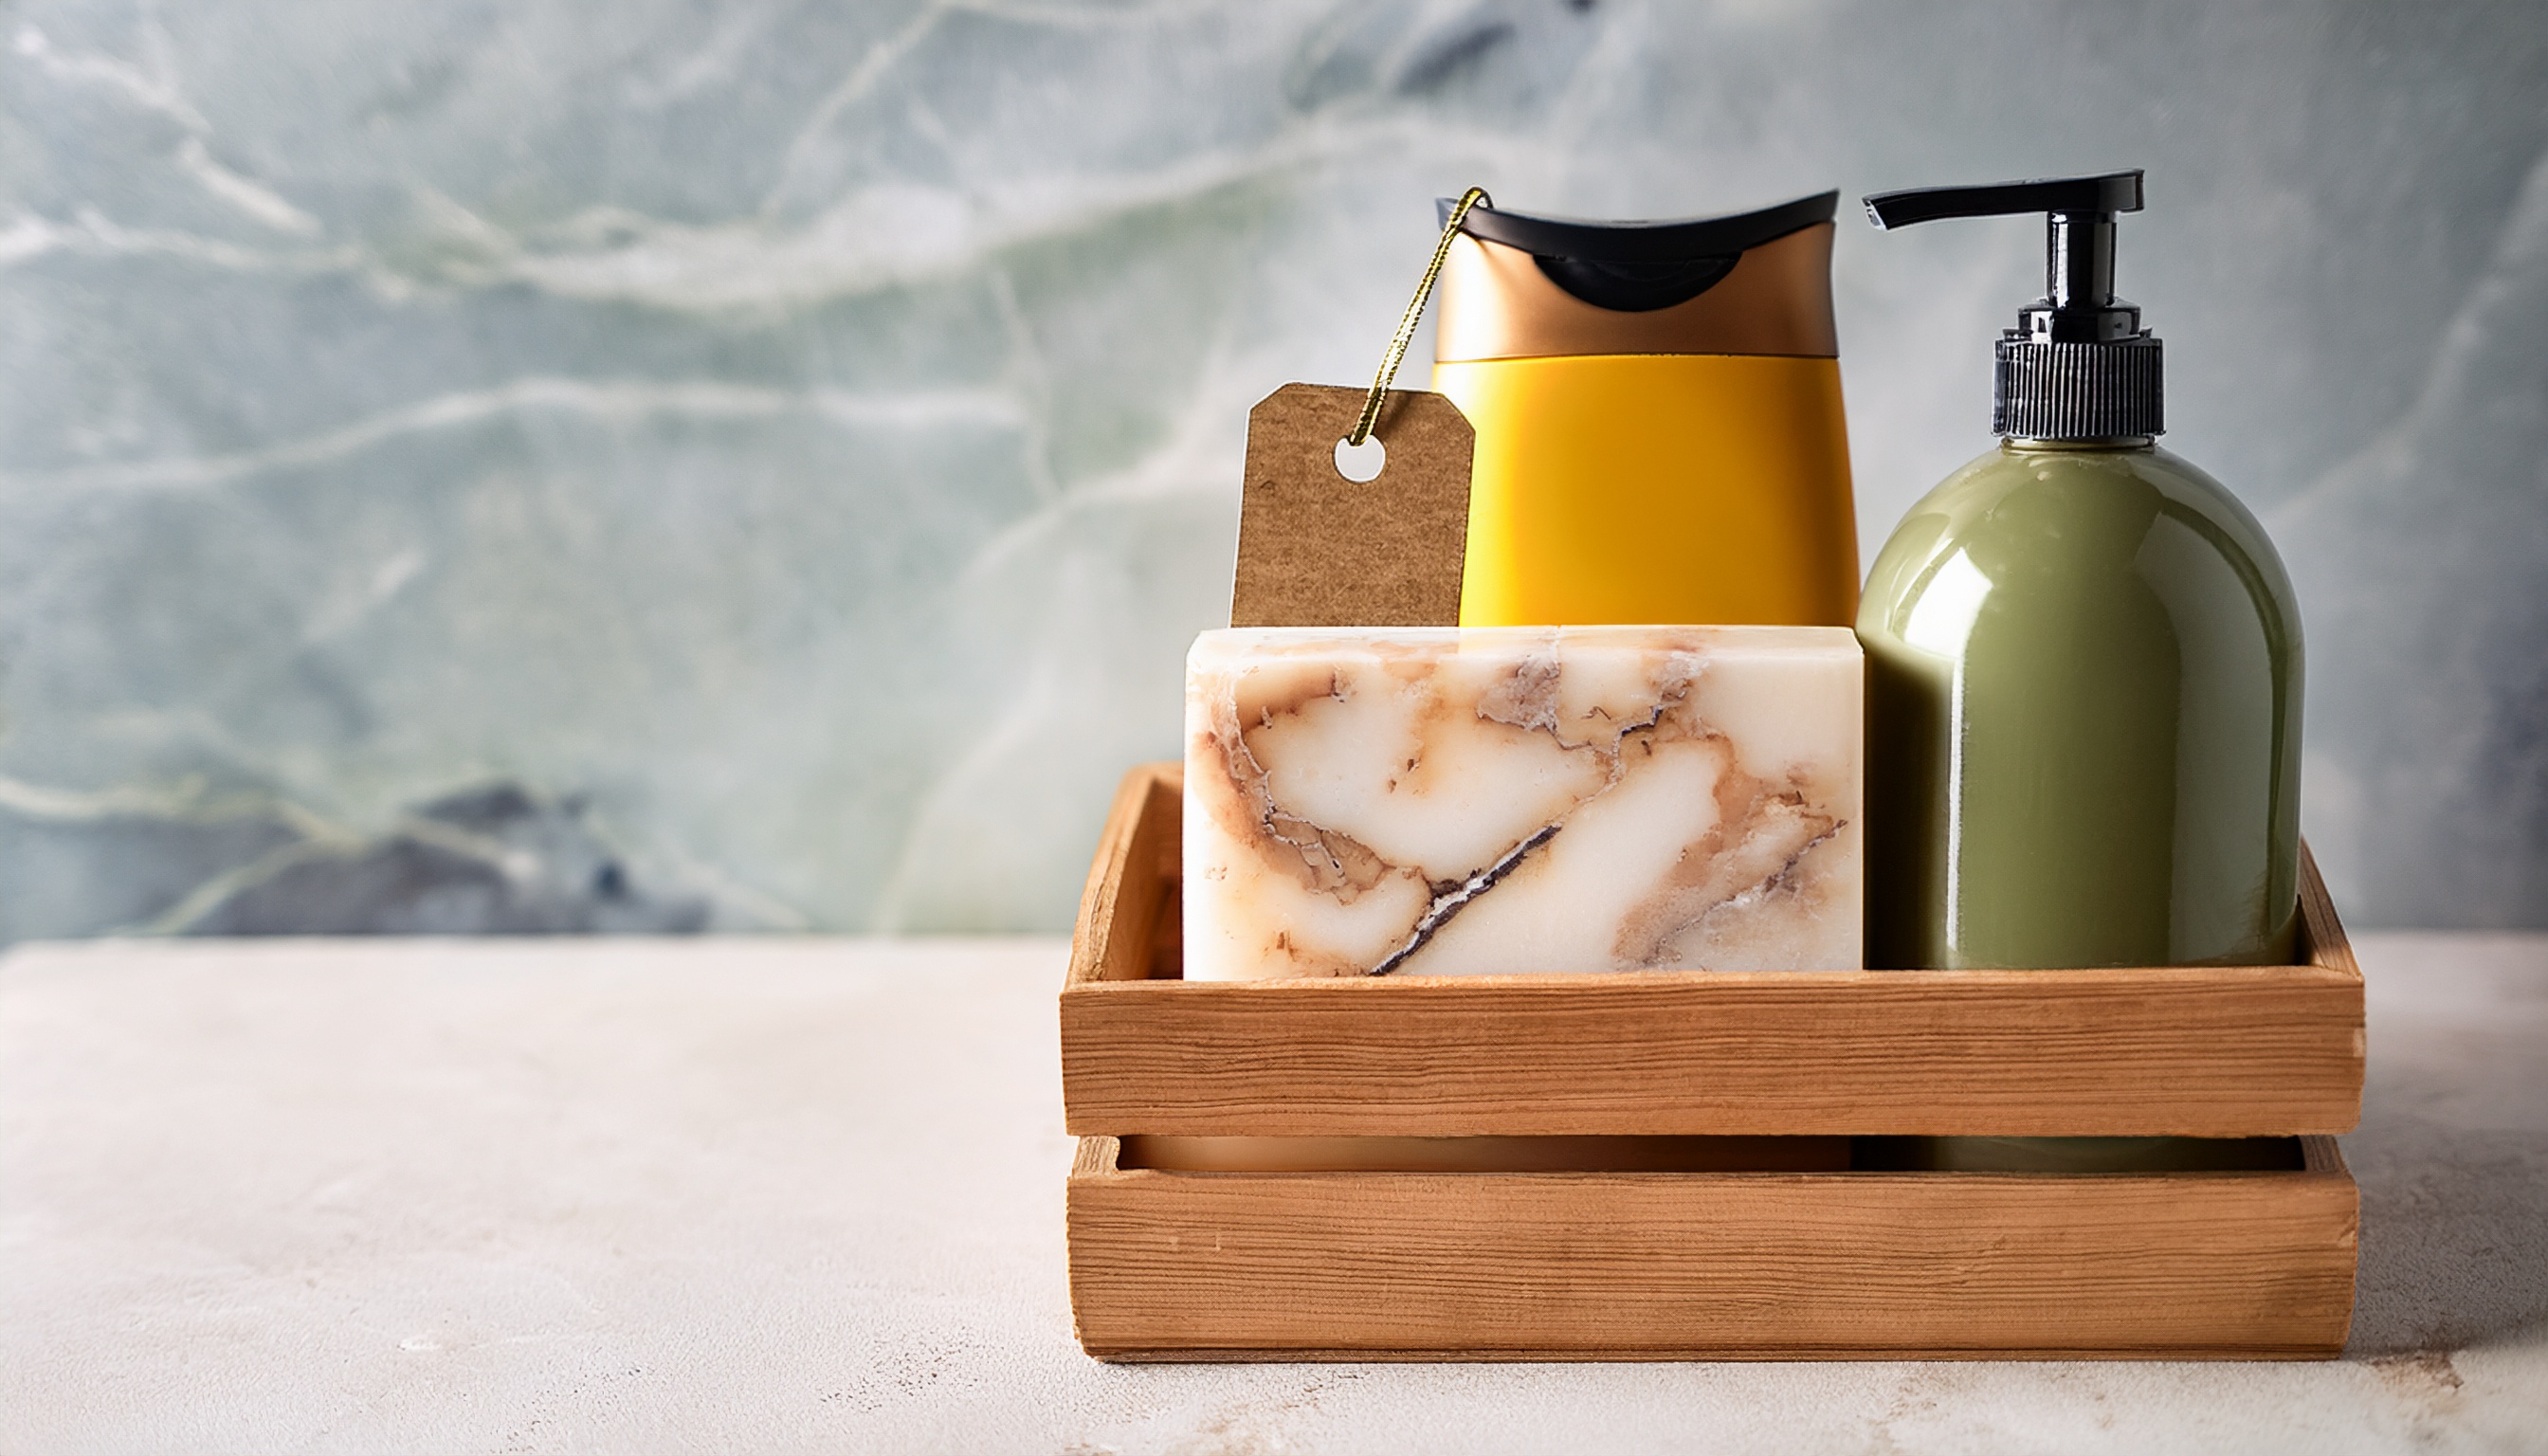
With Mother’s Day right around the corner, you’re probably wondering how to help your customers create the perfect gift. This is a wonderful opportunity to let your customers build their own bundle or box of products.
In this guide, you’ll learn how to create BYOB using Boxi app in Shopify.
Contents
- Install Boxi
- Create the builder
- Create the filtered product step
- Create the custom data step
- Preview, add discount, and style your builder
- Conclusion
Install Boxi
Boxi: Bundle Builder & BYOB is a relatively new app designed to increase sales by allowing your customers to create their own gift boxes, mix-and-match bundles, and custom product sets.
Boxi is user-friendly and you can have a build your own bundle setup with just a few clicks.
➤ Ok, let’s start by installing Boxi. Fortunately the app offers 14 days of free trial.
Create the builder
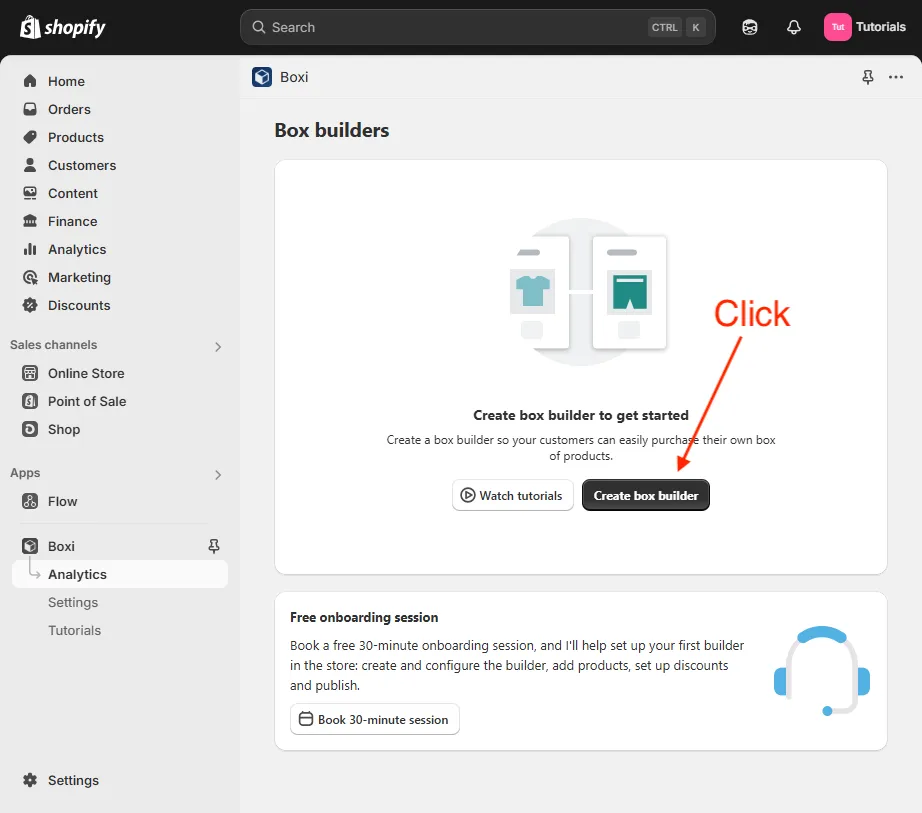
On the app’s main page you see two buttons: Watch tutorials and Create box builder.
We will now create a builder and then 2 steps inside of it. But I also recommend you watch the tutorials as they contain a lot of useful information.
➤ Click on Create box builder.
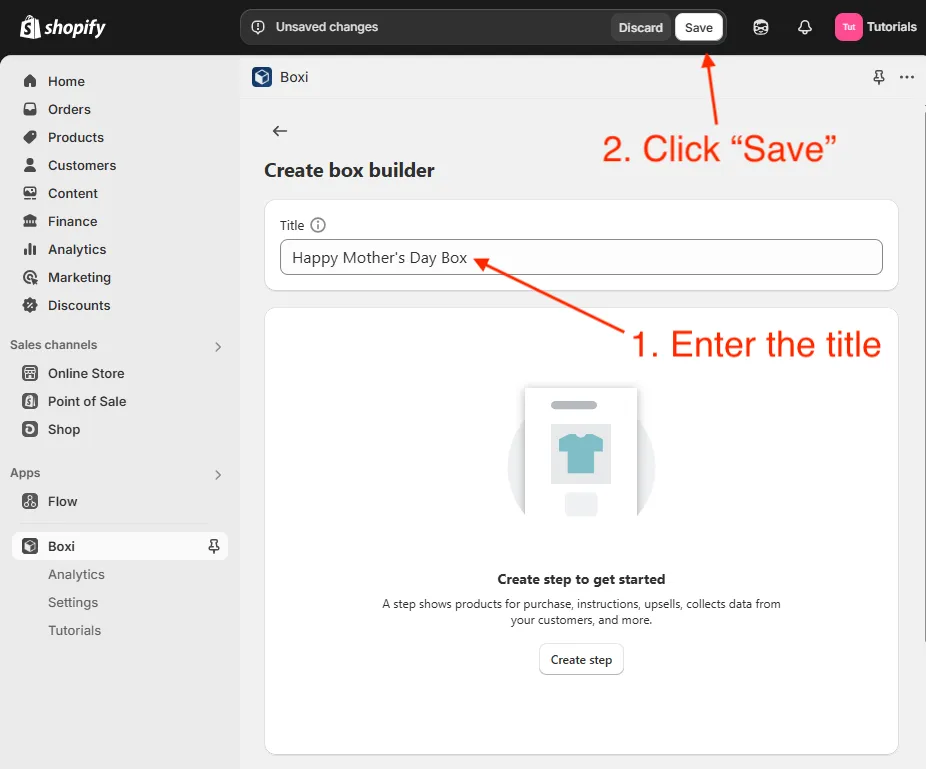
➤ Now let’s name the builder, for example: Happy Mother’s Day Box. Save your changes.
Now we need to create some steps in the builder.
➤ Click Create step.
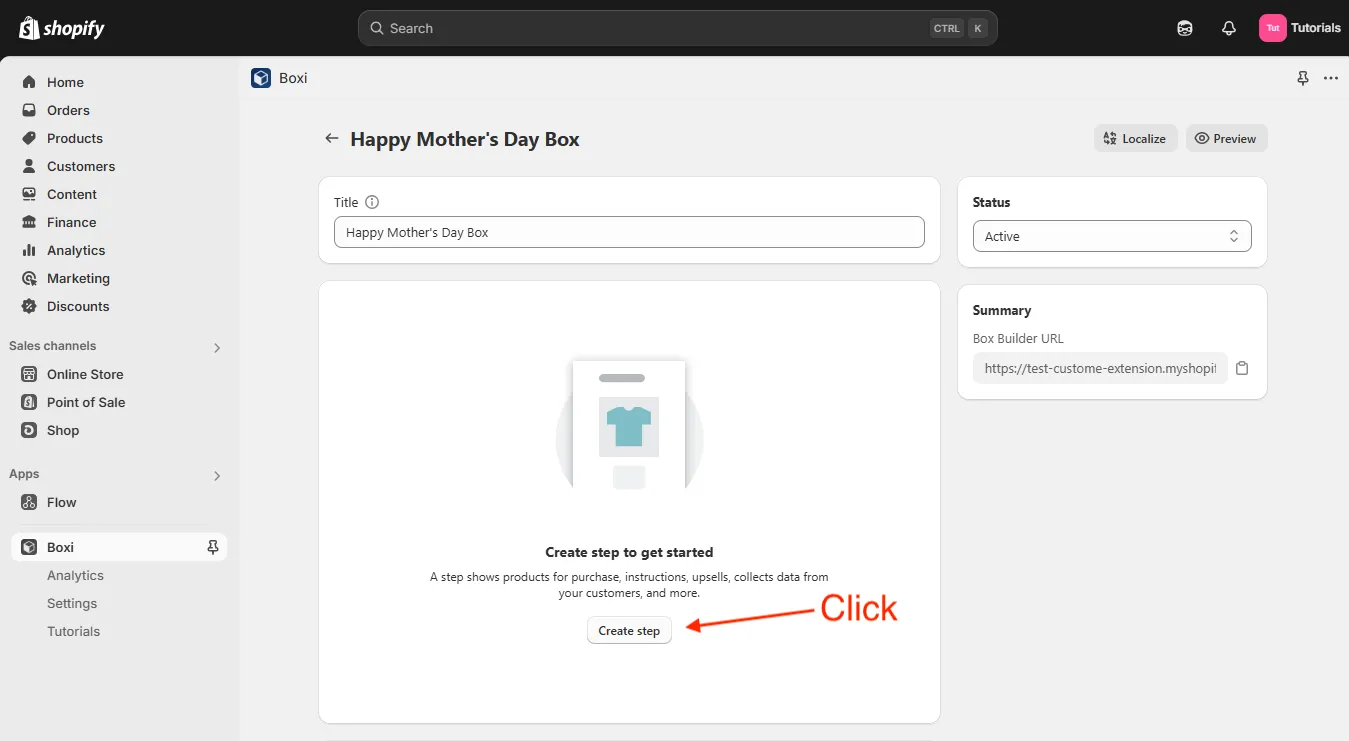
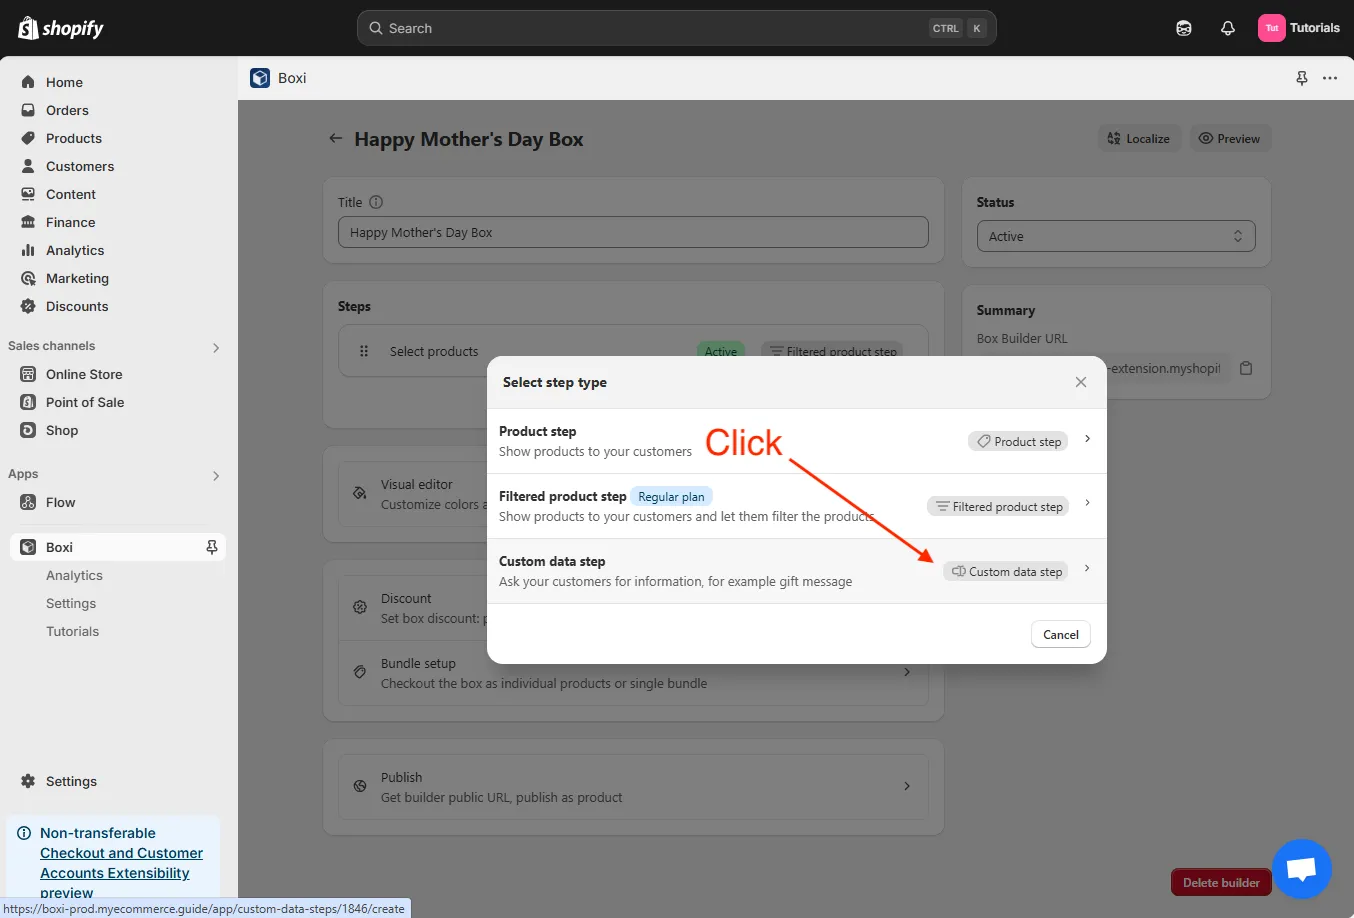
You will see 3 types of steps:
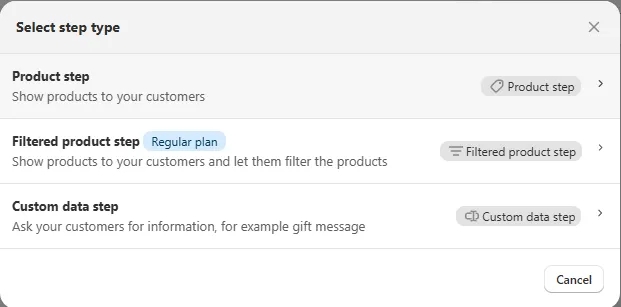
Product step - This is the step to show products to your customers from which they build their box or bundle. You can select products manually or add collections.
Filtered product step - This is a step that show products but additionally lets your customers filter the products. Boxi is integrated with the Shopify Search & Discovery app and you can configure any kind of filters you want.
Custom data step - A unique custom field builder to ask your customers for personalization information like gift message. You can create as many fields as you want, choose between different options like uploading photos, creating food diary preferences - to offer your customers maximum customization of their bundles or boxes.
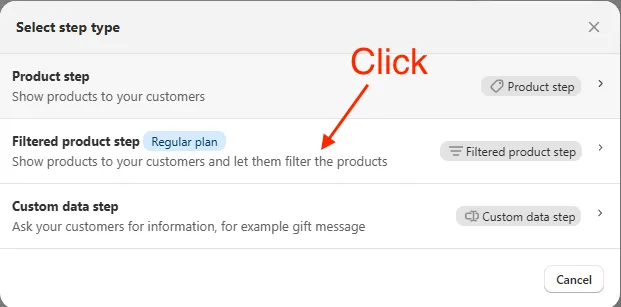
In this tutorial I’ll create a filtered product step and a custom data step.
Let’s walk through each one.
Create the filtered product step
➤ Click on Filtered product step.
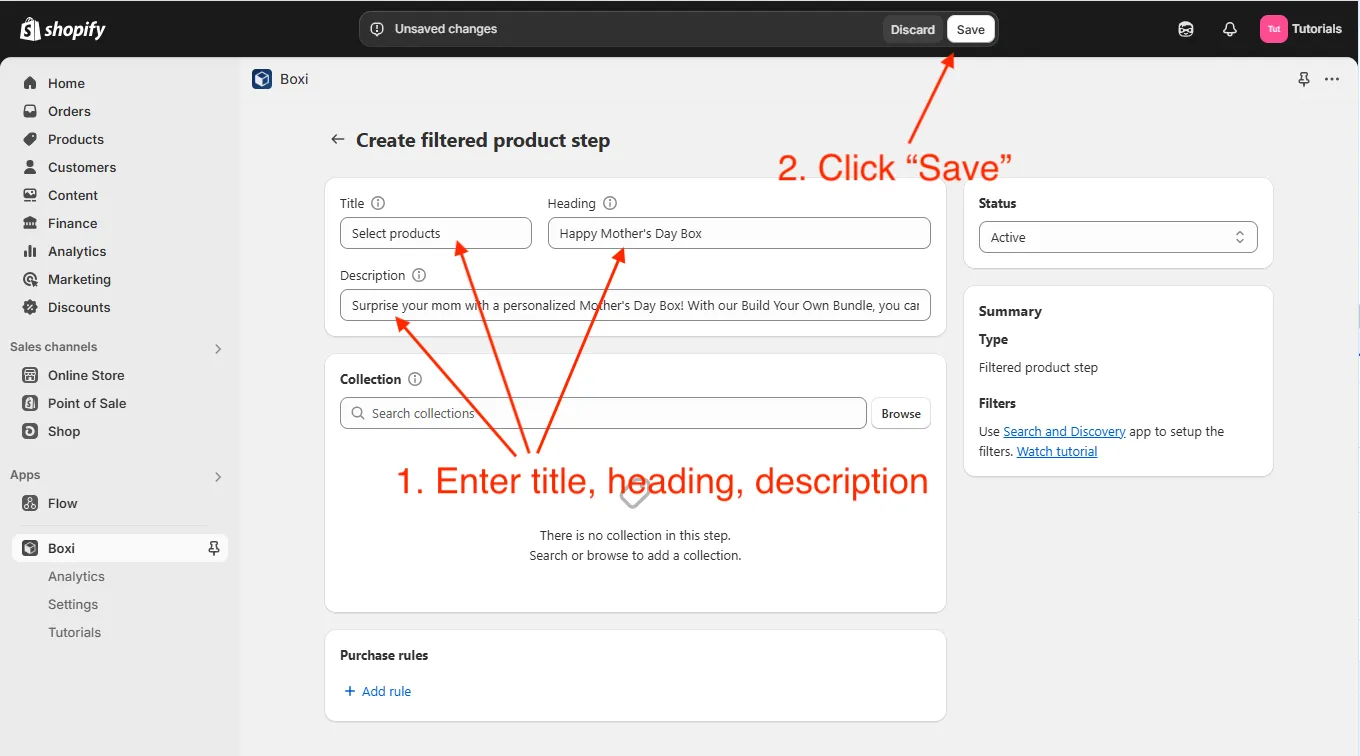
You will be presented with a simple form to fill in.
➤ First, give this step a title, such as “Select products” - this title will appear under the step number circle.
Then add a heading, for example: “Happy Mother’s Day Box” and a short description to let your customers know what this step is about.
Click Save to save your step.
Now you need to add a collection of products to your bundle.
➤ Scroll down and click Browse to select a product collection for this bundle. I’ll select “Mother’s Day Box” since it contains my products for the builder.
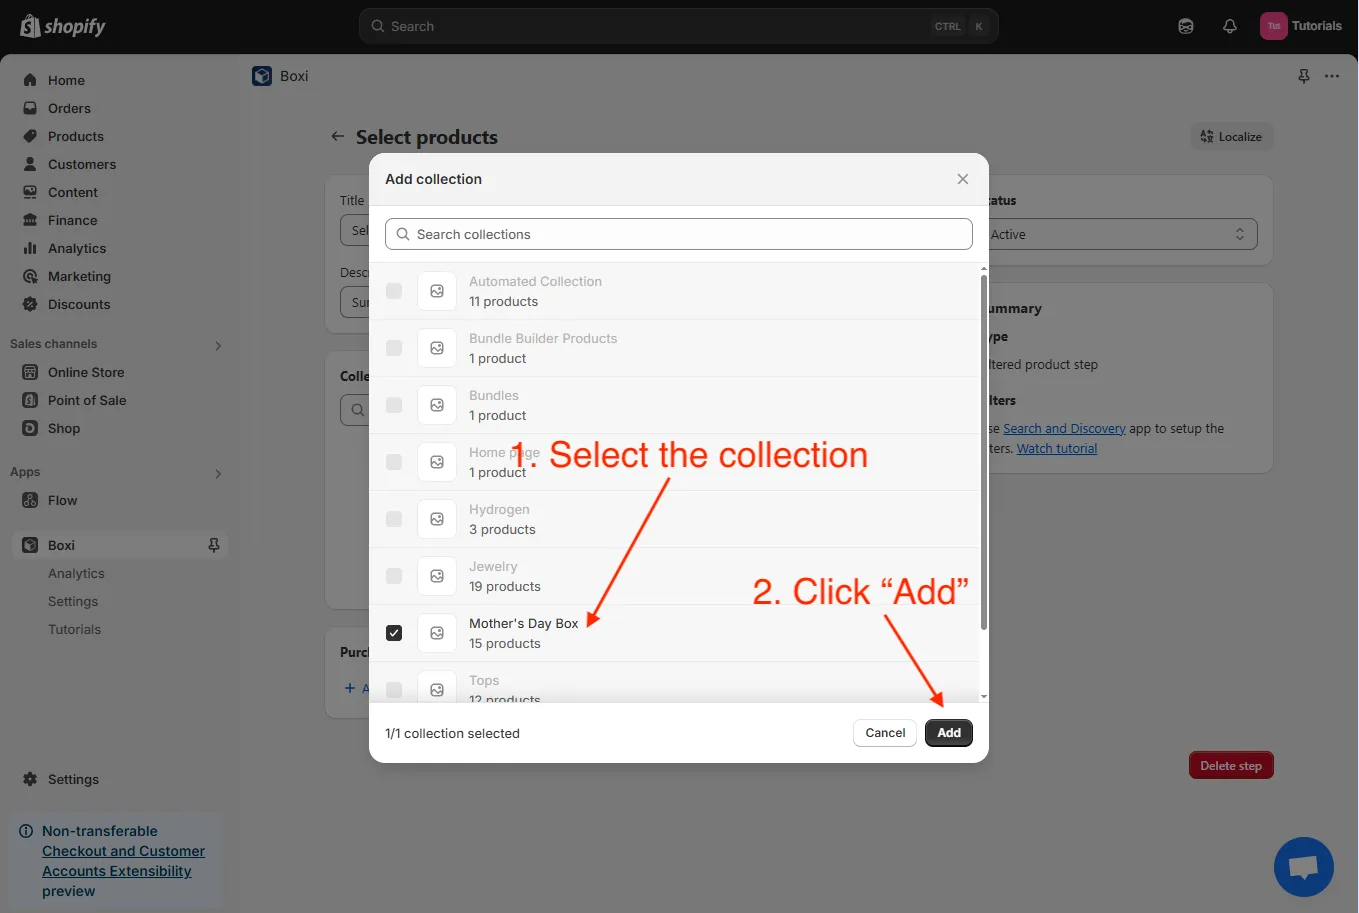
💡 Tip: If you don’t have a suitable collection yet, go to your Collections and create one. Then return and select it here.
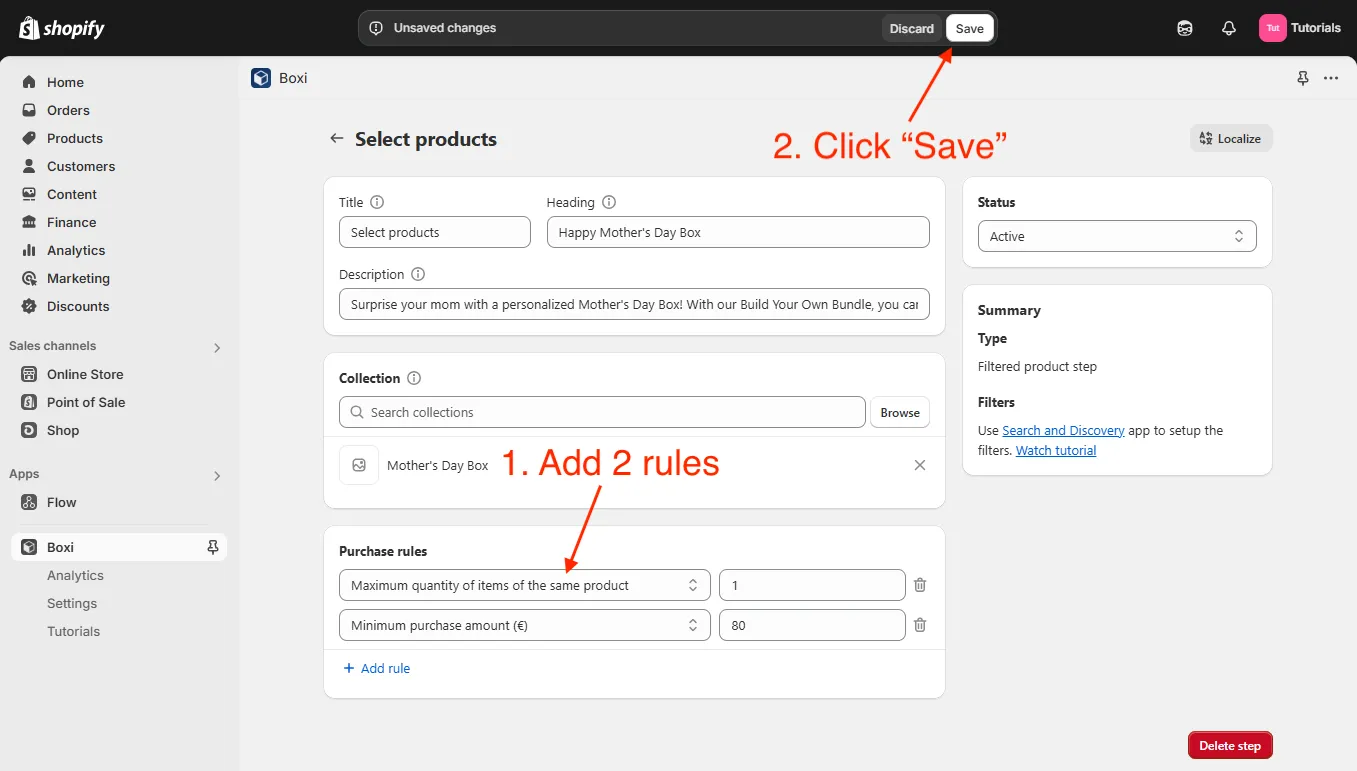
Next section is configuring the Purchase rules that are useful to set certain conditions during purchase. A common purchase rule is, for example, to set a minimum quantity of products for purchase.
➤ Let’s add two rules:
Maximum number of items of the same product to 1. Helps if you’re low on stock and want to prevent customers from selecting multiples of the same item.
Minimum purchase amount to 80 euros. Great for encouraging higher-value orders and enabling things like free shipping.
Once you’ve added your rules, click Save.
Done! You’ve completed your first step.
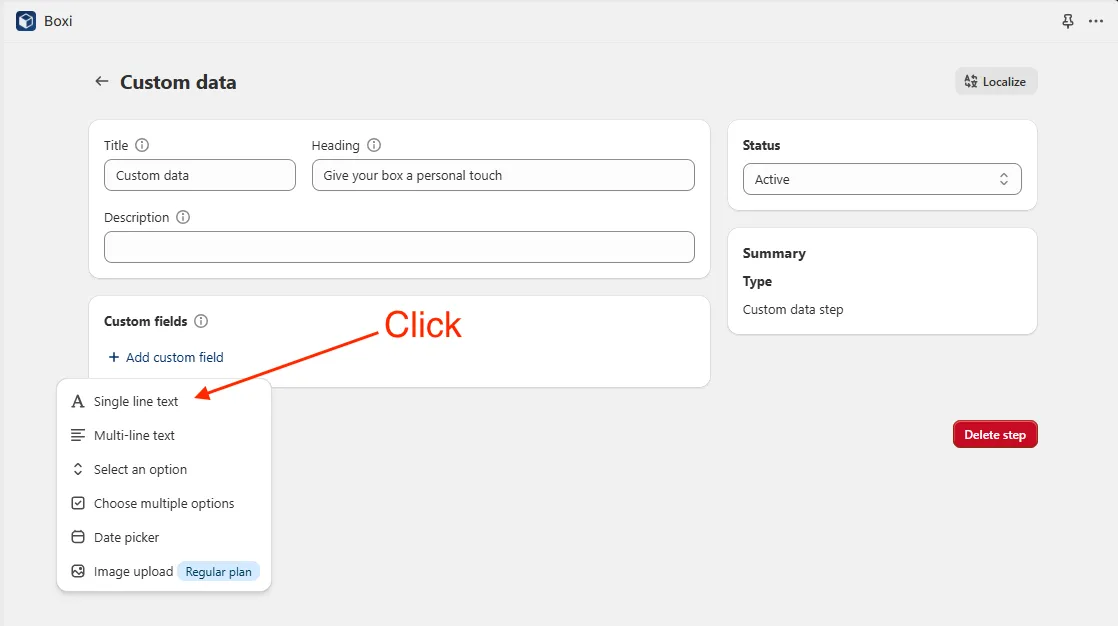
Create the custom data step
➤ Now please go back to builder form, click Create step, and select Custom data step.
➤ Just like before, enter a title and a short description for this step.
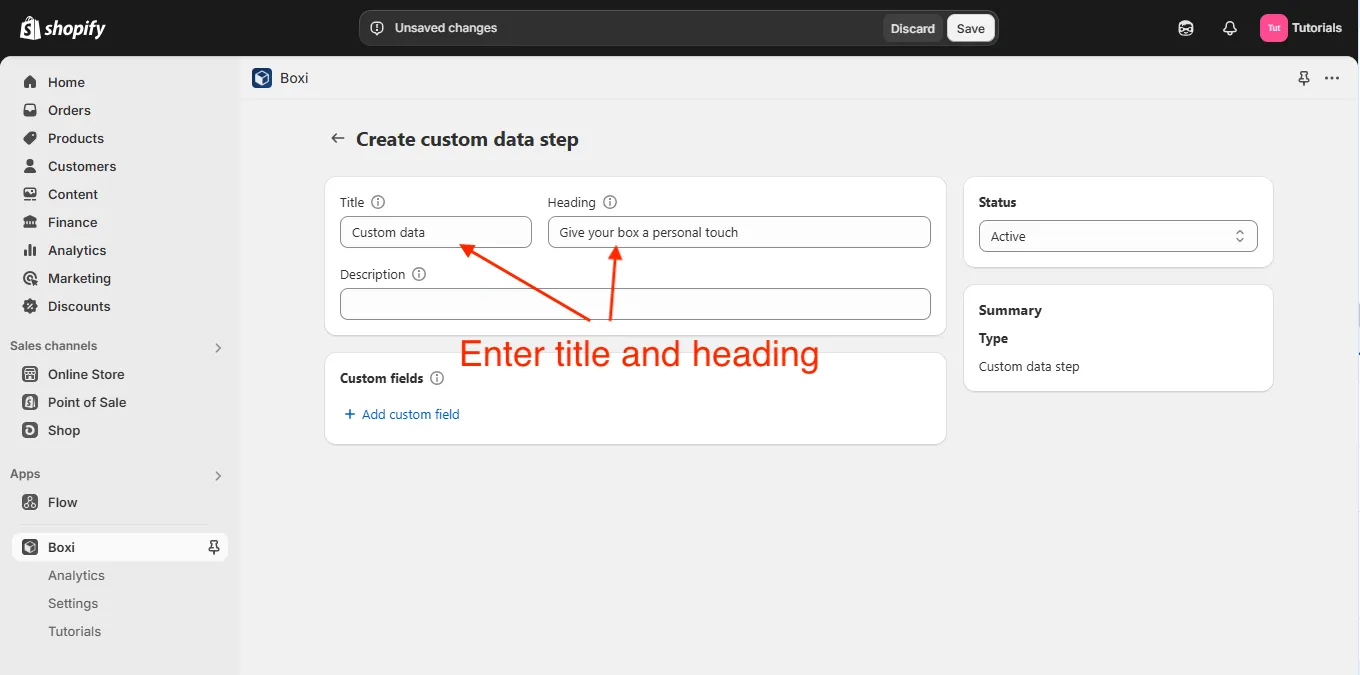
Now comes the interesting part - creating custom input fields for your customers!
You can choose from:
- Single line text - ideal for short information such as names;
- Multi-line text - usually used for inserting gift messages or notes;
- Select an option - dropdown menu;
- Choose multiple options - perfect for extras or add-ons;
- Date picker - the customer can use this option to say: “Don’t open this box until May 4th 😉”;
- Image upload - allow customers to personalize their box with a photo.
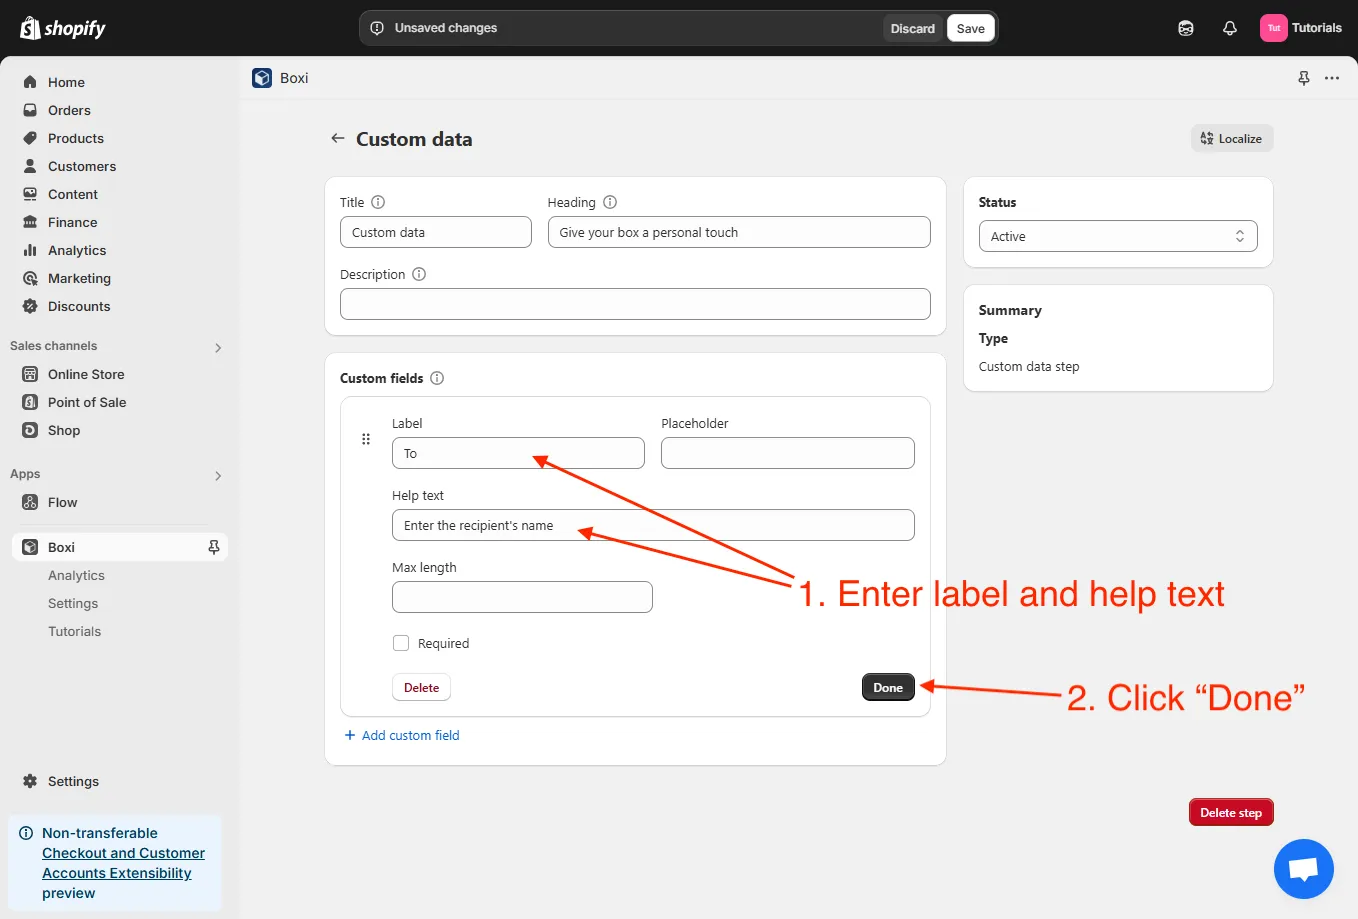
➤ Click Single line text to create the recipient field.
➤ Type “To” into the Label and “Enter the name of the recipient” into Help text.
You can also make the field required.
Click Done.
➤ Now click Multi-line text. We’ll use it for gift messages.
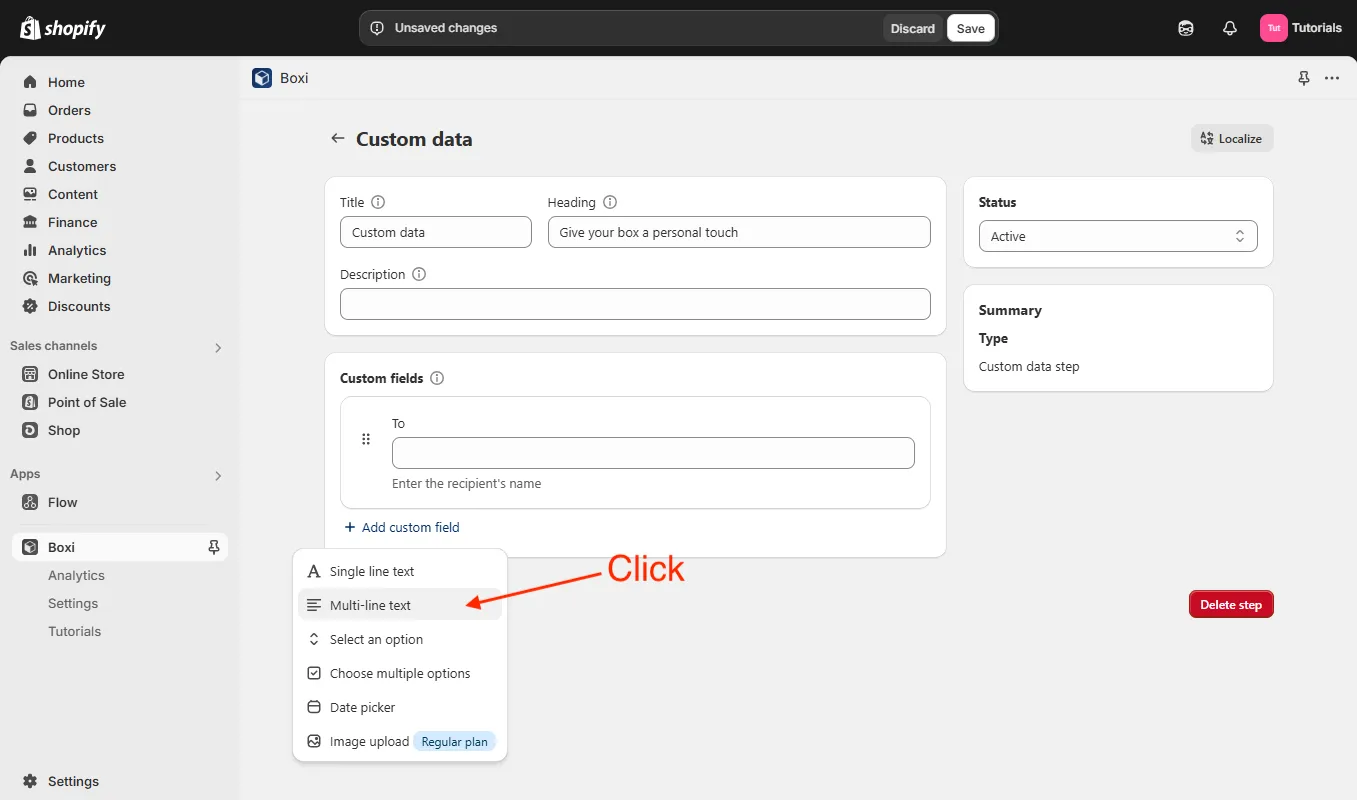
➤ Write in the Label “Gift message” and also I recommend to limit the message length. You never know don’t know how long some customers like to write! 😄
Click on Done and then click Save.
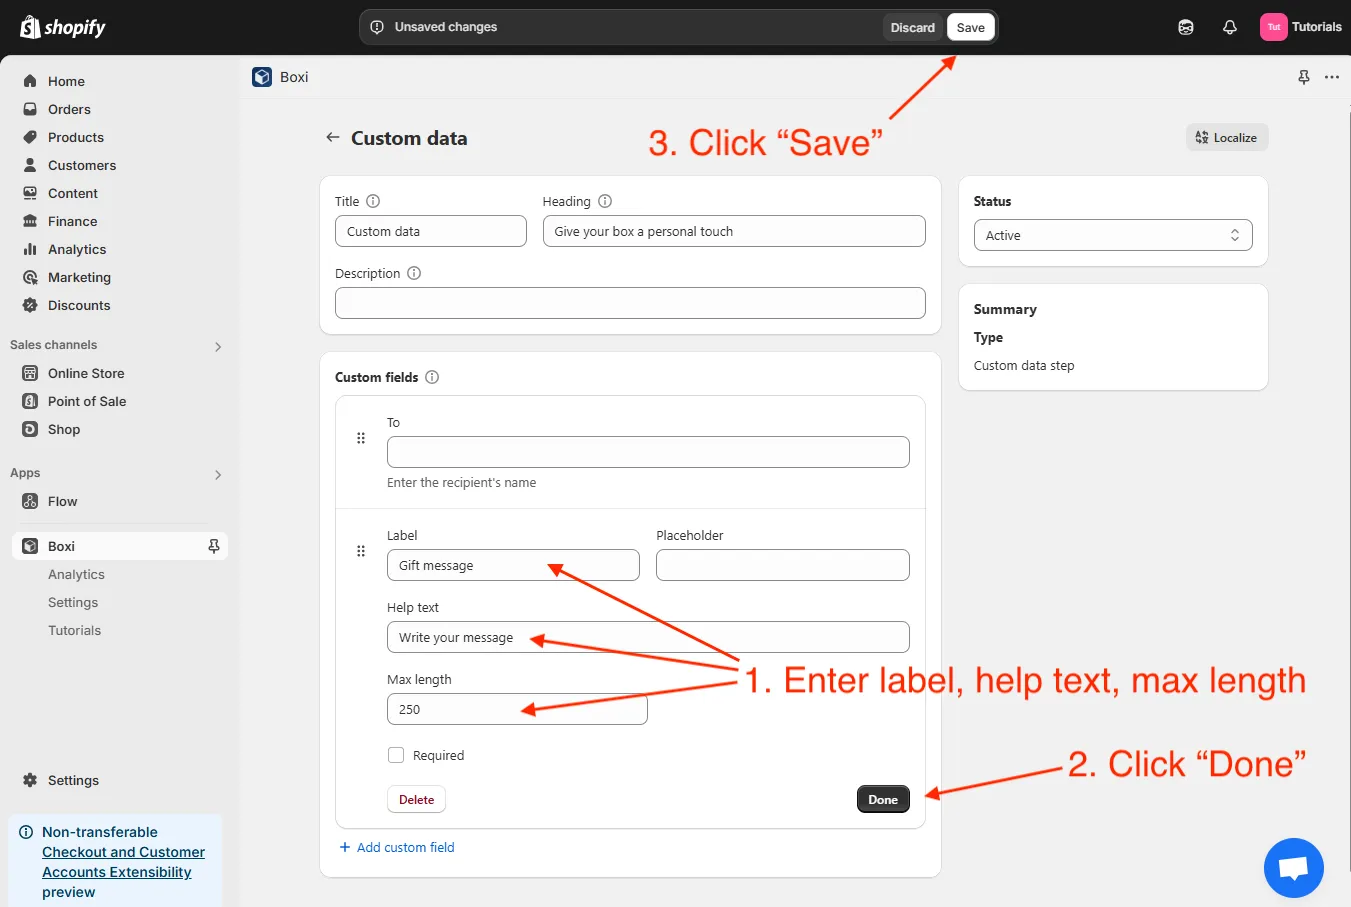
Nice, the custom data step is created and now your customer can personalize the bundle.
Preview, add discount, and style your builder
➤ Now go back to the builder form. You can already preview your box by clicking the Preview button.
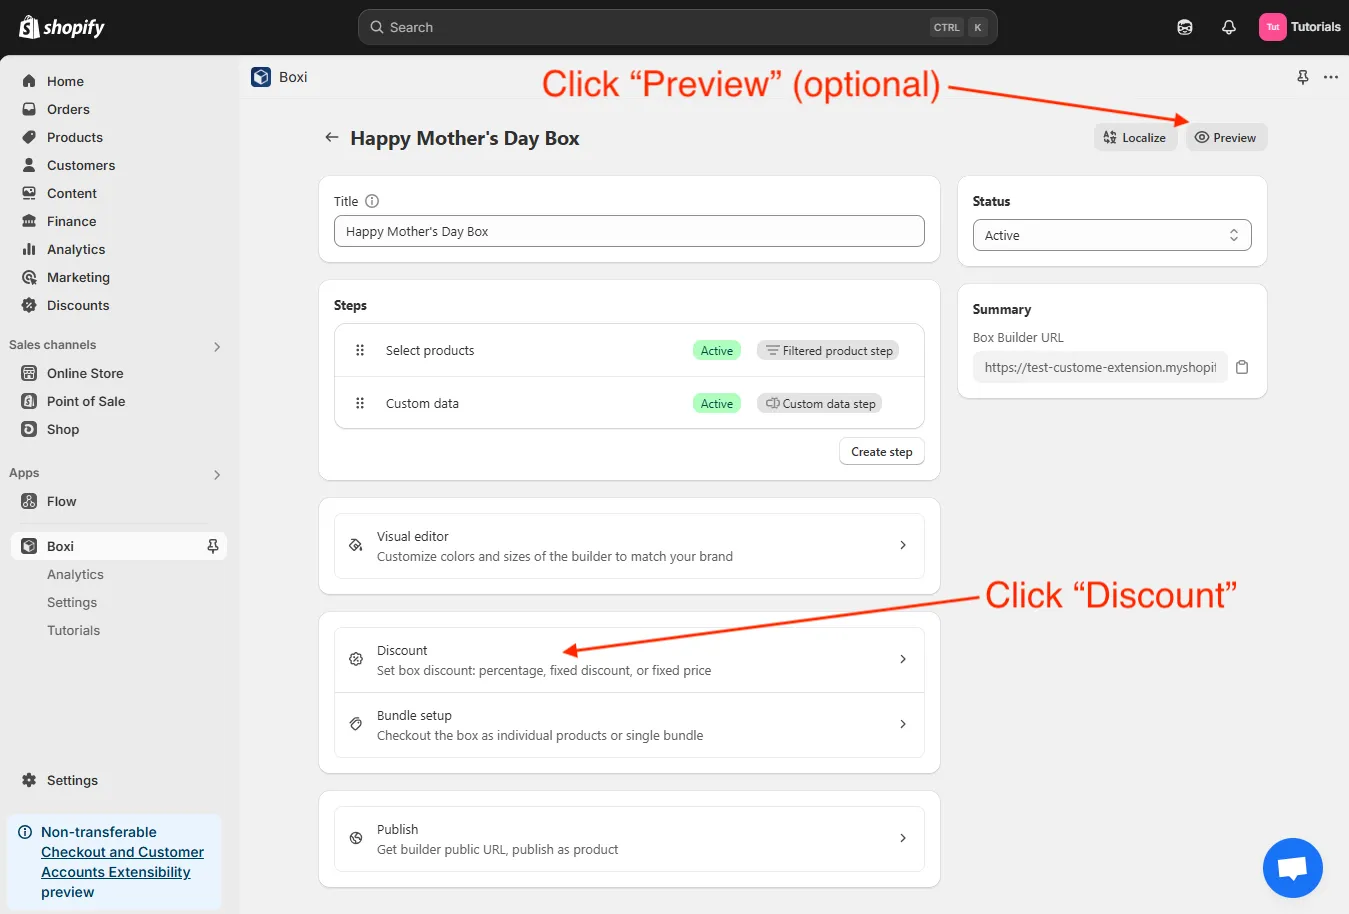
But we’ll continue with customizing your bundle.
➤ Click on Discount, and choose from two types:
- Flat - this type of discount offers a fixed reduction on the total purchase.
- Tiered - tiered discounts increase the discount as the order amount or quantity grows.
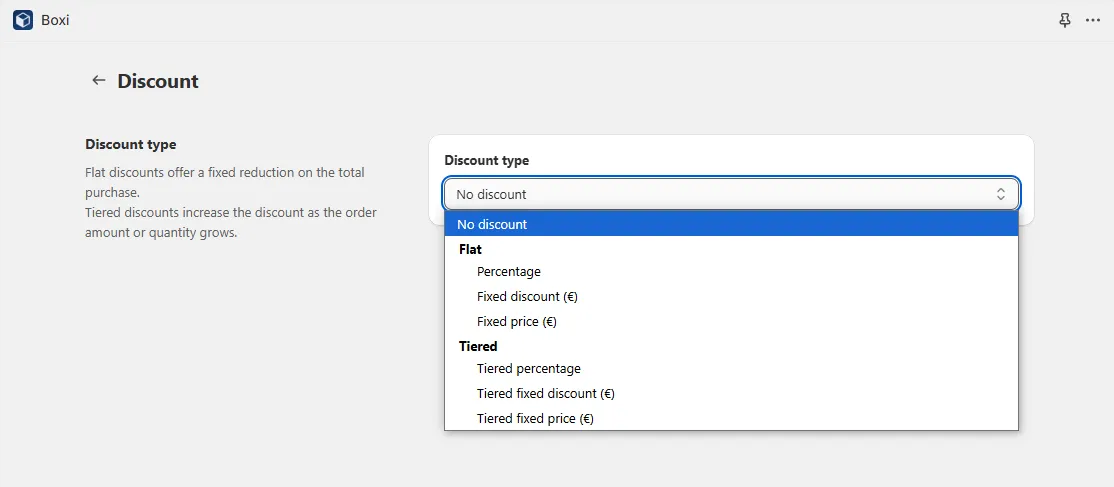
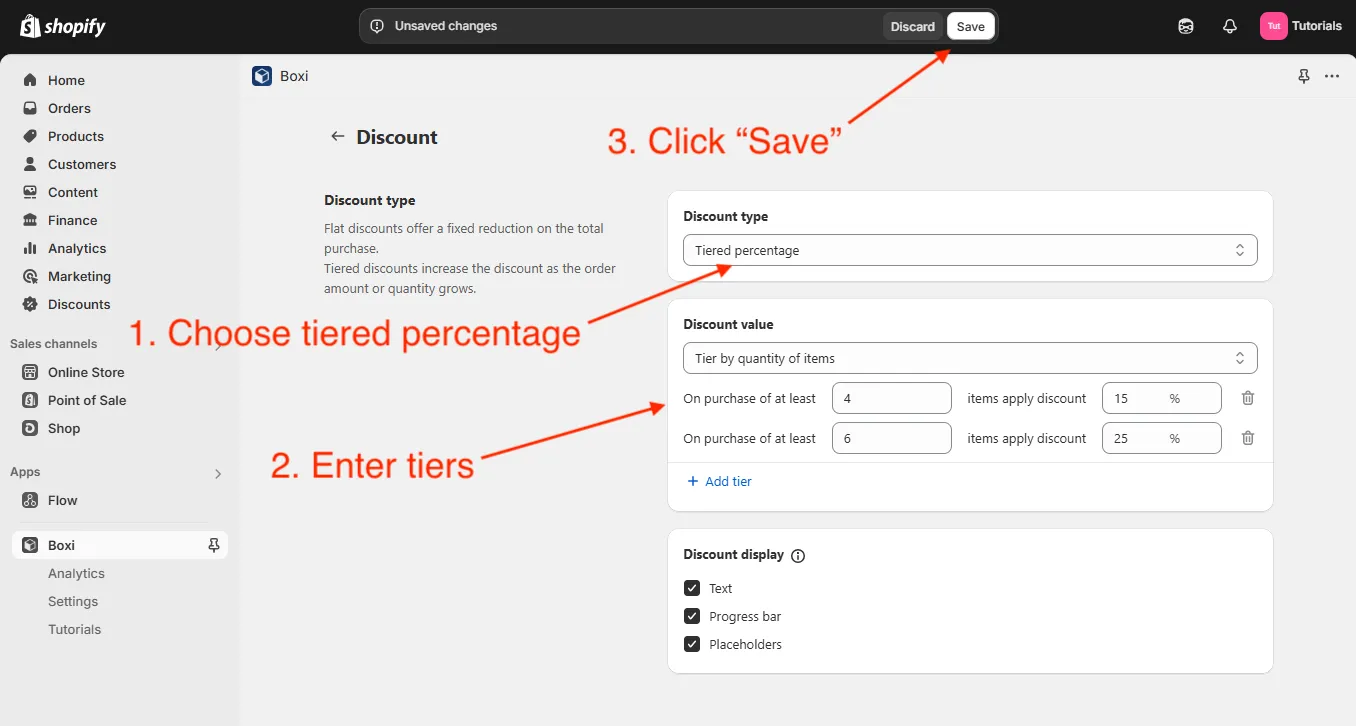
I’ll choose the Tiered percentage discount type to motivate customers to spend a little more but still get a good deal. Click Save.
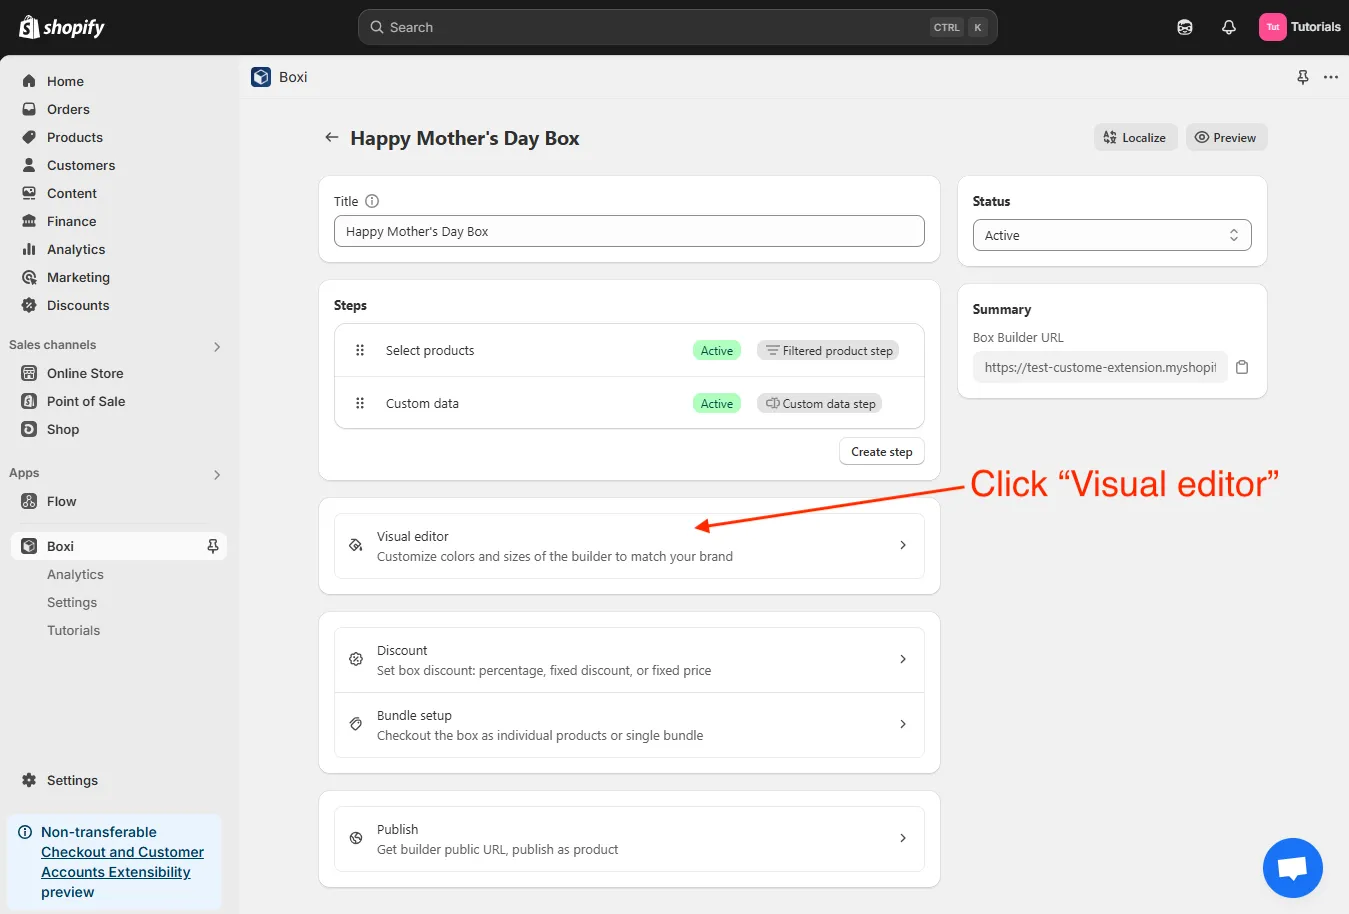
Now let’s customize the style of your bundle to match your brand.
➤ Go back to the main page and click on Visual Editor.
➤ This is your builder visual editor.
On the left sidebar you have the visual settings where you can customize the buttons, add a header image, set the checkout logic. Any changes made are visible in real time!
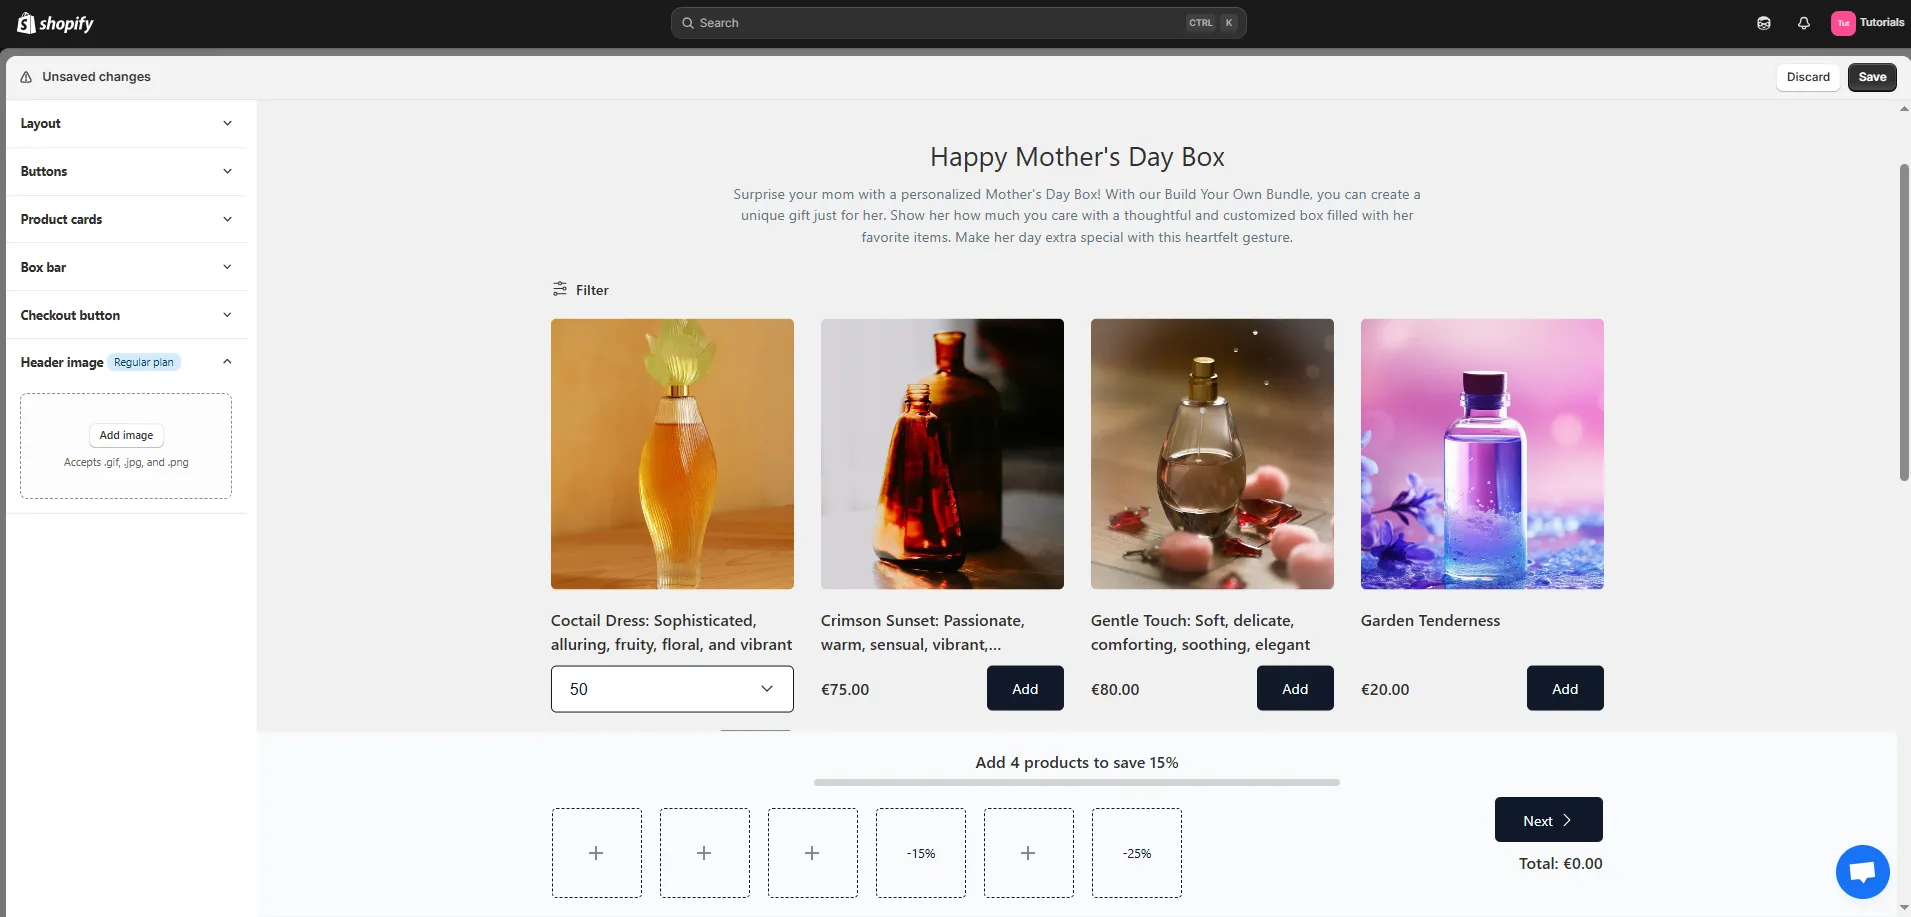
Let’s add a visually appealing header image to make your builder more interesting.
➤ Click Add image and select an image.
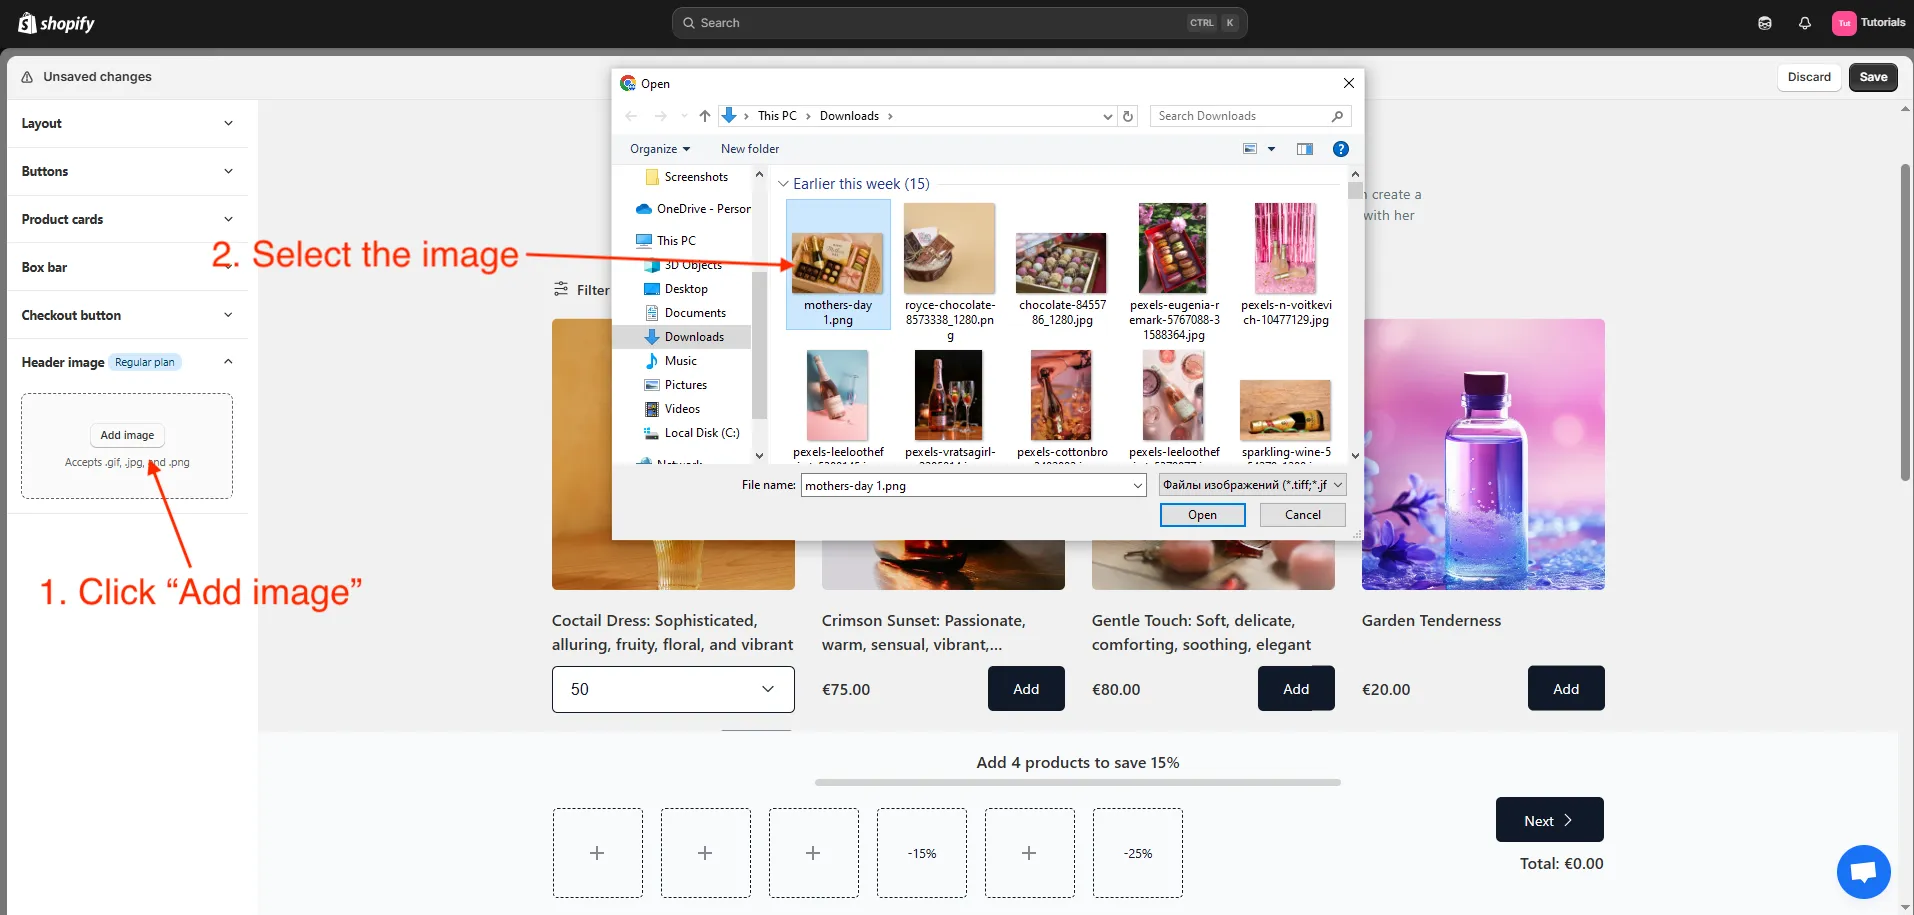
Here’s the header image, and for now I won’t change anything else because my bundle style matches my theme. But you can check all the options until you create the perfect box.
➤ Once you finish customizing, click Save. Then click Preview to view the builder on your store.
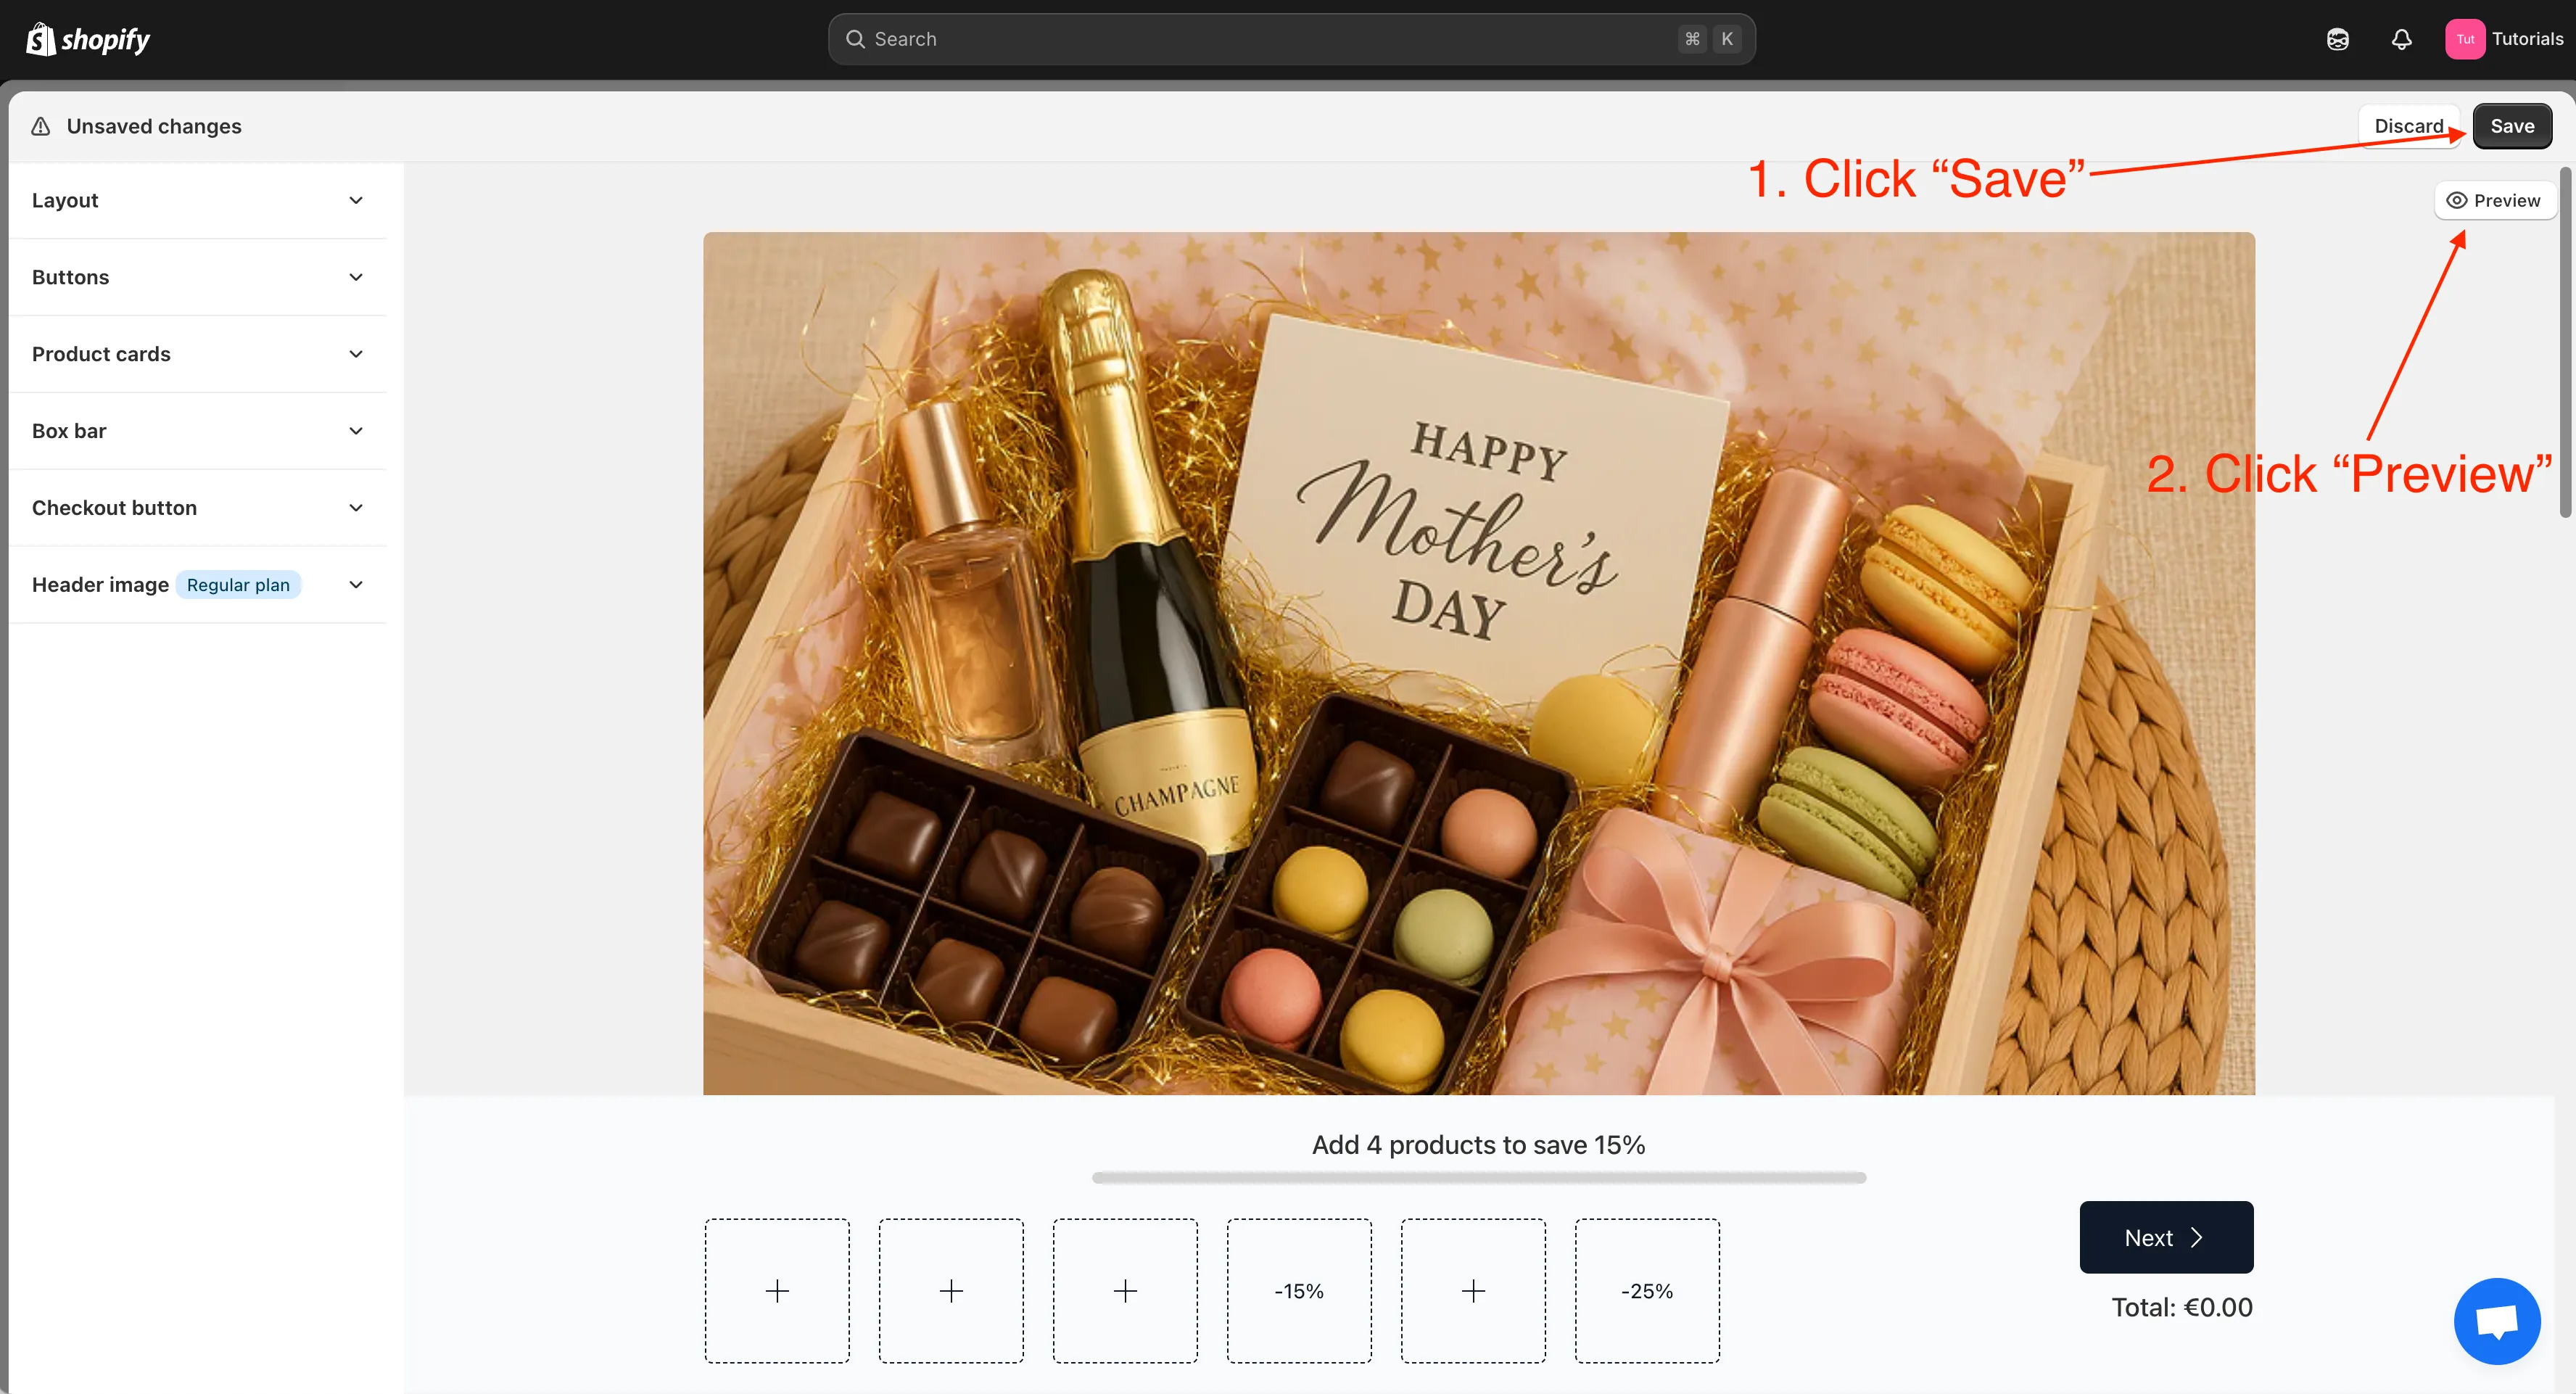
The builder is ready! Now you can add the builder link to your header menu or share on social media.
Conclusion
Today, we walked through how to create your own “Build Your Own Box” (BYOB) using Boxi Shopify app. You’ve seen how easy it is to:
- Set up a step to show products for purchase and also enable filters;
- Allow your customers to personalize the bundle using custom fields;
- Offer tiered discounts to your customers.
Now it’s your turn to get creative!
Give Boxi a try and explore everything it has to offer. Boxi comes with a free 14 days trial, so you have time to try it out without any commitment. Boxi customer support’ll be happy to help you launch your first BYOB with confidence.
Also, test your bundles quickly - don’t spend too much time on endless customization. The key is to start as soon as possible, then adapt on the run!